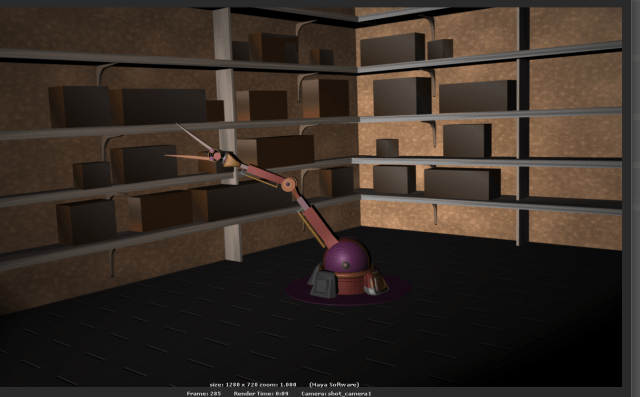
Lighting my first project. A Mechanical Arm which must be fixed to a stationary position.


The phong shader I chose for the walls, when adding lights there was an unnatural reflection. Changing the shader to a Lambert in the Attribute Editor solved this problem, not realise how different the shader textures would look with the test render for a frame.
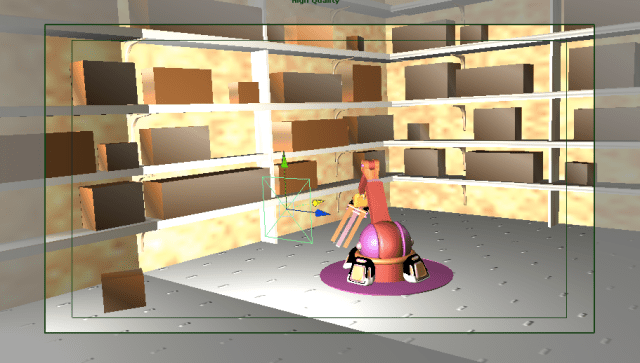
Using a spot light as the key light with no adjustments created a flat look. Working on the cone angle started developing afeeling of depth in the room though this made the front look very blown out, the back dark and under-lit or when too wide looking very flat. Changing the decay rate to quadratic, adjust the intensity and bringing the light closer helped when combined with adjusting the light’s cone attributes. The penumbra angle and drop off attribute softened the light edges, giving more feeling to the room atmosphere. I needing to add other lights and consider shadows. Turning on raytracing created very strong shadows and the fill light started to balance this out.
Shadows, not much of an idea about this and was not able to turn on both depth map shadows and ray trace shadows, so back to the drawing board. Working on raytrace shadows with the key and fill light I am starting to get some idea of what they do and how they work together while realising how much I needed to test render frames to see how they were looking. Working more with the placement of the lights in relationships to the distance between them and the objects, how they were pointed, the intensity and noticing the influence this had on how the scene was lit. The third light the back light reduced some of the shadows and also flattened the lights again. I’m now considering if I want some mood with the lights or an industrial feel of flat lights.
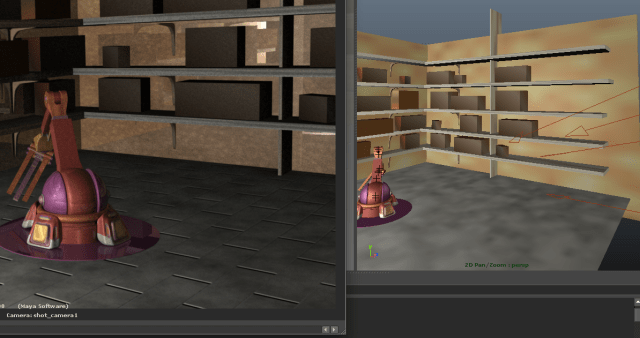
Looking at light linking to focus more on the arm, seeing how it works and maybe take some of the light away from the walls and behind the object. One of the shots shows the area light on the whole scene and the other shot shows how when the light is linked to the object and placed across the base the line only goes across the object and not the whole floor.
RENDER PIPELINE
For my lighting and render pipeline assessment, using Solid Angle’s Arnold render, I chose a model from the CG Society’s web site and a HDRI from hdrlabs web site.
Posted my final lighting render on the CG Society’s On-Going Challenges Page

Challenge #37: BAY AREA TRANSIT by Preston Plat

Arnold is a brute-force render where every pixel is acknowledged and taken into account creating photo-realistic renders that are physically based. Arnold is an unbiased, Monte Carlo, raytrace renderer, it is physically accurate, which means the light is unbiased and will be perfect every time, looking like how it would be lit and photographed in real life.
Arnold is taking care of the direct and indirect illumination by default, doing the final gather and global illumination, getting bounced light instantly. It uses unified sampling and AA will clean up everything, well not everything as we will see.
Setting up my model I checked:
- the scale of the model
- two sided lighting
- set to face
- check the surface normals, unlock
- conform, checks the way the surfaces are facing, looks at the direction of the majority and makes the others face that way
- put a test light in the scene to see how the model renders
- delete the history
- put an aiStandard shader on everything
- adjusted the scene camera’s far clip
- created geo for the back of the train, realistic lighting
- the trains posts rounded, under geo normals, soften
- window geometry put in a layer and turned off to see the outside
- created a ground plane for lighting and shadows
In this scene it is my intention to create photo realistic lighting, late in the afternoon when the sun is about to set. This includes showing the colour of the light at that time of day with the long evening shadows then combining with the interior lighting.
Where are the lights, what is happening, where to start?
Starting with the HDR Image to give the background through the windows, creating the scene’s environment and the position of the setting sun, I am then able to start working with the outside lighting. The key directional light has been place where the sun is in the HDR Image and Arnold creates the lighting and shadows from this light.
I started by putting various lights on the ceiling to see how it works. I am adjusting the exposure and position, seeing how they mix together, where the shadows are, what the shadows are doing and to see how many lights might be needed and where to place them. Arnold is physically accurate, real light physics so the light’s position, its intensity or exposure shows me where the light will bounce and fall.
Now I added an aiSkyDomeLight with the HDR Image mapped into the colour to add overall lighting and go back to adjusting the interior lights with the exposure of the key light.
Having placing the lights in layers I am now able to adjust exposure, placement, colour, shadows to see how the lights belong with each other in the scene, are they telling the story, creating the mood and setting the time of day.
The interior light’s shadows are not creating the realistic light and depth of shadows to reflect the environment, the seat’s shadows on the floor, window frames and joins between the ceiling, walls and floor to give the feeling of space and depth. Moving the aiArea lights to where the overhead lights have been made in the geometry the light is combining better from the different areas of the ceiling and Arnold starts to do a great job of creating the realistic indirect light and shadows.

To show the two fluorescent tubes lights in the render, a ramp has been put in the colour of the emissions attribute of the shader where the light’s geometry is.

The emission attribute is like a light from the surface shader showing the illumination in the render, there needs to be UV’s on the geometry.

The ramp and place2dTesture attributes have been adjusted to look like two fluorescent lights when rendered, using a black and white ramp and adjusting the repeat UV’s.

Rendering lights is slow, with this I have been able to be more efficient with the lights and used the shader’s emissions to create the illusion of the carriage’s lights. The lights have been place in front of the geometry, not touching so as not to create shadows from the geometry. When it is rendered we do not see the actual light and see the geometry illuminating like a fluorescent light, we are seeing the texture created by the ramp on the geometry.
Arnold has done a great job of lighting the scene in a realistic way including the shadows.
http://www.highspeed-rail.org/documents/11_dmu_2012apr20.pdf
Standardized Technical Specification, PRIIA 305 Next-Generation Equipment Committee Diesel Multiple Unit (DMU) Passenger Rail Cars, Chapter 11 Lighting System, Page 11-3
I did consider using a gobo and volumetric scattering. In the end I liked the shadows that were being created by the lights and have not introduced additional shapes from a gobo or volumetric scattering. If I had considered using a gobo I would have included shadows of building shapes. For the volumetric scattering I thought it could add some depth to the shot, some atmosphere and adjust it by turning it on or off for different lights.
There is a single material shader on all the geometry in the scene which was a good start to see how the lights were working. Now I need to add different shaders, looking at the object’s surfaces for colours and how to break up the diffuse and specular for chrome, plastic and refraction for the glass.

I started with the Ai Standard Material Presets and have a matte with diffuse, plastic with diffuse and specular, matt plastic with diffuse and specular, shiny plastic with diffuse and specular and chrome with specular. Each of these have then been adjusted for different colours and values for the Diffuse weight and roughness and Specular weight and roughness.
For the glass in the windows, I used refraction which has no diffuse and has a specular weight of 1 with fresnel on. In Refraction the weight is 1, IOR is 1.5 and fresnel is on. Also check the aiSky of the envHDR Image had the visible in reflections turned off, visible in refractions is on. Check the opaque setting, the normals and how many surfaces to bounces for the window geometry, these windows are two.
There are 13 shaders in all, repeating some of them to keep the amount of shaders to a minimum and still have some variety and contrast with the surface qualities in the train carriage. It was a good idea to have a shader on all the geometry, not only to work with the lights it was also helpful when working out which areas of the model had shaders and which did not. I could select the objects assigned to the original shader and find what I had missed.
With the final lights there were adjustments to the exposure settings as they combined to create the total lighting. With the sunset the overall colour temperature is warmer, to the yellows or lower values and again combining the light’s colour so no one light’s colour is dominating. I did contemplate a strong orange from the sun and preferred it a little more subtle by combining the colour of all the lights.
Even though Arnold gives accurate lighting every time, showing how the lighting would be in real life, giving bounced light instantly there are problems with grain or noise in the render, not to mention that little firefly.

To work out where the noise is coming from the AOV’s in the render settings will enable the break down of the different shader qualities, rendering each one separately to see where the noise or grain is coming from.

The Direct Diffuse was noisy when I checked the AOV render. Looking at the shadows, they are noisy and setting the aiSkyDome light samples to 3 improved this. I did not need to adjust the Diffuse samples in the Render Setting for this problem and adjusting samples for the light will not have as much impact on the render time as adjusting form the render settings.
At this point there were no problems with noise in the shadows.
The seat had noise and there was no problem with the noise in the diffuse. The seat does not have any specular and there is a problem with the AOV indirect specular render here. This is when I realised that with the light coming from everywhere, bouncing around the scene needs to be considered and looked at the specular for all the shaders.

There is noise on the window frame, Indirect Specular, specular is glossy and changing the render settings for glossy fixed this.
What to do with my one and only firefly, any shader that has specular (Glossy) or reflection, light bouncing around – I cannot say it better than the following:
Fireflies/Sparks
https://support.solidangle.com/display/ARP/Removing+Noise
It could be any shader shader causing the problem and some of the options were
- see if the gamma slider in the render view fixes the problem and if so it may be able to be adjusted in Nuke
- render that tiny spot and go through all the shaders one by one to see which one it is causing the problem and bring down the specular roughness, less reflective, never bring down to zero
- use a roto paint node in nuke, great idea and it did not take much encouraging to go with this one
After painting the fire fly with the roto paint node there was still a problem with the white doe on the window frame. In the roto paint node I needed select All Frames on the Life Time tab. For some reason there were 2 frames when opening the exr file in Nuke and this solved the problem.
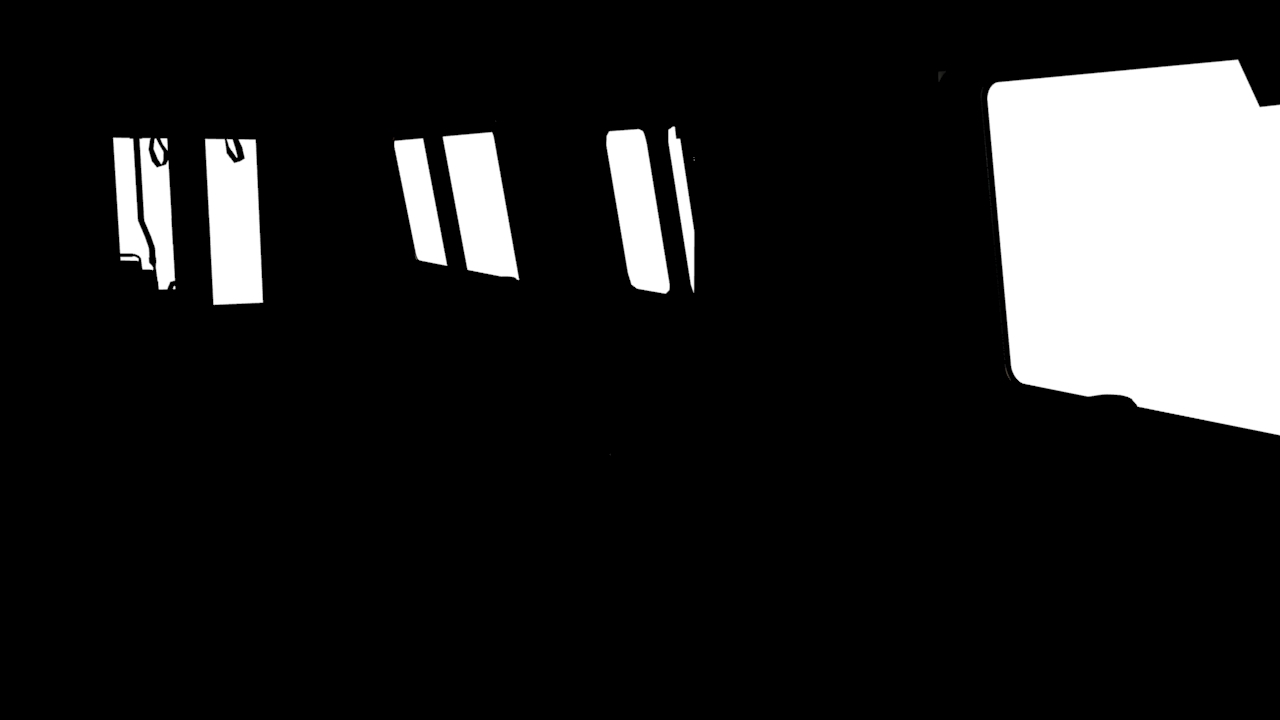
I wanted to blur the windows, meaning the image that can be seen through the windows would be blurred. To save on render time this was done in Nuke using a blur node and roto shapes for the windows. This gave me more control on each window, ability to vary the blur for each window and no needed to wait for renders to see how the values were blurring. It was almost instant to see how it was working when using Nuke.
Depth of Field was also done in Nuke. Again there was no need to wait for renders to see how the values and placement of the depth of field were working. I was able to adjust the position, values and range of depth of field almost instantly in Nuke. It gave me flexibility without waiting for long render times to see the results.
Arnold has been very kind with the lights not needing major adjustments for the shadow edges and Ray Depth values, the number of bounces. My final settings for lighting and rendering are:
aiSkyDomeLight
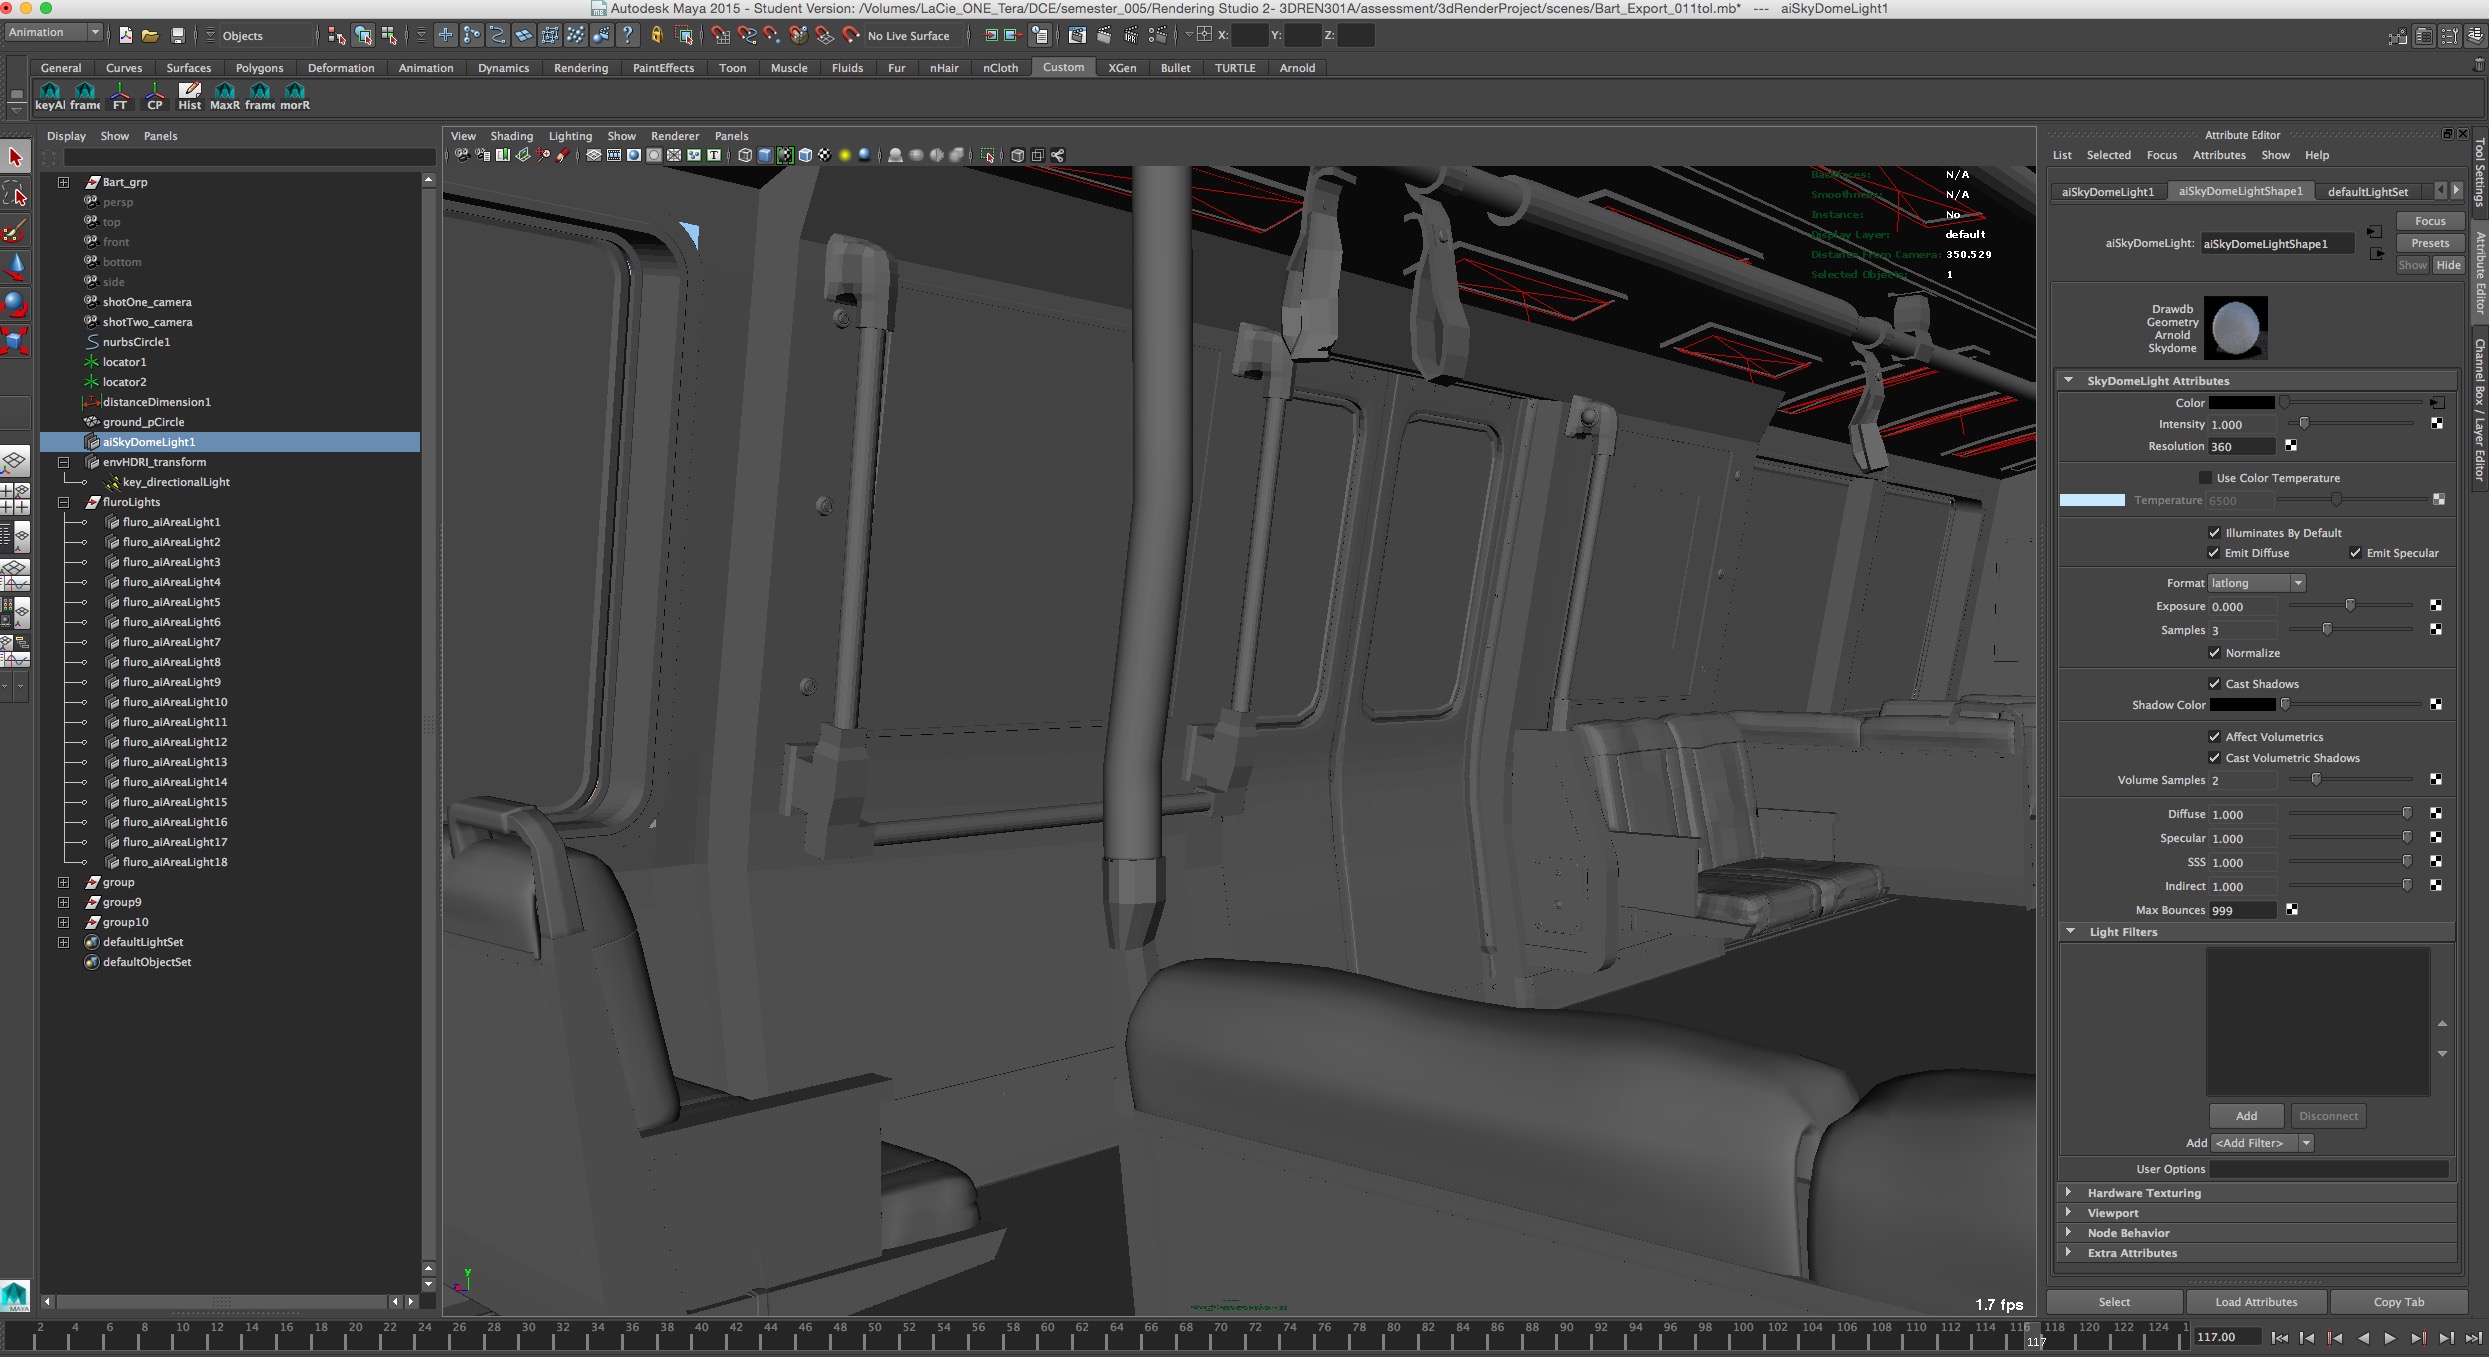 giving general overall lighting, filling the area with light from the outside environment and creating a lot of noise in the render, the samples have been increased to 3.
aiAreaLight

lighting the interior and creating the interior shadows on the floor, under the seats, ceiling, walls, seat backs, poles and around the different areas of the geometry. The exposure 13, colour temperature 4000, samples at 1 and casting shadows.
directional light

the key light, it is a child of the envHDRI transform in the outliner. This is giving even light from the position of the sun, an accurate sense of direction, creating parallel shadows from the sun and illuminating all the objects from the same angle which is giving the angle of the suns’s shadows. The exposure is 0.65, colour temperature is 4500 which is giving a warm light, casting shadows.
Arnold looks after the colour management, no need to set it up how it was done in Mental Ray between liner and sRGB.
My final render settings are:
Sampling:
Camera AA 5 or how many times a pixel is sampled
Diffuse 2
Glossy 4
Refraction 2
SSS 3, I am not using this attribute and probably could have set at 0
Ray Depth, or number of bounces:
Total 10
Diffuse 1
Glossy 1
Reflection 2
Refraction 4
Transparency Depth 10
Transparency Threshold 0.990
I found the AA’s at 5 gave me the best result, 4 still had some grain and 6 was not necessary with having the glossy at 4 and having adjusted the sky dome light’s samples. As there were no textures I did not use TX files.
I like the contrast and combination of the hard edge of the sun’s shadows for this time of day with the softer edge on the interior fluorescent light’s shadows which are on top of each other giving a different depth of shadows on the floor. The higher and darker shadows here and there are adding to the realistic mood to the shot, giving it light and shade.
Looking back something I would consider is reflections of the interior on the glass of the back doors and I did not notice the geometry on the overhead handles attached to the poles on the ceiling. They could be smoothed to look better.
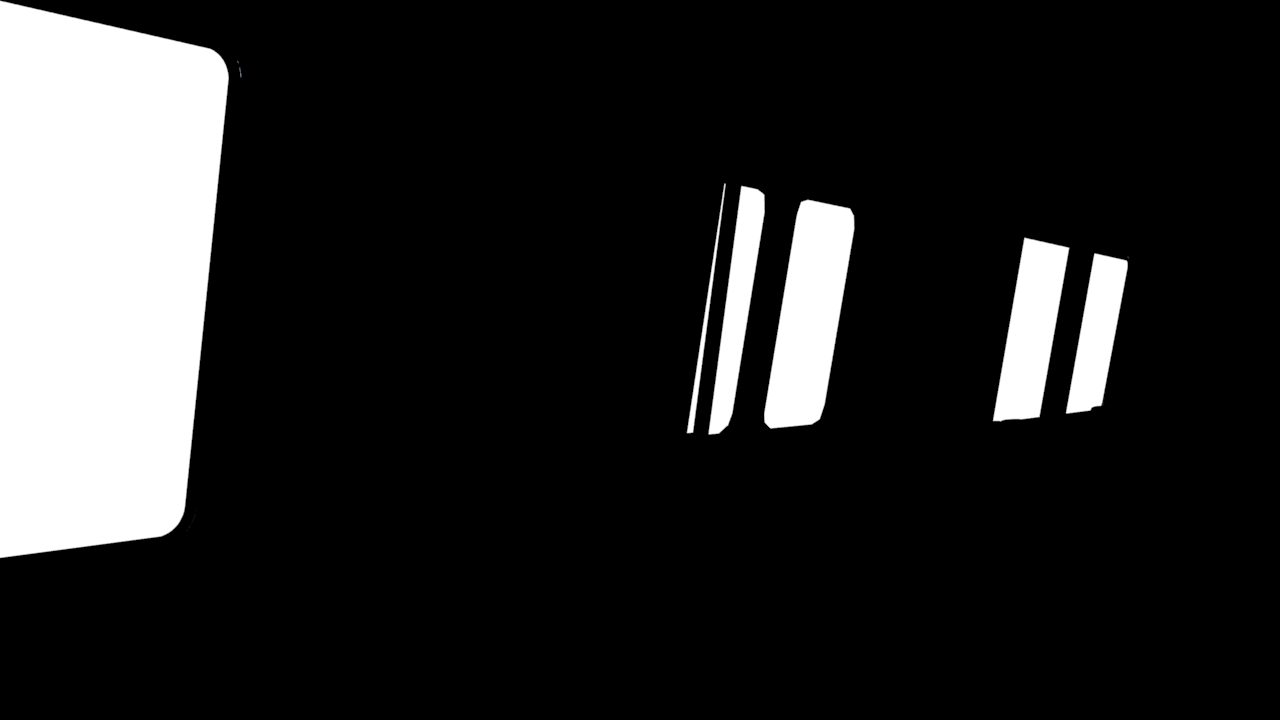
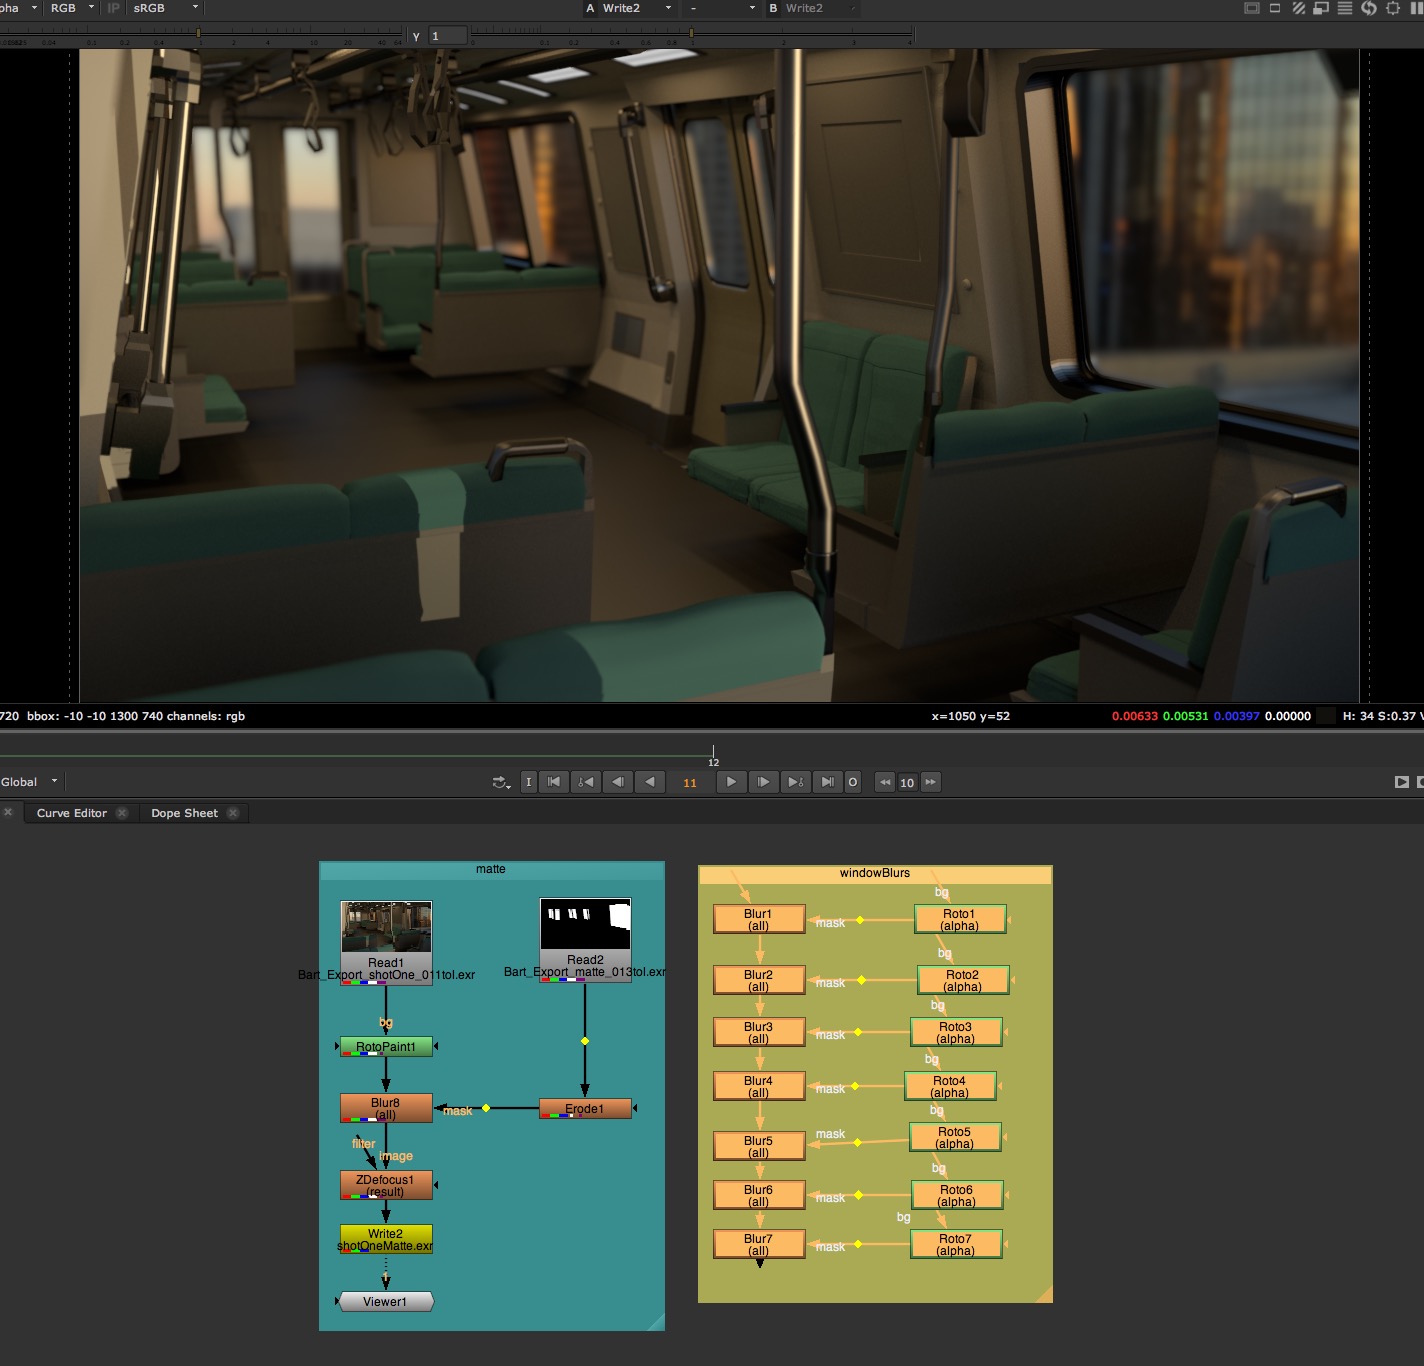
An alternative to the roto node that I have been using to blue the windows is a matte. In Arnold a matte render layer is used to create the black and white exr by using an aiStandard shader with one on the geometry then another one only on the windows to be blurred. Enable the matte attribute in the shader and choose black for the main geometry shader and white for the shader on the windows. Turn all the render settings down except for AA as these attributes are not required for this render layer. How quick was that render, a flick of the eyelids in comparison to the 100 or so minutes for a full render. Render the exr and then import into Nuke.
In nuke include the matte exr image by putting a blue node between the image and the ZDfocus, which is the node used for depth of field, and connecting the matte image to the blur node. This works like a treat to blur the background through the windows and give the flexibility that I was getting with the roto node. To soften the edges I included an erode node before the blur.

Special thanks to Vincent Rossini and Kim Nguyen for all their help.
MODEL
Lighting challenge from CG society
Challenge #37: BAY AREA TRANSIT by Preston Plat
http://forums.cgsociety.org/showthread.php?f=185&t=319005
posts on the forum for this challenge:
http://forums.cgsociety.org/showthread.php?f=185&t=1182899&highlight=Challenge
model donated by Preston Platt and how it used it:
https://www.youtube.com/watch?v=CKMTzEWoQTs
http://en.wikipedia.org/wiki/Bay_Area_Rapid_Transit
HDRI BACKGROUND
HDRI background: http://www.hdrlabs.com/sibl/archive.html
Helped GoldenHour
Author: Blochi
Location: Los Angeles
Downtown LA, and the last rays of sunlight
BG8192x4096, ENV, REF, SUN
ALLTRACK
rail interior lighting: http://www.alltrack.com.au/alltrack-solutions/interior-lighting.html
railway technology: http://www.railway-technology.com
SOLID ANGLE: ARNOLD
Removing Noise
https://support.solidangle.com/display/AFHTUT/Removing+Noise
Removing Noise Workflow
https://support.solidangle.com/display/AFHTUT/Removing+Noise+Workflow
Ai Standard Material Presets
https://support.solidangle.com/display/mayatut/Ai+Standard+Material+Presets
REFERENCE
Birn, Jeremy, and Jeremy Birn. Digital Lighting and Rendering. Indianapolis, Ind.; London: New Riders ; Pearson Education [distributor], 2006.
Robertson, Scott. How to Render: The Fundamentals of Light, Shadow and Reflectivity. Culver City, CA: Design Studio Press, 2014.
WanderingDP Cinematography
http://wanderingdp.com/category/cinematography/
shadows, reflections & atmosphere:
http://www.handprint.com/HP/WCL/perspect6.html
Adaptive lighting brings the sky and clouds onboard
Color Temperature & Color Rendering Index DeMystified
http://lowel.tiffen.com/edu/color_temperature_and_rendering_demystified.html
Lighting atmosphere on trains: development of a methodology to assess visual perception and improve trains specifications
http://www.uic.org/cdrom/2008/11_wcrr2008/pdf/R.2.4.3.1.pdf
LED Lighting System for Rolling Stock, Hitachi Review Vol. 61 (2012), No 7 Isao Ishii, Fumio Shimada, MItsuru Sahara, Shigenori Imamura
http://www.hitachi.com/rev/pdf/2012/r2012_07_108.pdf
NSW Government Transport for NSW Standard, Interior and Exterior Lighting for Passenger Rolling Stock
Standardized Technical Specification
PRIIA 305 Next-Generation Equipment Committee Diesel Multiple Unit (DMU) Passenger Rail Cars, Chapter 11 Lighting System
http://www.highspeed-rail.org/documents/11_dmu_2012apr20.pdf
11.4.1 Lighting Color Temperatures
The lighting color for all interior lights and lamps in the passenger rail car shall be 3500° – 4100° Kelvin (K). The Contractor is to provide suggested light color plan for Customer’s review and approval during the preliminary design review.
VisualFX.AT
http://www.visualfx.at/wp/hdri-cg-lighting-with-canon-5d-dslr/
LESTER BANKS
http://lesterbanks.com/2011/11/maya-chrome-ball-lighting-feedback-for-nuke-compositing/
Creating and Lighting with HDR Lightprobes Tutorial
https://www.youtube.com/watch?v=fpTQAzyec5E
Advanced Maya Texturing and Lighting
Inside Mental Ray
http://blog.mentalray.com/2015/04/17/mental-ray-for-maya-2016/
High Quality Interior HDRI Free Pack by Maxime Roz
https://gumroad.com/l/hdri-free-pack
WEDGE ATTRIBUTE STUDY
How we see objects is determined by how light is reflected and scattered, the way it is bounced, defining the form of the image.
DIFFUSE WEIGHT

diffuse weight
Using the aiStandard shader’s default attributes, I am adjusting the weight attribute in the diffuse options.
For diffuse the light is scattered in different directions or angles giving a matte appearance, no reflections or highlights are shown. The weight value of the diffuse is how much light/colour is absorbed or reflected by the shader and is controlling what is seen.
The higher the value, the brighter the object, as more of the light is reflected from the surface. For lower values more light is absorbed by the surface giving a darker object. It cannot be 0 as this means all the light is being absorbed by the shader. The last sample has a diffuse value of 1.0, it is the brightest, more light is being reflected back with the varying degrees of brightness being shown as the value go from 0.0 to 1.0.
The weight is a multiplier for the colour. When the colour is white = 1 and the weight has a value of 0.5 the result will be 0.5 for the brightness of the surface. Keeping white as a value of 1, when the weight is 0 the resulting value will be 0, no brightness and when the weight is 1 the resulting value will be 1, the brightest value.
SPECULAR WEIGHT

specular weight
Specular is direct and indirect reflections which can be made glossy (blurred). The specular weight, influences the brightness of the specular highlight.
I have used the default settings for the aiStandard shader for this wedge study and I’m adjusting the Specular’s Weight attribute.
The brightness of the surface highlights provided by the Specular is being controlled by the weight, how reflective it is. It is a multiplier of the colour, black or 0, produce no specular while white or 1 creates the brightest one. The values in-between create the range shown above with less specular having less weight values, less reflective then reduce the weight.
Glossy, is specular, it is less diffuse with the light rays having some scattering. The default setting has some roughness creating softer highlights.
SPECULAR ROUGHNESS

specular roughness
Controls the glossiness of the specular reflections. The lower the value, the sharper the reflection. In the limit, a value of 0 will give you a perfectly sharp mirror reflection, whilst 1.0 will create reflections that are close to a diffuse reflection.
I am using the default shader values except for the specular weight because at 0 I have no specular for any of the values from 0.0 to 1.0, therefore have chosen a specular weight of 1.0 for this exercise.
The edge of the specular is changing, not so obvious in the little samples. As the Roughness increases the edges are not so sharp or crisp, the light is more dispersed over the surface, with the highlight being more integrated into the overall surface until it looks as though it is part of the diffuse surface. The roughness is changing how the light is scattered, no roughness having more parallel rays that are brighter and have tighter highlights and the higher values are giving more of a matte finish. High Roughness values are reflecting dimmer and broader highlights
Reference:
https://support.solidangle.com/display/AFMUG/Standard
https://getzit.files.wordpress.com/2013/05/diffuse_study2.pdf
https://www.solidangle.com/research/physically_based_shader_design_in_arnold.pdf
Birn, Jeremy, and Jeremy Birn. Digital Lighting and Rendering. Indianapolis, Ind.; London: New Riders ; Pearson Education [distributor], 2006.
Derakhshani, Dariush. Introducing Autodesk Maya 2013. 9th ed. Indianapolis, Ind: John Wiley & Sons, 2012.
Keller, Eric. Mastering Autodesk Maya 2011. Serious Skills. Hoboken, NJ: Wiley Technology Pub, 2010.
Livny, Boaz. Mental Ray for Maya, 3ds Max and XSI: A 3D Artist’s Guide to Rendering. Indianapolis, Ind: Wiley, 2008.
Palamar, Todd. Mastering Autodesk Maya 2014: Autodesk Official Press. 1st ed. Indianapolis, IN: John Wiley & Sons, 2013.
ARNOLD and UNBIASED RENDERING
In Vincent’s video he describes unbiased as when lighting a scene that is built to scale the light is perfect, working its magic every time. Solid Angle descries Arnold as a highly optimized, unbiased, physically-based ‘Monte Carlo’ ray/path tracing engine.
Rendering, using computer software, is a process of calculations based on the three-dimensional mathematical data or vector information giving a value for a 2D pixel image or picture. The 3D scene could consist of geometry, lighting information, shadows, reflections, colour texture, motion blur, animation and/or visual effects.
The goal is to accurately simulate the behaviour or transport of light and the interaction of the light rays with surface shaders. The shader describe things such as diffuse, reflection, index of refraction and colour returning the information from each pixel at render time.
Unbiased is correct, calculating the physical path of light as accurately as possible within the algorithm, no error or ‘bias’ is introduced, no systemic error.
Physically accurate unbiased rendering gives the user less control while with biased rendering the user has manual control over how the renderer interprets the scene by being able to choose and tune the settings. When adjusting values such as Photon Mapping, Global Illumination and Final Gather in biased renderers such as Mental Ray other settings may be affected and bias can be introduced. Accuracy cannot be guarantee regardless of the number of samples used.
Bidirectional path tracing is a combination of light transport paths, one from the selected light source (light path) and one from the viewing point or camera (eye path) in the same algorithm, with the bounces going back to the pixel before rendering. The render is combining the sampled paths in a single unbiased value, also calculating the lighting in many directions and this is summed together with the sampled values.
Path tracing is an extension of Ray Tracing, using the Monte Carlo method or algorithm to combine the surfaces with direct and indirect light for each pixel and naturally simulates many effects such as shadows, depth of field, motion blur, caustics and ambient occlusion. It is evaluating global illumination based on random samples and averaging the different results giving better results with fewer samples, not losing information from poor sampling distribution.
Data samples are not cached for re-sampling later, when creating caches the render introduces the possibility of bias and may cause visual artefacts.
REFERENCE
Books:
Birn, Jeremy, and Jeremy Birn. Digital Lighting and Rendering. Indianapolis, Ind.; London: New Riders ; Pearson Education [distributor], 2006.
Derakhshani, Dariush. Introducing Autodesk Maya 2013. 9th ed. Indianapolis, Ind: John Wiley & Sons, 2012.
Keller, Eric. Mastering Autodesk Maya 2011. Serious Skills. Hoboken, NJ: Wiley Technology Pub, 2010.
Livny, Boaz. Mental Ray for Maya, 3ds Max and XSI: A 3D Artist’s Guide to Rendering. Indianapolis, Ind: Wiley, 2008.
Palamar, Todd. Mastering Autodesk Maya 2014: Autodesk Official Press. 1st ed. Indianapolis, IN: John Wiley & Sons, 2013.
Pharr, Matt. Physically Based Rendering: From Theory to Implementation. 2nd ed. Burlington, MA: Morgan Kaufmann/Elsevier, 2010.
Robertson, Scott. How to Render: The Fundamentals of Light, Shadow and Reflectivity. Culver City, CA: Design Studio Press, 2014.
Web:
http://www.cs.rpi.edu/~cutler/classes/advancedgraphics/S10/final_projects/carr_hulcher.pdf Robert Carr and Byron Hulcher (2009), Path Tracing: A Non-Biased Solution to the Rendering Equation.
Click to access Constantinos%20Kalampokis%20Thesis.pdf
https://support.solidangle.com/dosearchsite.action?queryString=unbiased
Solid Angle Support
http://www.fxguide.com/featured/the-state-of-rendering-part-2/
Mike Seymore (2013), The State of Rendering FXGuide
http://www.fxguide.com/featured/the-art-of-rendering/
Mike Seymour (2012), The Art of Rendering (updated), FXGuide
http://citeseerx.ist.psu.edu/viewdoc/download?doi=10.1.1.38.3626&rep=rep1&type=pdf Eric Lafortune Mathematical Models and Monte Carlo Algorithms for Physically Based Rendering, Department of Computer Science, Faculty of Engineering Katholieke Universities Leuven.
http://3d.about.com/od/A-Guide-To-3D-Software/tp/Rendering-Terminology-Explained.htm
Justin Slick, Rendering Terminology Explained, About Tech
http://3d.about.com/od/3d-101-The-Basics/a/Rendering-Finalizing-The-3d-Image.htm
Justin Slick, What is Rendering, About Tech
https://sites.fas.harvard.edu/~cs278/papers/veach.pdf
Eric Veach and Leonidas J. Guibas Optimally Combining Sampling Techniques for Monte Carlo Rendering, Computer Science Department, Stanford University.
http://usa.autodesk.com/adsk/servlet/item?id=17940930&siteID=123112
Autodesk What is Rendering
http://animation.about.com/od/faqs/f/In-Computer-Animation-What-Is-Rendering.htm Adrien-Lux Sanders In computer Animation, What is Rendering About Tech
http://en.wikipedia.org/wiki/Path_tracing
Wikipedia Path Tracing
http://en.wikipedia.org/wiki/Unbiased_rendering
Wikipedia Unbiased Rendering
YouTube:
https://www.youtube.com/watch?v=K-wgA08c2gU
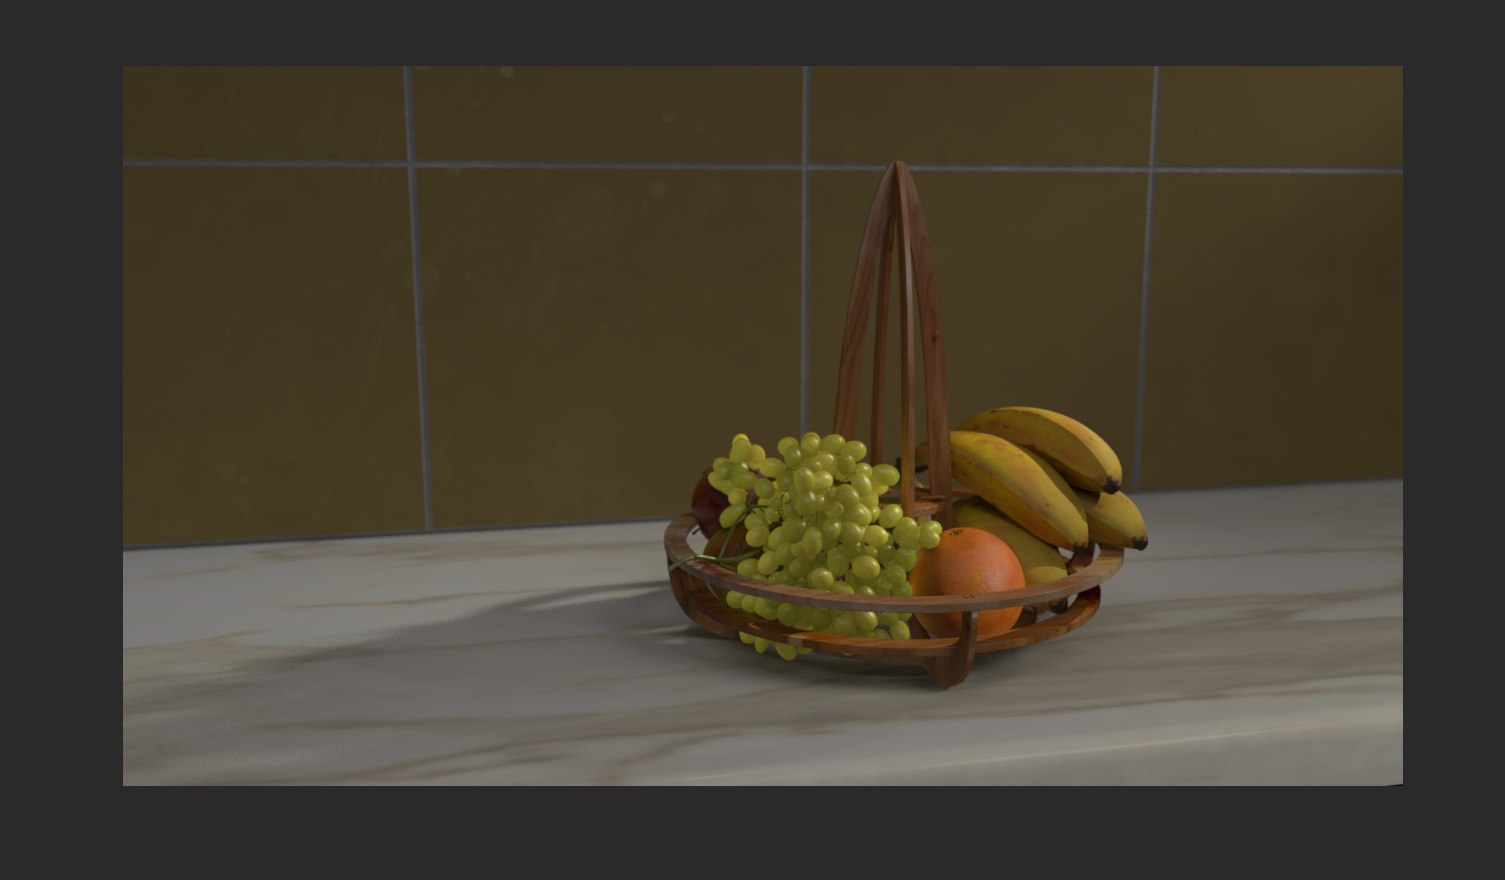
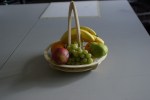
FRUIT BOWL PROJECT
INCLUDING CUSTOM SHADING ATTRIBUTES and THE STUDY OF REAL WORLD SURFACE PROPERTIES
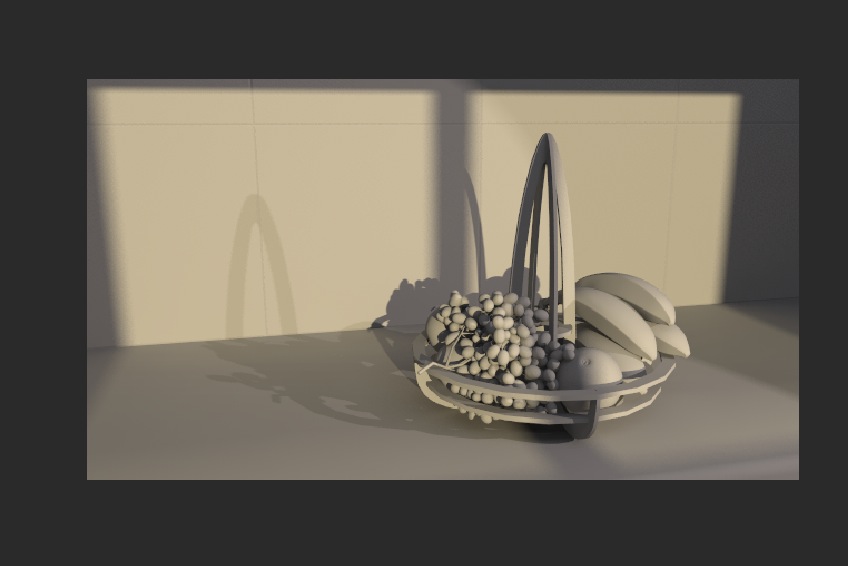
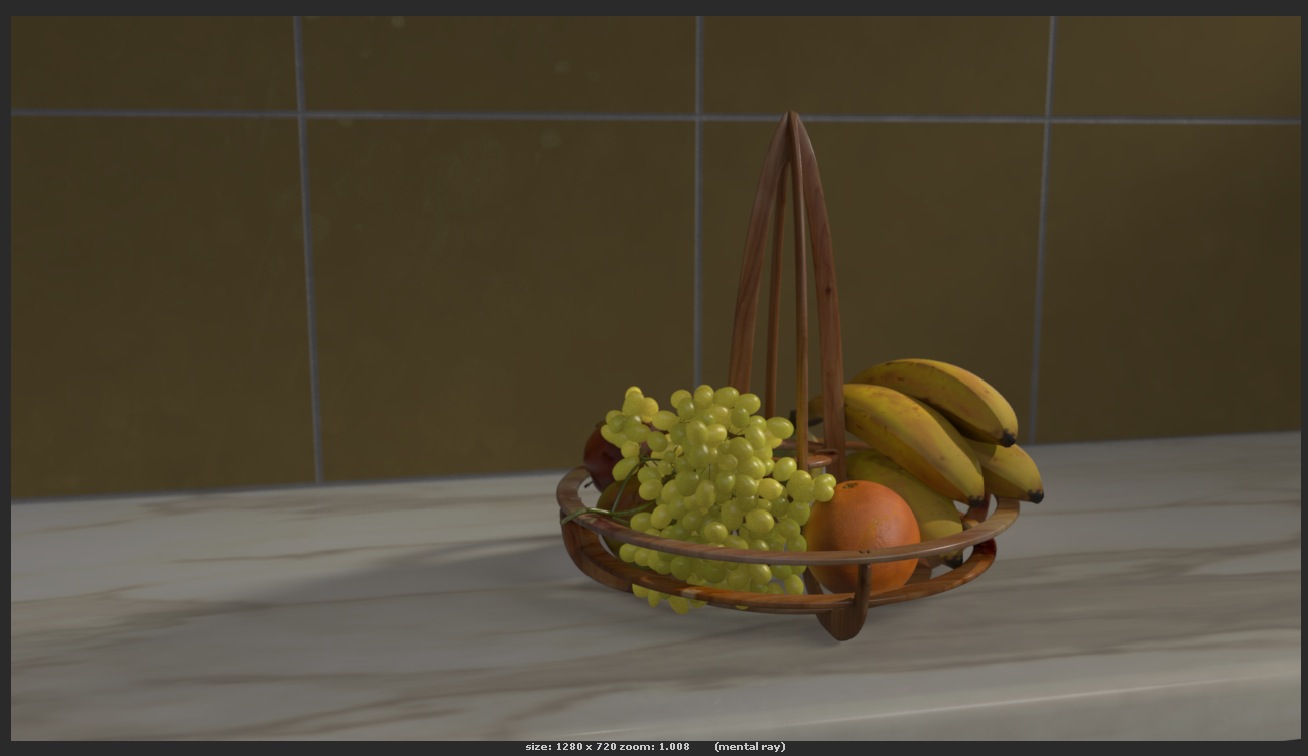
We have been asked to light two different versions of the fruit bowl below, one being directly related to a reference image and the other being our own lighting solution.

original scene
SETUP FOR FIRST LIGHTING SCENARIO

reference one
FIRST STAGE
I have chosen the above reference as my guide for shadows, light direction and intensity in creating the photo-realistic render.
When considering the lighting, setting and camera point-of-view I started out with several lights including, physical sun and sky, a portal light to bring the outside light in, general area and spot lights to consider for the main lights, shadow lights, direct and indirect illumination.
Assigning the lights to layers, then being able to look at the type of light, their positions, shadows, values and how it lights the scene both individually and in combination with other lights gave a good working base. A base shader was assigned with the reflectivity turned down to see the overall illumination.
For the direct illumination and shadow direction the main shadow casting light and the outside lighting was looking wrong. The shadows are not falling in the direction I need, there are two shadows and the scene is too bright. I changed the light type, which light was casting the shadow, the lights position and looked at how the intensity was working. This started to give me more control over how it was looking and where the shadows are falling.
For the shadow casting light I am using a spot light with the idea of adjusting the cone angle, penumbra and drop-off values to adjust the shadow. Later I learnt that I can control the shadows in the Attribute Editor under raytrace shadows for shadow rays and light radius.
I’ve turned off the sun and sky indirect lighting as the main light source and will use that in the next lighting scenario. It’s position, hard lines and dark shadows are not fitting in with the more general, softer and flatter light in the reference. I’ll use the overhead area lights as cylinders, as if they were ceiling lights in the room for the general lighting, with no shadows and look at using a spot light for the main shadow on the bench that comes from the other side.

reflection on bench edge and tiles

no reflection on the bench and lots of grunge on the tiles
I have started adding other lights for more specific lighting and using Final Gather illumination in the scene. I’m continuing to work on softer broader shadow and have lost the reflection on the edge of the bench as my reference does not have strong reflections.
It is probably a bit early in the lighting of the scene to have textures, no stopping having some fun with the different images used to create grunge on the tiles. From no grunge to experimenting with all these shapes, colours and bump effects, the finished render will not have this much bump and grunge. I’m looking at making adjustments with the black and white values connected to the shader’s reflection attributes with reflectivity and glossiness’s colour balance and adding some colour to reflectivity’s colour swatch.


SECOND STAGE

both shadows before using light linking to the fruit and basket
With the main shadow in the right direction I’m using a Mental Ray area light to highlight the shadows on the fruit. I now have two shadows on the bench, turning off illuminate by default and using light linking to connect the light to the fruit and basket eliminated this. Now I’m able to have detailed light and shadows on the fruit and basket giving more illumination and stronger shadows on the fruit.
It took a few variations of intensity and light position to show the shadows falling on the fruit and basket. When tuning on the other lights included in the overall scene the different lights values needed adjusting. The light and shadow on the basket handle it is not working with this linked light, I have created more lights for this shadow and including it to focus on the details of the fruit.
With the lighting so far I was not able to see the orange in the front of the basket to look like the piece of fruit in the front of the reference. It was looking too dark and had the wrong shadow lines. The orange managed to get it’s very own light, when I had it looking right I linked some of the other pieces of fruit and I think this lighting helped give some visual depth to the fruit in the basket.

working on individual lights to see how and where they are casting light and shadow

hard edged shadow and the reflection in the tile went when I turned off the physical sun and sky
I wanted to use the lighting to create more depth between the fruit and the tiles and have some variation in the light intensity across the scene. I’ve created a spot light to one side and pointed it between the front of the fruit bowl and the tiles. Then adjusting the cone angle and penumbra to vary the light intensity across the bench. These values control the width of the cone of light and the intensity at the edges of the cone giving a softness either into the width or away from the cone which I imagine being across part of the length of the bench.
grainy shadow edge
The shadow in my reference is soft edged and blurry and at the moment the shadow is a very clear shape and sharp edged. I need to adjust the spot light’s ray trace attributes including the light radius, the higher the radius value the softer the shadow and the longer the render. If the soft edges are grainy then increasing the shadow rays will compensate for the quality issues. For example changing from LR 0 and SR 1 to LR 6 and SR 32.
For the grapes we used a misss_fast_simple shader for subsurface scattering, the light penetrats the surface and scatters below the surface before leaving at a different point. There is a lot to consider here, the diffuse weight from 0.5 to 0.3 controlling the overall combination of the diffuse channels, there is a ramp into the diffuse colour and front SSS colour with the overall colour for the top colour. SSS is calculated based on meters with the back SSS depth controlling how deeply light penetrates into the object and the radius controlling how the light scatters across the surface.
For the two layers adjusting the weight (percentage of colour I am seeing), the radius and back scatter it is not giving the translucency and shadows for the grapes. I start looking at the lights, how to get shadows by varying the intensity of the three lights linked to the grapes, with illuminate by default off and diffuse only. I also adjusted the lights direction and position and this is not working. Now one of life’s gems, how it comes for nowhere. I wanted to look at what the lights I set up for the shadows on the fruit and basket might do when also linked to the grapes and here comes some of the shadows on the grapes.
The lighting for the grapes was a bit more complicated than that as the colour was not looking right, too much like olives. The last place I thought to look was the colour in the ramp for the grape shader, there was a whole new adventure in there.
Samples under the light map in the attributes was set to 128. Still not sure how the specular is working.

A Black Body node was added to the shading network for some lights to set exact colour temperatures for that light. A Low value gives warmer colours, higher values colder colours and exact colour temperatures can be set for creating atmosphere such as daylight at noon which is between 5000 and 5400K.
At the moment I have Ray Trace shadows on, have added my textures, the basic shading network and it needs refining. There is no Global Illumination, Ambient Occlusion or Depth of Field.
THIRD STAGE

After spending some time with Vince I needed to think about the following:
– It was not necessary to use the lights linked to the grapes for the sub surface scatter as the main light influencing their shadows. Moving the lights had influenced the sub surface scatter. I did not realise about the samples option on the sub surface shader under the lightmap option and the option to adjust the overall colour.
– I had been looking for the light radius and had overlooked the attribute under raytrace shadows of the light and to look at the light samples.
– With highlights only the reflection comes from the lights, not the environment and what controls the sharpness and blurriness of the highlight.
– To solve the problem of the strong square light coming through the window from the physical sun and sky was as simple as putting a piece of geometry in front of the window where the light was coming through. Now I can use this light for my next set up.
Looking at the overall lighting combined I made changes to the light’s intensity, angles and some of the subtle reflections. This included the reflective surfaces with the light’s reflection on the front edge of the bench and some highlights on the fruit and basked. I think this adds to the visual focus and depth perception. For this I added another light and linked it to the bench. The reflectivity was set to 0.8, glossiness to 0.181 and glossy samples to 16 with highlights only off. The basket had different shaders on each piece and I adjusted glossiness for one of the basket pieces. Not so sure about this, I was not wanting highlights all over the basket and the scene to lose some of the visual focus.
The last part was looking at the texture details including the grit on the tiles and the reflectivity of the fruit. My reference is quite bright and does not have strong, sharp highlights so I left it more diffuse with blurry reflectivity.
I added some BRDF, which is used to improve realism and is based on the angle of the camera to the reflected surface with the camera usually being the viewer’s point of view. This is very subtle in my shot as there is not much reflection and I wonder how much it is noticed. Zero is the surface directly facing the camera and 90 degrees is when the surface is 90 degrees to the camera.
“In general, the degree to which light is reflected (or transmitted) depends on the viewer and light position relative to the surface normal and tangent.”
http://www.cs.princeton.edu/courses/archive/fall06/cos526/tmp/wynn.pdf
For this shot I have used the Depth of Field in the camera’s attributes aiming to have the main focus on the fruit, choosing one of the grapes and the subtle out of focus section on the background tiles.
Now turning on the default settings for Global illumination and Ambient Occlusion all of which are adding to my render time and will be adjusted as part of the rendering testing.

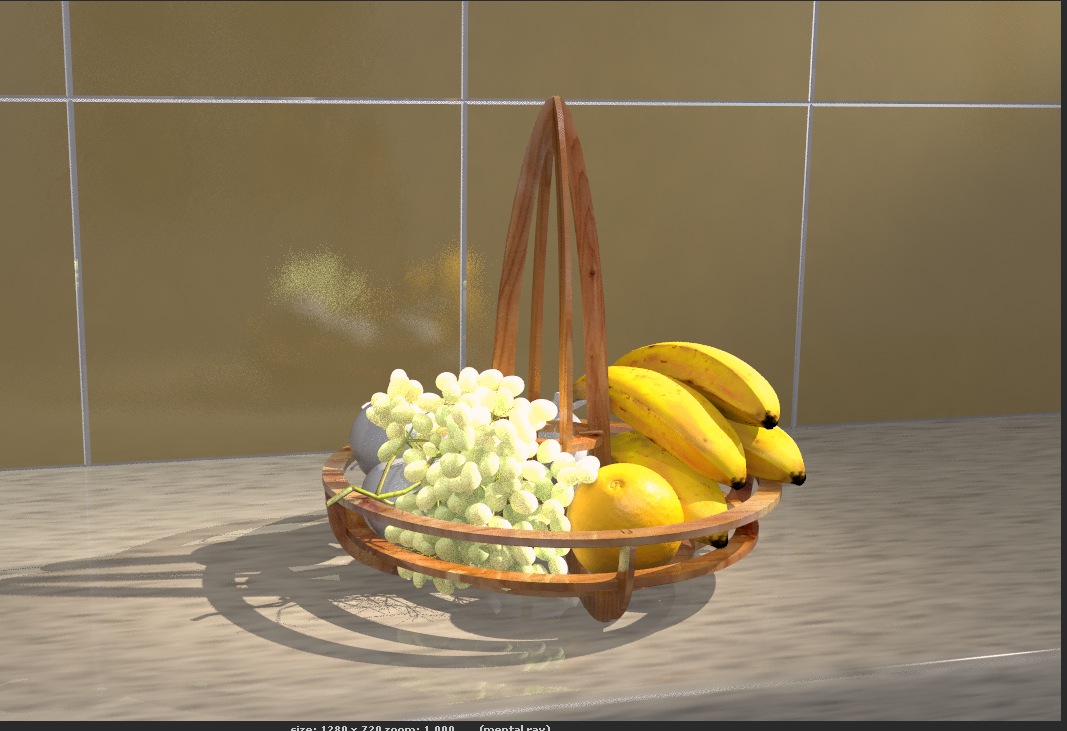
final lights
final shot
SETUP FOR SECOND LIGHTING SCENARIO

reference two
This lighting set up can be creative, I will take the high angle, darker lighting, harder shadow edges and contrast from this reference and apply it to my set up.

I’ve including the physical sun and sky through the window as the main light. I need to get the shadow edges from the fruit basket similar to the shadows on the bench that are coming from the same light. Thanks to my lecturer he was on my case about this. In the light’s utility node, I think it was the sun node’s shadow softness and samples were adjusted and the fruit basket edges softened a bit, looking more like they belonged with the light coming through the window. With this the strong shadow line in the front of the shot also softened more on the edges. The smaller the thickness the less samples I need.

harder shadows for the basket from the physical sun and sky light
The area light on the side is used as a portal light, having a colour ramp giving more of the overall late afternoon, early evening look with the shadows coming through the window. The Final Gather hits this plane and gets the colour form it.
The main light is the physical sun and sky coming through the window to create the contrast and depth. Therefore I am leaving the back, fill light out that was used to create depth in the previous set up. I think the higher camera angel is also adding to the visual depth in this shot.
There is a second shadow for the fruit basket on the bench top was done with another shadow casting light. I needed to make the shadow edges match the shadows of the physical sun and sky so they looked like they both belonged.
I have used the bokeh node for DOF here. It is mapped into the camera’s lens shader under mental ray in the attribute editor. The f/stop is realted to the radius on the Bokah, if the depth of field is grainy increase the samples.

final for second lighting
Building on what I have learnt in the previous set up I’m creating the darker, harsher shadows, a second shadow on the bench and combining direct, indirect and shadows lights. I’m enjoying adjusting different lighting values, changing the position, seeing how the intensities work together and combining different lights and lighting to work towards my final lighting set up.
I’m more aware of how the lights control the shadow edges with the light’s radius and rays, samples and direction and intensity to show depth and brightness. For every slider I thought I had worked out there were 10 more waiting for me to discover and work out what they do, not to mention how they related to each other and every other button.
I need to work more on the grapes, the uneven colour between them and the lack of transparency. It was not only the lights and sub surface scatter values, I needed to look at the colour used in the ramp to improve the visual texture of the grapes and have their lighting match the scene more.
My aim is to create depth with the lights, a more interesting range of light intensity across the scene, have shadows that belong with each other and work on the reflections, specular and render settings. Did I leave anything out?
fun shot, I’d like to experiment more with reflections, specular, shadow and shadow edges
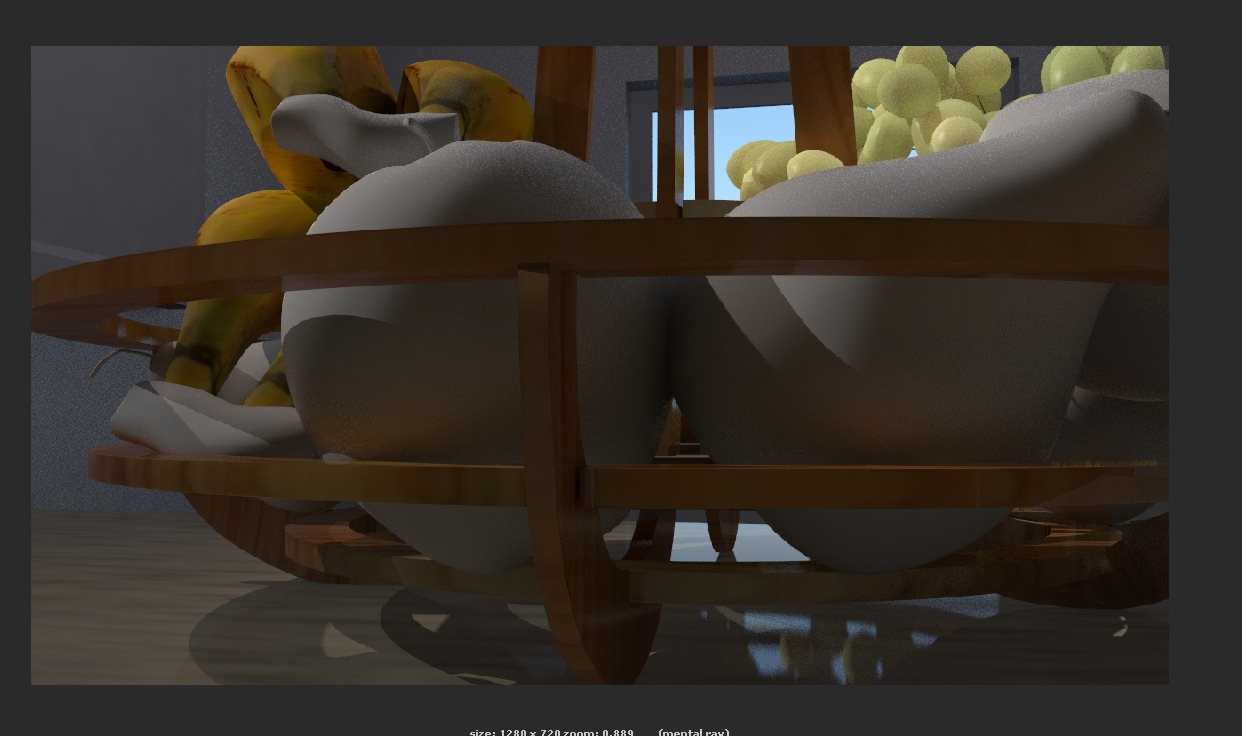
fun shot, I’d like to experiment more with reflections, specular, shadow and shadow edges
PIPELINE and TROUBLE SHOOTING
“On one end, you add as much as you can to the map, light, relfections and shadows. On the other end, you rely on shaders and rendering techniques and have maps that provide nothing more than shades of colour.” Mastering Autodesk 2014, page 596
We are rendering with Mental Ray, it is a physically accurate renderer, keeping the maths and colour consistent to achieve photorealistic renders.
To achieve this I enable mental ray and a linear workflow for a consistent pipeline, as the computer processes data and data is linear.
– set the resolution to HD 720 for the final render and used lower resolution for working.
– set to 32-bit-Floating-Point HDR.
– use energy conservation shaders, the mia_material_shader which is monolitiic, supporting most materials, is physically accurate and energy conserving. The diffuse + reflection + refraction <=1 and the shader takes care of this, not returning more energy than is being contributed by the incoming lights.
– lights set to quadric to reflect real life light intensity values, where the values represent the actual light energy in a physically correct way. The render calculates the amount of light in the scene and renders the result. I did have problems with some lights being to large and blowing out the surfaces and when the light values were too low I was not able to see the models at all. Setting the correct lighting values was important for how the textures looked.
– make the area light a mental ray area light
– enable colour management to control the color profile associated with the inputs and outputs of the rendering process with the render view and render settings.
– gamma corrections for rendering giving a true representation of the colours. The human eye is not digital, the computer is linear, it uses maths and algorithm for the calculations. The colour space is changed for displaying the image and it is not a true linear representation of the colour, it is colour corrected for us to see – LUT. Colour swatches needed a gamma correction of 0.455.
– use the correct scale for real world dimensions and for mental ray to produce a physically accurate result when rendering.
– check the normals, they need to be positive for each face, otherwise the lights do not work and the textures cannot be seen. There was a problem with some of the baskets normals facing the wrong way. The normals also control how the bump works on the surface, the light interacts with the direction the normal is facing and I did have problems with my some of my normal maps. The normals are how the surface is defined and the direction can be changed giving the illusion of bump on the geometry’s surface. When extracting a normal map it calculates a colour value based on the angle the normals are facing. The RGB values in the normal map, which comes out a purple colour can be adjusted in the shading network using a multiply node and then the sRGB values can be converted to liner with a luminosity node for the linear workflow.
– unified sampling, I started with a sampling quality of 0.25 and increased to 1.0 for rendering. The more samples the better the quality and the slower the render time. This reduced the anti-aliasing by casting more rays into the scene, smoothing the resulting render with unified sampling doing the work of averaging the contrast values of adjacent pixels. The default Min (guaranteed minimum number of samples per pixel used when processing an image) and Max (absolute maximum number of samples per pixel used when processing an image) sample levels and this was ok. The edges on my bananas were more jagged than other areas, setting the sampling quality to 1 cleaned up the render and I also took into account the distance between the camera and the bananas.
“The number of times MR reads and compares the colour values of adjacent pixels in order to smooth the resulting render to avoid jagged lines” Introduction to Maya 2013, P506
“The most important attributes for Quality is Min Samples and Max samples. Quality is basically a Contrast threshold. With a Low Quality setting, then there will need to be a great deal of contrast between adjacent pixels in order to force additional samples or to get better anti-aliasing.If the Quality setting is up really high, then we won’t need as great of contrast between neighboring pixels in order to force additional samples. “ Lynda.com, on-line tutorials
– filter initially set to Box which is faster to render and then rendered using Mitchell which has minimal blurring, a coherent image and is expensive for rendering. Filtering happens after sampling and uses the height and width based on the value of the pixel when converting the samples to pixels. Mental ray takes the average of every pixel and its surrounding pixels and removes aliasing artefacts, some blur the image and some sharpen it.
– UV maps for the texture maps to work. There was a problem with the UV’s on the basket when exported as a whole, I exported as separate pieces for use in mudbox and this worked better for the UV’s and the textures. Other UV’s showed a problem when opened in Mudbox and because the area of detail was not significant they were left and looked fine for the final texture.
– for graininess in the render after the quality has been set to 1, the shaders glossy samples under reflections was another area I initially overlooked. The glossiness adds blur to reflections and increase the number of glossy samples, the number of rays sent out and adjust 8. 16, 32 etc helped. I did not find this necessary for all the shaders.
– exported the models separately as obj for texturing in mudbox, then imported the texture maps back into the final fruit bowl scene to connected to the shader attributes. Some of the texture maps did not work the first time and after seeing the result I was better able to make choices in mudbox for the results I was looking for. The surface texture appearance is defined by the shader’s attributes where the samples return the values for rendering.
– raytrace shadows for some of the lights under shadows and in the render settings to help noise in shadow edge. I could have done more work here in relation to the shadow casting lights and the quality of the shadows to possibly reduce my render times.
– final gather in the render settings has a default accuracy of 100, point density 1, point interpolation 10. It takes the information from points on the surface and the accuracy is the number of rays from each point. The first lighting set up was left at 100 as it did not appear too noisy and the second one I changed to 400, larger slowing down the render time. I did not change the point density (anchor points for each pixel), interpolation (blending together between accuracy and point density) , primary diffuse sale (the overall lighting level globally, higher is brighter) or secondary diffuse bounces (combine FG with lights to see the specular highlights and clear shadows). Final Gather can smooth out the result of GI if there are black pixels in some of the reflective surfaces and adjusting the trace depth can help. I did not have a large reflective surfaces which maybe is why I did not see these black pixels. I could have done more testing and fine tuning here, did not venture far from the default and adjusting the accuracy.
– global illumination was used for some lights using the diffuse surface to illuminated based on the intensity of the photons. The photon intensity value needs to be set for the linear workflow with the area light’s intensity value multiplied by 3.15 and the point/spot light’s value by 12.6. Exponent set to 2 to match the light’s quadric setting and to be consistent with the inverse square law. I think I could have done more work here and developed my understanding of how this works for the scene with individual lights and the impact of the render times. The default settings looked fine and I mostly left them.
– ambient occlusion is for lighting areas such as where objects are close together and possibly blocking some of the bounced light from reaching the surfaces. This is turned on as part of the shaders attributes as well as in the render settings. I could have had a better understand of what the samples are doing in the shader and the render settings for ambient occlusion and this would have helped when making adjustments and having more control of the render settings. Where AO was turned on I adjusted some of the samples and again thought the render looks good with the presets.
– depth of field with the focus being on the fruit, the grapes and a subtle blur on the tiles because the main focus is the fruit and the tiles are the background. For the first one I used the DOF in the camera’s attributes and for the second one I used the bokeh node.
Did not use importunes
I would like to have spent more time understanding and using FG, GI and AO to find the best quality and for the smallest render times. There was a lot to take in and apply and I think it is was a taste of what there is to learn and what is possible.
Render times started out at 0.13, went to 56 sec, to 1:41 and finally to 19:51 – what to leave on and off, still working on that.
Reference:
Autodesk Maya Techniques: Hyper-realistic Creature Creation. San Rafael, Calif.: Autodesk, Inc, 2007.
Birn, Jeremy, and Jeremy Birn. Digital Lighting and Rendering. Indianapolis, Ind.; London: New Riders ; Pearson Education [distributor], 2006.
Brown, Blain. Motion Picture and Video Lighting. 2nd ed., New ed. Amsterdam ; Boston: Elsevier/Focal Press, 2008.
Demers, Owen. Digital Texturing & Painting. Indianapolis, IN: New Riders, 2002.
Derakhshani, Dariush J. Introducing Autodesk Maya 2013. 1st ed. Indianapolis, IN: Wiley Pub., Inc, 2012.
Obermeier, Barbara. Photoshop CS5 All-in-one for Dummies. For Dummies. Hoboken, N.J: Wiley Publishing, 2010.
Palamar, Todd. Mastering Autodesk Maya 2014: Autodesk Official Press. 1st ed. Indianapolis, IN: John Wiley & Sons, 2013.
Präkel, David. Lighting: N. Light of a Particular Quality or the Equipment That Produces It. Lausanne; London; New York: AVA Academia, 2007.
Web References:
“Architectural Material,” n.d. http://docs.autodesk.com/MENTALRAY/2014/ENU/mental-ray-help/files/shaders/architectural/arch_mtl.html#mi_shader__mia_material_x.
Autodesk help for subsurface scatter: http://download.autodesk.com/global/docs/maya2014/en_us/index.html?url=files/mrfMS_mental_ray_for_Maya_shaders_sample_workflow.htm,topicNumber=d30e733870
“Common Techniques to Improve Shadow Depth Maps,” n.d. http://msdn.microsoft.com/en-us/library/windows/desktop/ee416324(v=vs.85).aspx.
Glossy Reflection: http://www.raytracegroundup.com/downloads/Chapter25.pdf
How to Use Color Management in Maya: http://www.steves-digicams.com/knowledge-center/how-tos/video-software/how-to-use-color-management-in-maya.html#b
Lynda Tutorials: http://www.youtube.com/watch?v=uDfWns96988
Mental Ray Architectural and Design Visualization Shader Library, 1986, 2011<www.sophia.org/tutorials/elements-of-art-texture> http://msdn.microsoft.com/en-us/library/bb976075(v=snagamestudio.31).aspx NVIDI Corporation,
“Mudbox Online Help Files,” n.d. http://docs.autodesk.com/MUD/2015/ENU//index.html#!/url=./files/GUID-0DF909C0-A02A-4729-A285-F7E5F40BD71A.htm.
Physical Sun and Sky with Portal Light: http://www.cgarena.com/freestuff/tutorials/maya/sun-sky-portal-light/light.html
Rendering Mental Ray: Anti Aliasing Settings: http://wiki.bk.tudelft.nl/toi-pedia/Rendering_Mental_Ray:_Anti_Aliasing_Settings
CUSTOM SHADING ATTRIBUTES
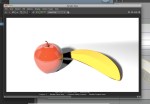
With reference to the qualities of the apple and banana surfaces customise 3D Shaders to emulate two virtual surfaces discussing the use of lighting and shading toolsets and shader attribute requirements with Mental Ray for Maya.

Mental ray linear work flow is necessary for photorealistic rendering, to produce the correct colours and for realistic lights and shadows when rendering, compositing and viewing on monitors. Setting up colour management including gamma correction gives correct colour values and mental ray is a physically accurate renderer.
-

- mia_material shader assigned
-

- gamma correction on the shader
-

- colour assigned
-

- reflectivity to zero on the banana
In real life you cannot see a surface without light and and what we see is influenced by how the light interacts with the surface. In Mental Ray the object’s surface material qualities are assigned through Shaders that have connecting networks. These shaders are small programs that solve a specific piece of the rendering process, having some inputs and an output value for the visible parts of the scene that gives the surface its characteristics.
The attributes that are created through these networks allow the object to be rendered with Mental Ray, coordinating how the shaders return information from the scene to the camera. Collecting the information from the shaders includes how the lights interact with reflections, absorption or having the light pass through the surface with assigned attributes such as such as colour, surface bumps, transparence, reflection, shine, or opacity. The shader is creating the surface texture information, the properties that are sampled from the camera and the shader surface is returning. We also need to consider energy conservation with the surface not returning more energy than is being than is being contributed by the incoming light. This is more likely to give realistic and believable lighting and shading.
-

- three point lighting
-
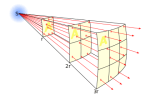
- inverse square law
-
- area light and penumbra
-

- autodesk’s mental ray architectural and design visualization shader library
“The three ‘points’ in three-point lighting are actually three roles that light can play in a scene, each serving a special purpose”
Birn, Jeremy, and Jeremy Birn. Digital Lighting and Rendering. Indianapolis, Ind.; London: New Riders ; Pearson Education [distributor], 2006. Page 133
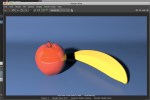
The light decay rate is how the intensity of the light decreases with distance, how fast it decays. For realistic light it is set to quadric decay, inverse square law to reflect how light is bounced around in real life, it does not stop it gets more spread out. The intensity of light is inversely proportional to the square of the distance from the source. This is one of the reasons why 3D models are build to scale.
-
- key light, area light
-
- smaller scale, area light
-
- background colour
-
- fill light and lower intensity values
The key light is an area light, they can be physically scale, changing the size of the source of light. The key light helps to cast the shadows and the smaller lights are more difficult. This can create light wrapping, giving softer diffuse and distance based shadows. They can be grainy and there is the option to adjust the samples, the number of lights that are in the area, the high sample attribute, the horizontal or vertical axis, creating smoother lights. In the area light AE > MR > Area Light > tick use light shape and visible (see in the render). These settings makes the maya area light into a mental ray area light.
-

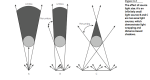
- spot light with hard edge cone angle
-

- spot light with softer cone angle
-

- no back light
-

- area light for back light
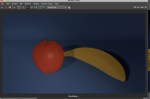
Adding a spot light for the fill to soften and add some depth to the scene by adjusting the cone angle, penumbra angle and drop off. I was not able to do this with the point light, also changing the point of the lights focus from the front of the apple to between the apple and the banana. Also added an area light for some back light and not sure if the hard line is what I wanted to get more depth into the scene. Still thinking of ways to make some depth with the lights and seeing where that goes.

Ray trace is turned on for the key, area light leaving shadows off the other two lights. I like how the shadow from the apple goes over the banana and gets darker further back and how there is a slight line at the back of the area giving some depth between the floor and the wall areas. The general surface areas of the apple and banana are still a bit flat so not sure about that. Maybe another light on them some how without losing the shadow cast by the key light. I used another spot light, turning off shadows and emit specular because I was getting to highlights. When the object was sometimes over lit it was a combination of intensity and the position of the light in the scene. I like how the background light is now reducing in intensity along with the shadows. There is the shadow on the top of the apple and from the apple on the banana.

I have turned on Final Gather under Indirect Illumination, which is a way of calculating the indirect lighting. The rays from the camera interact with the scene giving the first Final Gather point. This emits a number of Final Gather rays which gather information about the irradiance values and the proximity of other scene elements. This can be adjusted with how many rays are cast from each point, the number of points generated by the rays, the point interpolation or blending between the samples, the brightness of the Final Gather render, if there is a second defuse surface and the values for this can increase the brightness of the scene.
SHADER ATTRIBUTES
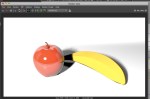
Using the mia_material shader assigned to the apple, it’s stem and the banana This is a monolithic shader, meaning it has the ability to represent many surface types and aspects of something, supporting most materials with its many attributes. I am able to adjust the diffuse and reflective qualities of the objects. The surfaces are too reflective, shiny with the banana being more diffuse and not having the reflective hot spot and the stem not as reflective either.
-
- apple too shiny
-
- apple too dull
For the apple, I thought is was not totally reflective or shiny and have reduced the reflectivity and included some diffuse to roughen the surface a bit, also reducing the reflected glossy attribute. There are some hot spots that are not totally shiny or pure white and have reduced the reflectivity and glossiness of the highlight a bit. Also looked at putting some of the apple colour into the hotspot for the specular, as it is not pure white on my apple. Now the apple is much to dull looking and need to put back some of the reflectivity, glossiness and reduce the diffuse.

Also looking at increasing the diffuse roughness and how that looks with the reflectivity a bit higher. I think the colour in the reflectivity is softening the edges and looking more like it belongs on the apple surface. I thought reducing the reflectivity and glossiness would give me the mix of shiny and matte that I wanted, I was not happy with the result. By bring back some diffuse and roughness and adjusting with the reflectivity and glossy it started to give a better balance between them.
-

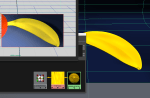
- banana with no reflective colour
-
- banana with lighter reflecting colour
The banana is a duller surface with no highlight or specular qualities. I have looked at reducing the reflectivity and increasing the diffuse and thinking about the roughness. I liked the idea of putting some colour, maybe slightly contrasting into a low reflectivity value to give the banana some definition. I do not want to lose the line where the skin changes direction and wondering if that would help keep some of it while the surface is still mostly diffuse.
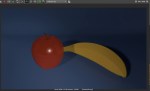
Continuing on from this I have reduced the apple’s reflection by reducing the reflectivity and glossiness while slightly increasing the roughness. This has reduced the shininess and changed the strong white highlight to a more realistic diffuse highlight with softer edges and more of the apple colour in it. There is also the option to turn on highlights only. I am losing the shadows including the one from the apple on the banana and of the apple stem on the apple . I have increased the intensity of my key light and now need to have another look at the other lights and the texture on the banana.
-

- lost my shadow
-

- changed reflection

-
- adjusted placement of texture
SOME TEXTURING
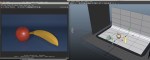
For this exercise I am now looking at adding some basic texturing to the fruit. One option is to create a simple procedural texture,that means a texture created internally by a 3d program, in this case maya into the colour channel only. The other option we have been looking at is to paint surface colours and textures with using other programs such as photoshop onto a flattered pattern of the surface, a UV layout of the modelled shape.
With the procedural texture I have created a basic shading group, which is a collection of nodes connected into a single object to show the idea of the fruit’s surface qualities. The banana has a fractal node mapped into the material shader’s colour giving the options for a pattern with a second colour. The first one being the fractal and the second one with the 2d placement being changed for the U 0.2 and V 1.0 direction.
The link to autodesk’s information on colour managed liner workflow and gamma correction.


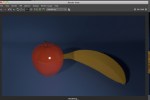
With the apple I have created some procedural textures by using noise and fractal nodes. It is probably not the apple you would purchase at the fruit shop, I like the changes in colour to help show some depth to the shape. I can see how the apple’s shadow shows on the different sides of the banana behind it.


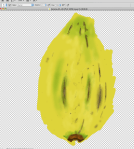
Now looking at texturing with photoshop. The UV Texture editor in Maya makes it possible to used two-dimentional images on three-dimentional objects, known as texture mapping. The projections of the banana shape’s 3d surface was already there then in the uv texture map I was able bring these separate surfaces together, making a flat surface for painting in photoshop. This painted file is them saved in the projects files and with a file node is mapped onto the banana giving the painted look. In the shot below the apple still has the procedural texture and the banana has the painted photoshop surface.

It is possible using the same process as for the banana above to map the 3d apple with a uv texture map to make a flat surface for painting. This shape would be painted in photoshop, saved into this maya project and mapped onto the apple to give a painted, realistic image. This apple image was painted in my photoshop, texturing class.

References:
Birn, Jeremy, and Jeremy Birn. Digital Lighting and Rendering. Indianapolis, Ind.; London: New Riders ; Pearson Education [distributor], 2006.
Derakhshani, Dariush J. Introducing Autodesk Maya 2013. 1st ed. Indianapolis, IN: Wiley Pub., Inc, 2012.
Palamar, Todd. Mastering Autodesk Maya 2014: Autodesk Official Press. 1st ed. Indianapolis, IN: John Wiley & Sons, 2013.
http://download.autodesk.com/us/maya/2010help/mr/shaders/architectural/arch_mtl.html#parameters
http://download.autodesk.com/us/maya/2010help/mr/shaders/architectural/arch_mtl.html#parameters http://wiki.bk.tudelft.nl/toi-pedia/MIA_Material_-_Basics
http://supportsolidangle.com/display/AFMUG/standard-shader
http://www.impresszio.hu/szabolcs/MentalRay/MentalRaySampling.htm
https://support.solidangle.com/display/AFMUG/Standard+Shader
STUDY OF REAL WORLD SURFACE PROPERTIES
Observing and recording the physical surface properties of an apple and a banana giving a brief description and critically analyse each objects surface properties.
APPLE

The main visible colour of the apple is red with yellow areas around the top. The yellow includes textures on the surface with the spots, line shapes and around the top of the apple. Included with the yellow are areas of green. The red and yellow are blending together in areas with the lines and spots of yellow, you do not have a coherent reflection.
The diffuse quality of the surfaces is its ability to reflect light and how it is broken up and scattered in different directions. The smoother surface of the apple reduces the amount of diffused reflection, the opposite to a high diffuse or non-directional light, which would scatter light in random directions. The angle of incidence measures the deviation of something from straight on. Light is absorbed by diffuse and it is the scattered light component. The reflected rays make up the colour of the diffuse surface.
Refraction qualities of a surface change the direction of the light rays as they pass through the surface. It is how light is bent and the refractive index controls what happens when the light is passes through objects such as a glass or surfaces such as water. The image of the objects on the other side are distorted, with a value of one meaning there is no bending of the light rays as they collide with the surface. The shader needs to have transparency for refractions to work. The apple does not have a transparent surface.
Specularity is when there are hot spots and/or highlights on the surface. When the light rays hit the surface it is reflected at the same angle reducing the diffuse and creating highlights, the mirrored reflections. The appearance of light bouncing off the surface. The apple has a hot spot and has specularity. When set to black there is no specularity.
Glossy, or specular highlights are described as having a smooth, shiny or lustrous surface, showing broader highlights and possibly mirror reflections. It does not need to be perfectly smooth, can be blurry and can be used to add blur to reflections or how dull or polished the surface is. A combination of specular light which is reflected in an equal direction to the angle of the light hitting the surface and diffuse which is scattered over a range of directions. The apple has a glossy surface, it looks shiny and shows broader highlights with possibly mirror reflections. Glossy can be between diffuse reflectivity and specular reflectivity. The darker the colour the more blurry the highlights, the hue does not matter it is the brightness controlling the sharpness.
The apple is not transparent as this allows light to pass through the surface, having qualities that allow objects to be seen clearly through it. the more transparent it is the more you can see through it. When the value is 0 or black the surface is totally opaque, not allowing the transmission of light, when the value is 1 or white the surface is totally transparent. With transparency you can incorporate the refraction of the light.
Translucency permits light to pass through, also diffusing it so the opposite side is not clearly visible preventing seeing distinct images. One is where all light shines through the object and zero none does. The apple is not translucent.
Reflective surfaces allow light rays to bounce back into the environment, the relationship between incoming and outgoing illumination. It can be diffuse, specular and/or glossy. A diffuse reflection would give a matte appearance and a specular reflection a glossy appearance and/or with highlights or hot spot. The apple has a reflective surface with glossy and highlight areas and is able to reflect in areas of its surface the elements in the surrounding environment. When a surface has some reflectivity it also has glossy.
Surface qualities of the apple when I touch it are at first are flat and smooth even though it is not perfectly round. The surface does have gradual and small variations in the surface depth with indentations where there is some damage and changes to the surface. Where the apple joined the tree and at the opposite end there are ridges even though it has a smooth appearance. The end of the apple has the rough, small leafy part which comes out from the surface.
BANANA

The surface properties of the banana are different from the apple in several ways.
The visible colour of yellow and the darker ares are how light interacts with the surface. As black absorbs all the light the darker areas of the banana are absorbing most of the light while yellow is being reflected back and we see that colour.
As there are minimal highlights and hot spots on the banana the surface is very diffuse, scattering the reflected light even though it has a smooth surface. With this there is reduced specular, with no reflection of the environment and light from specular or hot spots. The quality of the surface is smooth but not glossy , it gives a diffuse reflection being a matte surface with no highlights.
We are not able to see through the banana or see objects through it so therefore it has no transparent or translucent qualities and no refraction to consider. It is opaque with the light being absorbed or reflected.
Like the apple there are the rougher part of the banana at each end where the textures changes from the overall surface. The surface is a combination of how the light is absorbed and reflected.
References:
Click to access architectural-library.pdf
http://ogldev.atspace.co.uk/www/tutorial18/tutorial18.html
http://www.physicsclassroom.com/class/refln/Lesson-1/Specular-vs-Diffuse-Reflection
https://support.solidangle.com/display/AFMUG/Standard+Shader
Derakhshani, Dariush J. Introducing Autodesk Maya 2013. 1st ed. Indianapolis, IN: Wiley Pub., Inc, 2012.
Palamar, Todd. Mastering Autodesk Maya 2014: Autodesk Official Press. 1st ed. Indianapolis, IN: John Wiley & Sons, 2013.
RENDERING 1
SHORT ANSWER EXAMINATION
Question 1 (Total = 2 marks)
Using dot points ‘list’ what features need to be enabled in order to setup linear workflow for Mental Ray in Maya.
Question 2 (Total = 2 marks)
a) When using Unified Sampling with Mental Ray, what render Settings attribute would you adjust to remove artefacts and improve overall anti-aliasing? (1 mark)
b) Name the shading attribute that you would use to remove grain from glossy reflections and glossy refractions? (1 mark)
Question 3 (Total = 2 marks)
a) Using the diagram below, write down (in the spaces provided) the name of the two (2) missing lights.

b) And explain the purpose of the above lights and how they contribute to the overall lighting of the scene. (1 mark)
Question 4 (Total = 2 marks)
c) When attempting to determine the appropriate Unified Sampling rate for Anti-Aliasing, what feature of Mental Ray should you enable to her inform this decision? (1 mark)
d) And explain the meaning of the information presented by the above feature. (1 mark)
Question 5 (Total = 2 marks)
a) In order for Mental Ray to produce a physically accurate result when rendering, it is important that the scale of geometry is based upon what? (1 mark)
b) In order for Mental Ray to produce a physically accurate result when rendering, it is important for light to decay at what rate? (1 mark)
Question 6 (Total = 2 marks)
Name four (4) Indirect Illumination features found within Mental Ray. (1/2 mark each)
Question 7 (Total = 2 marks)
a) Explain the difference between Indirect Illumination and Direct Illumination.
Question 8 (Total = 2 marks)
There are two (2) types of Caustic Photons effects, what are they? (1 Mark each)
Question 9 (Total = 2 marks)
a) What Mental Ray feature can be enabled to visualise photons in three dimensions wishin Maya’s viewport? (1 mark)
b) And what is the purpose of enabling the above feature? (1 mark)
Question 10 (Total = 2 marks)
a) What Indirect Illumination feature can be enabled to help smooth out the results of GI (Global Illumination). (1 mark)
b) If black pixels are rendering in some reflective or refractive portions of a model, what should be done to resolve this situation? (1 mark)
