RESEARCH, REFERENCE, INSPIRATION and WORK
Design Centre Enmore 3D Art and Animation (DCE3D)
MY GRADUATING MAJOR WORK
DESIGN CENTRE ENMORE, SYDNEY: Bachelor of 3D Art and Animation
COURSE COORDINATOR: Richard Cass
LECTURER MENTOR: Vincent Rossini
MENTOR: Kim Nguyen
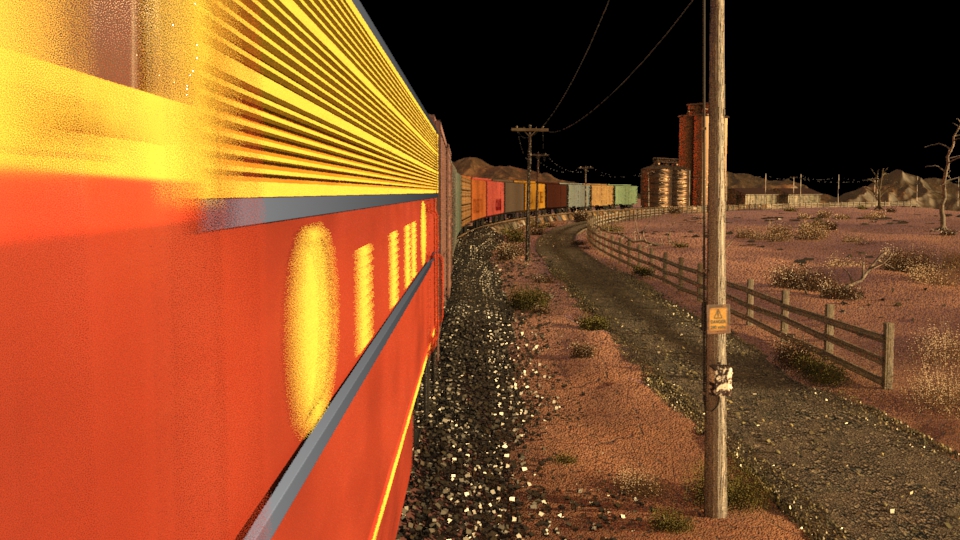
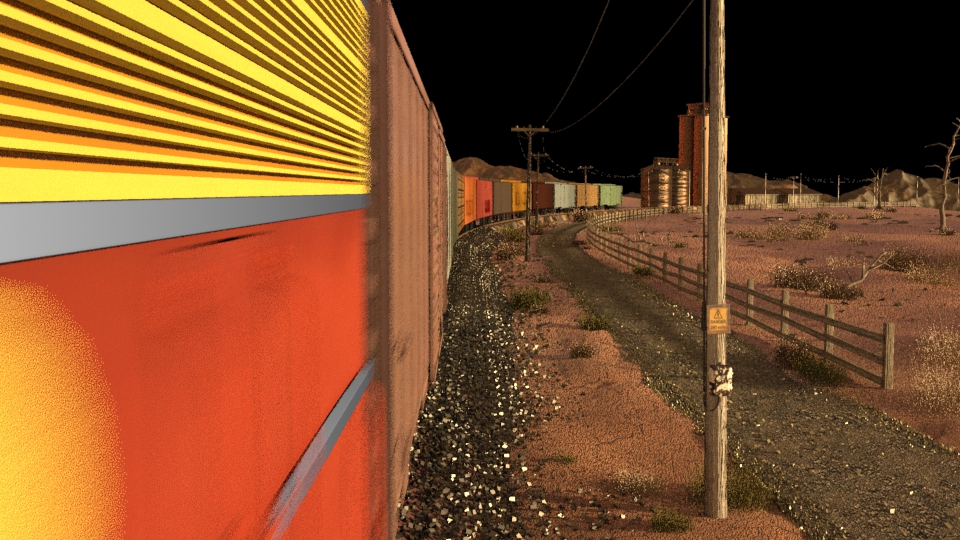
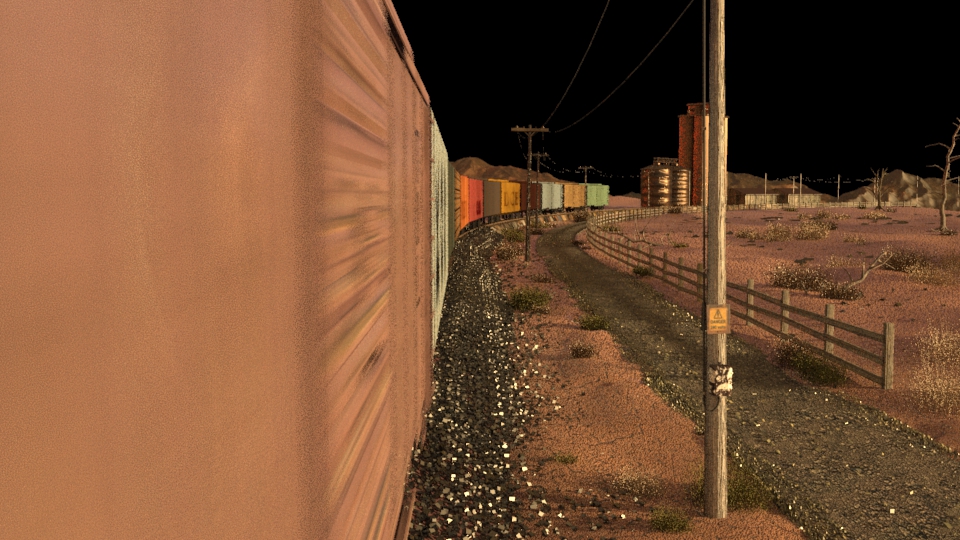
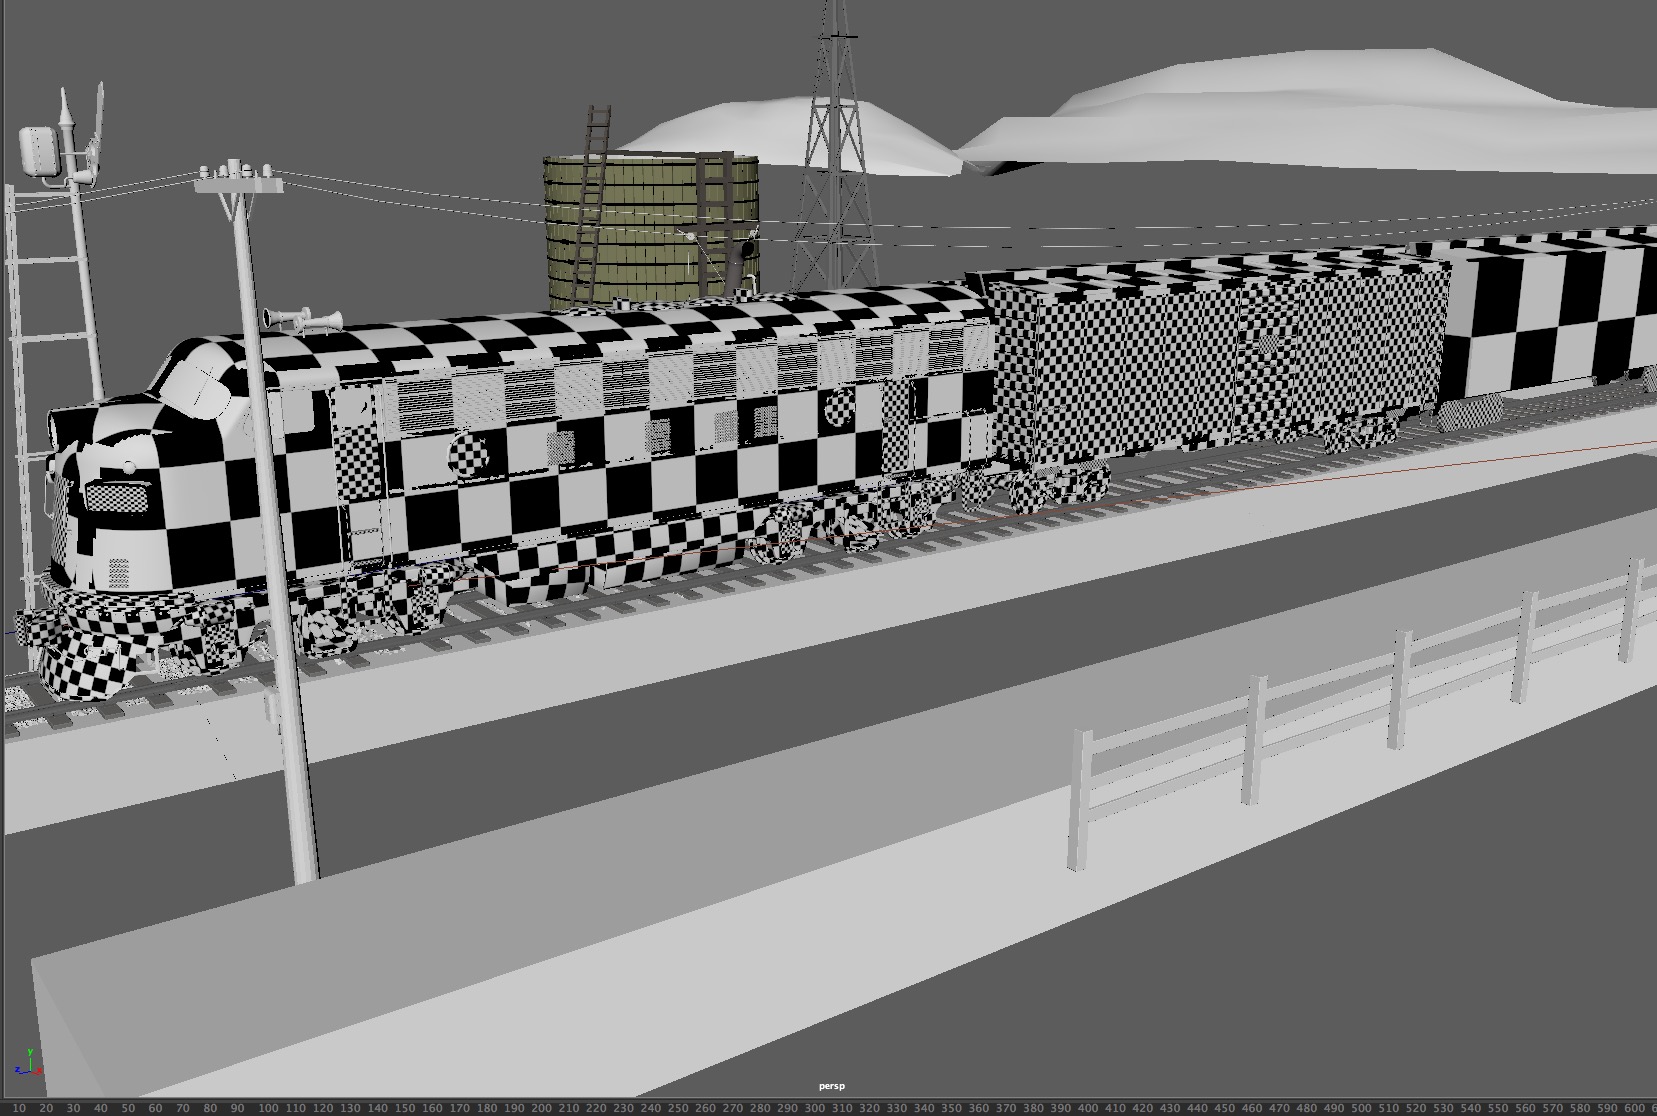
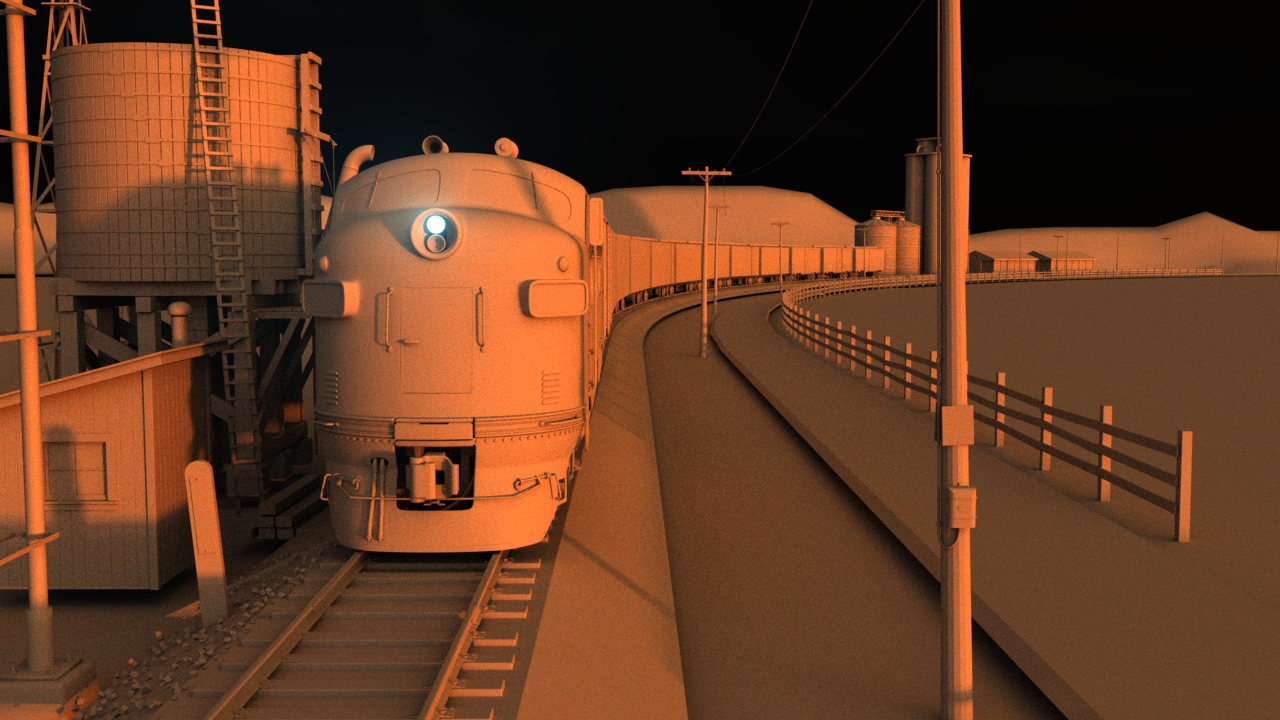
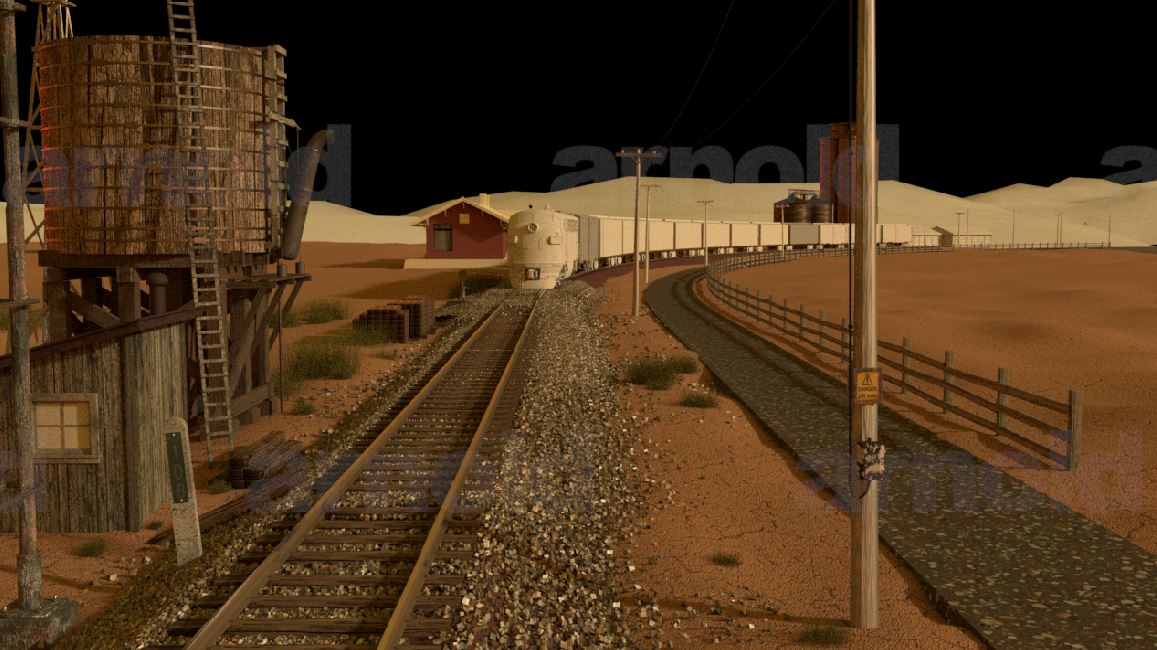
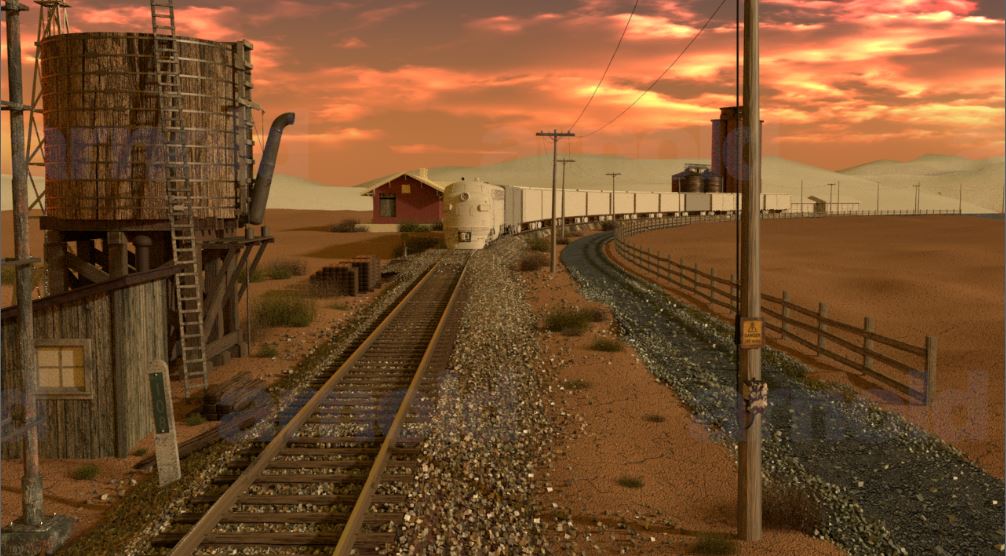
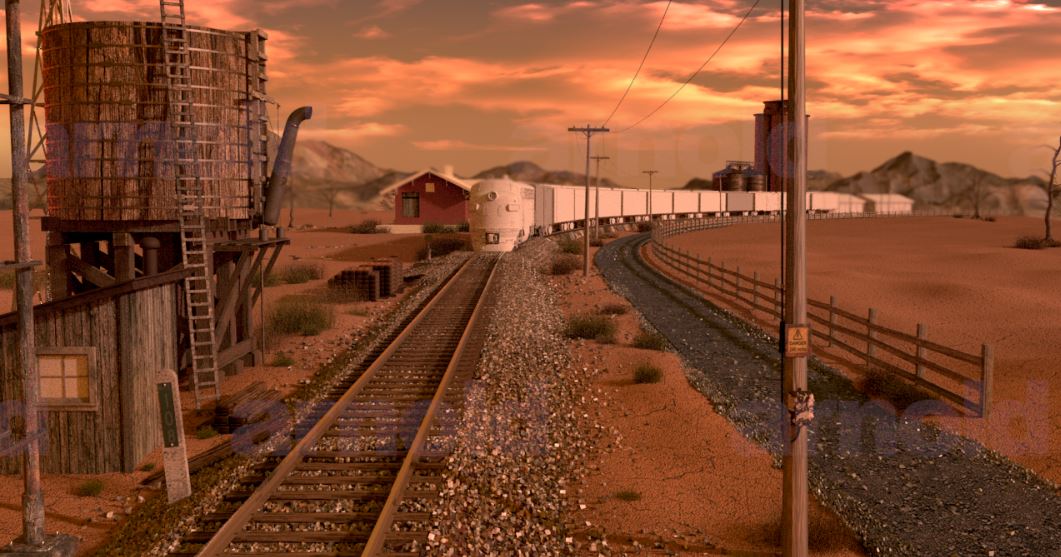
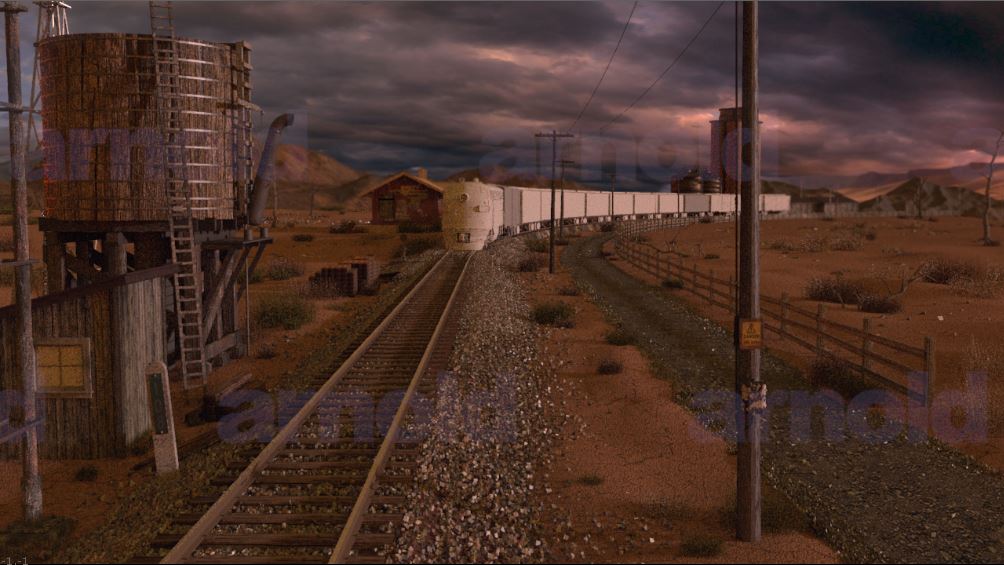
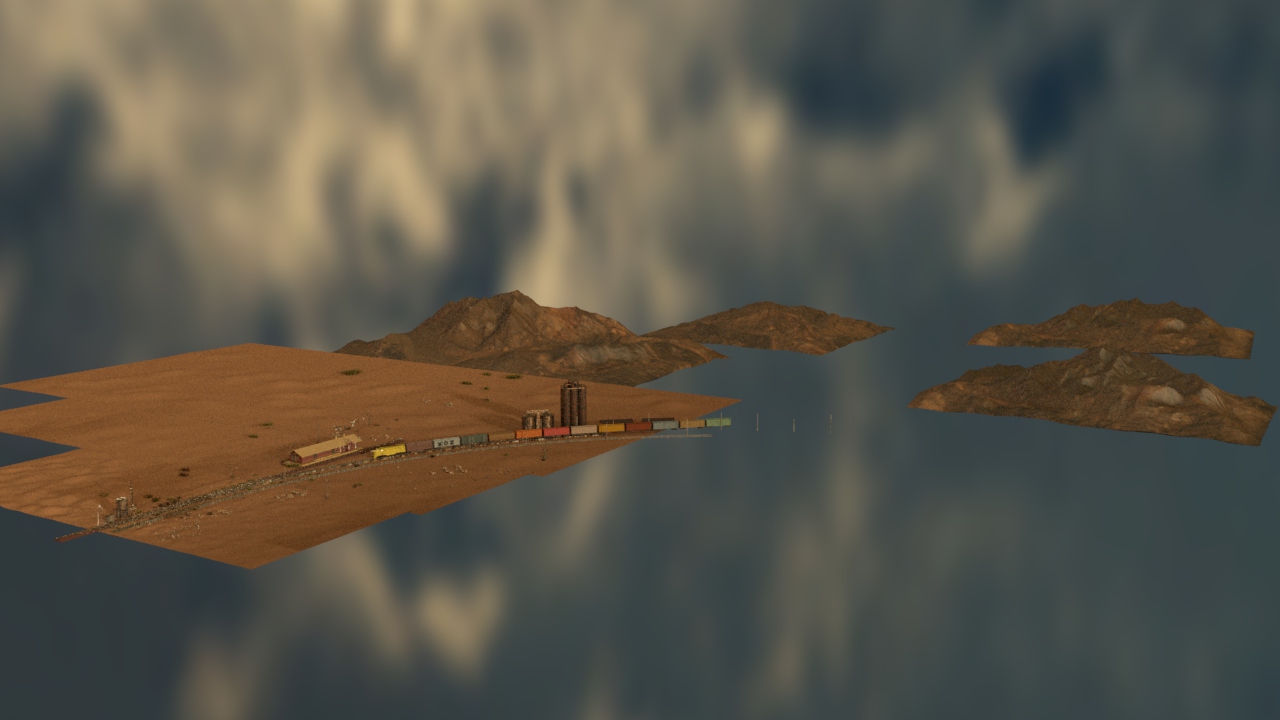
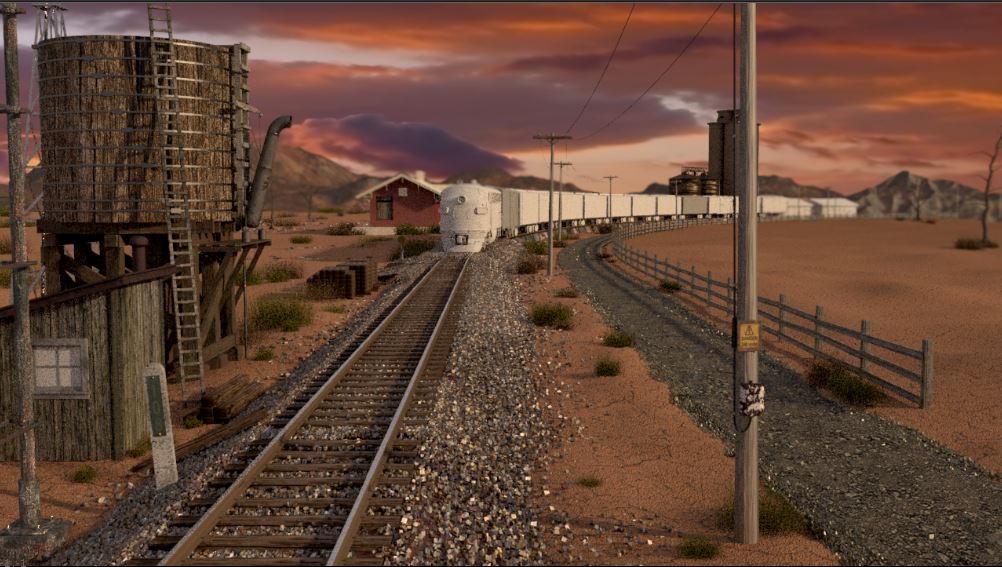
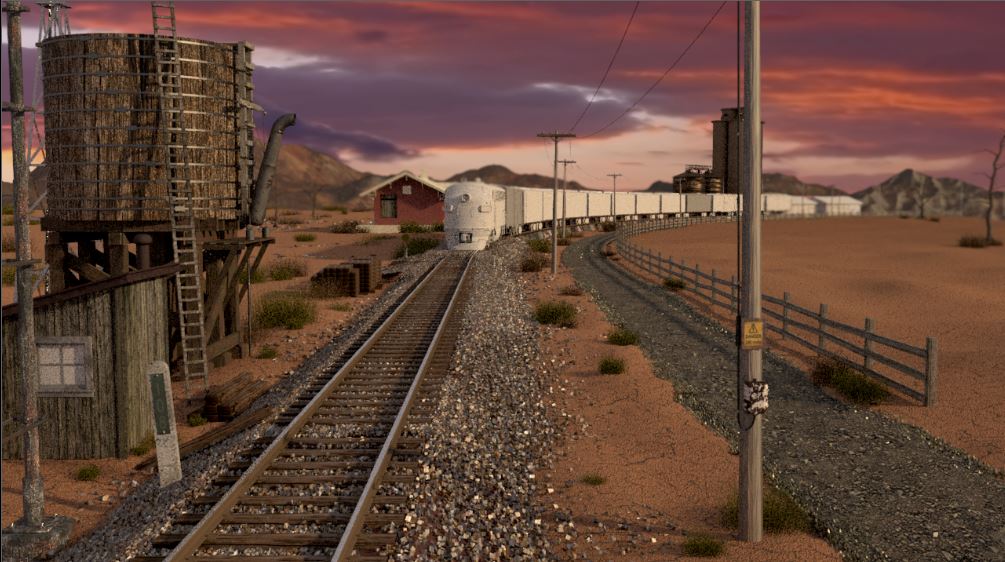
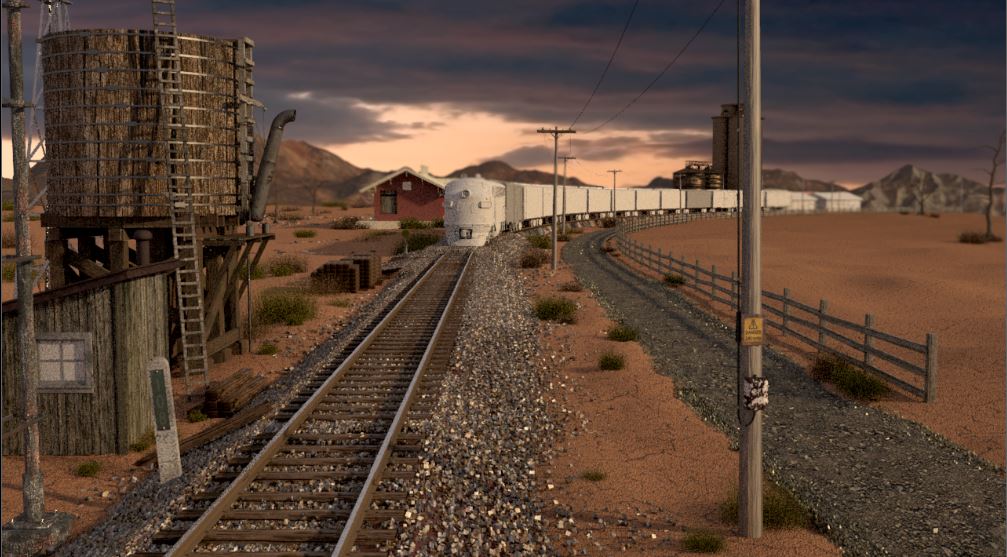
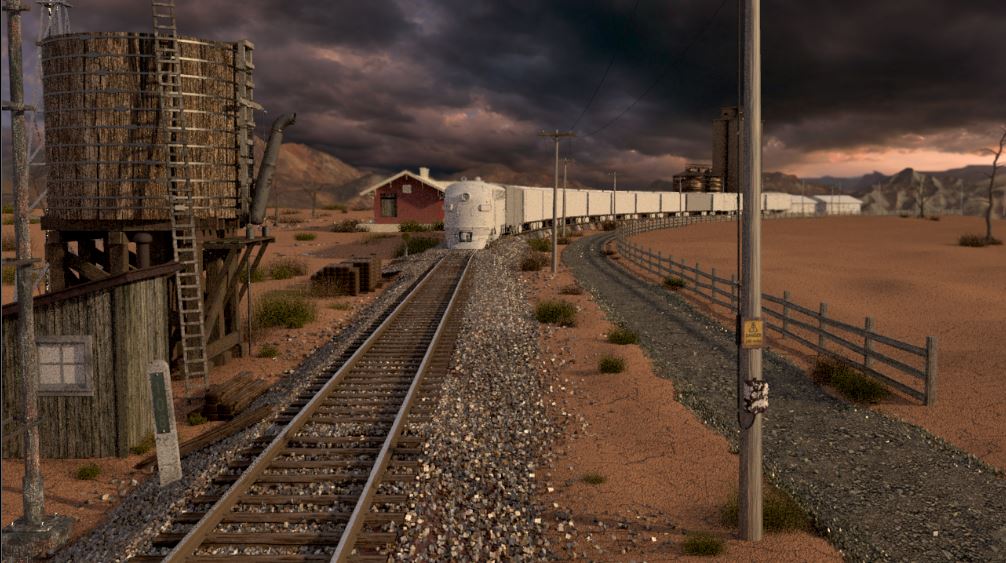
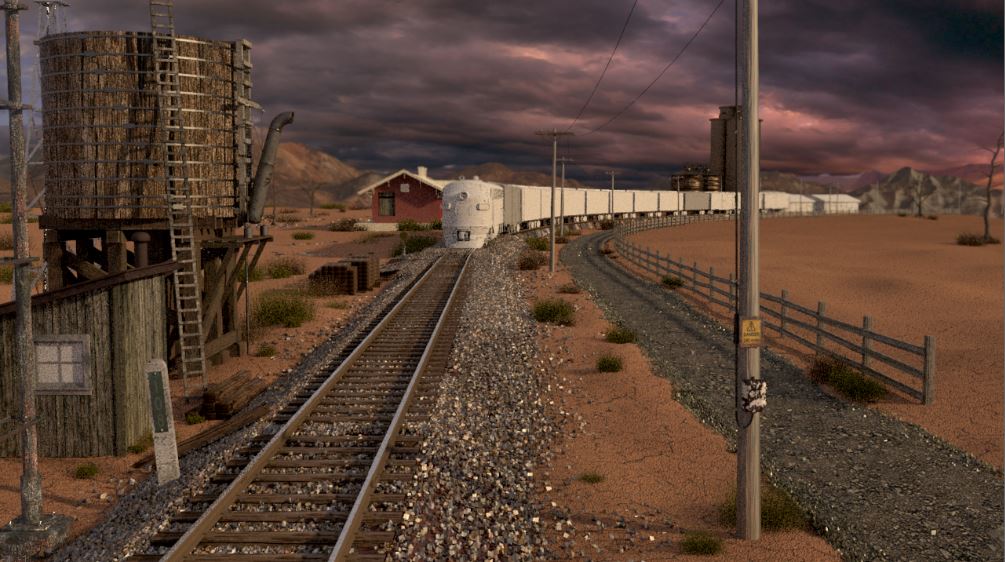
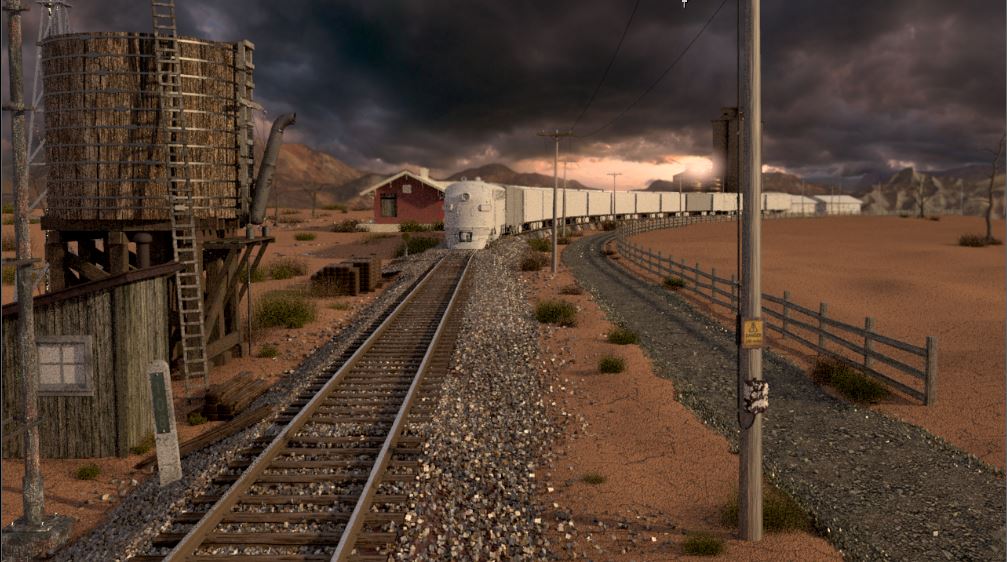
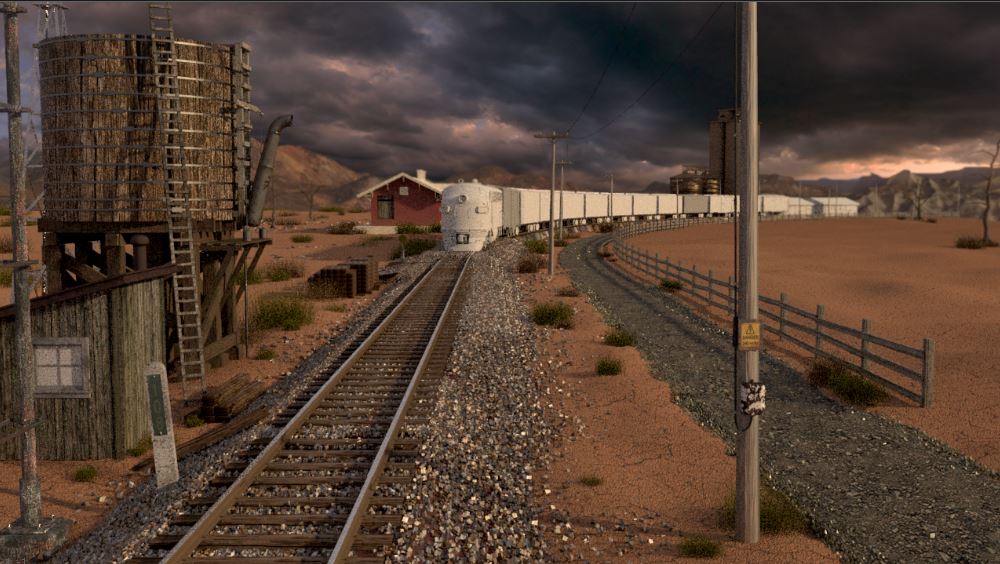
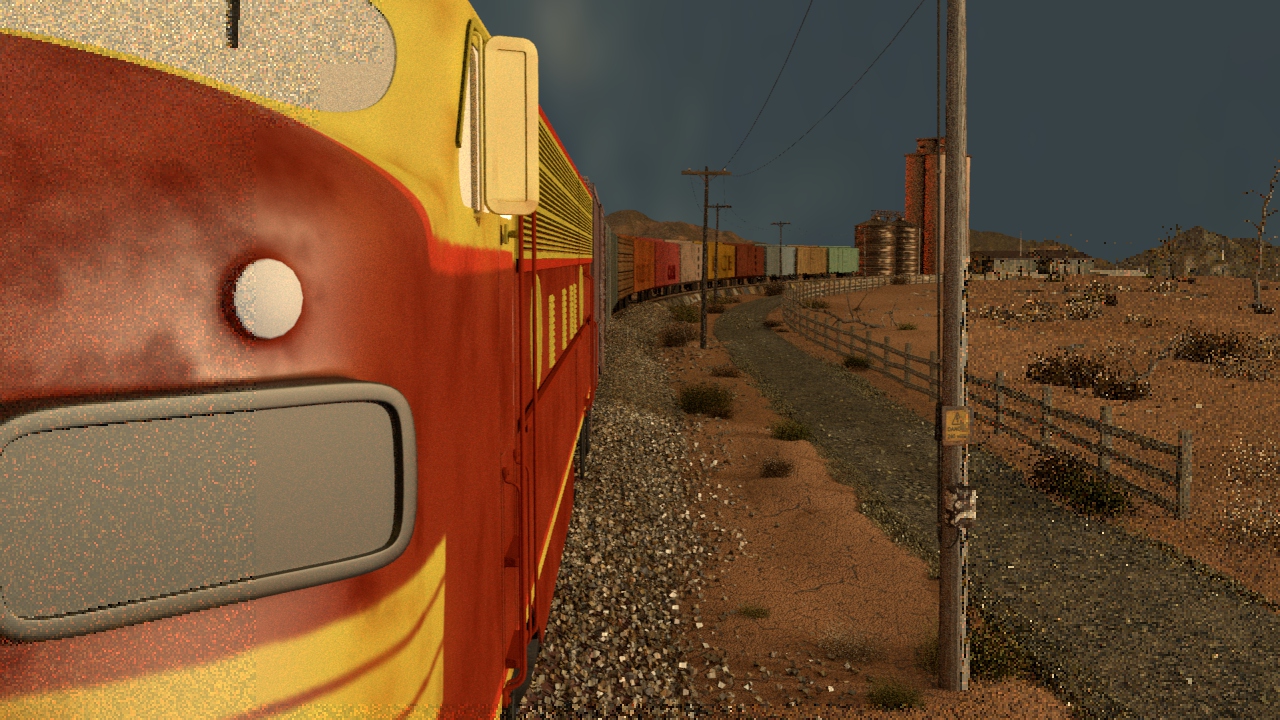
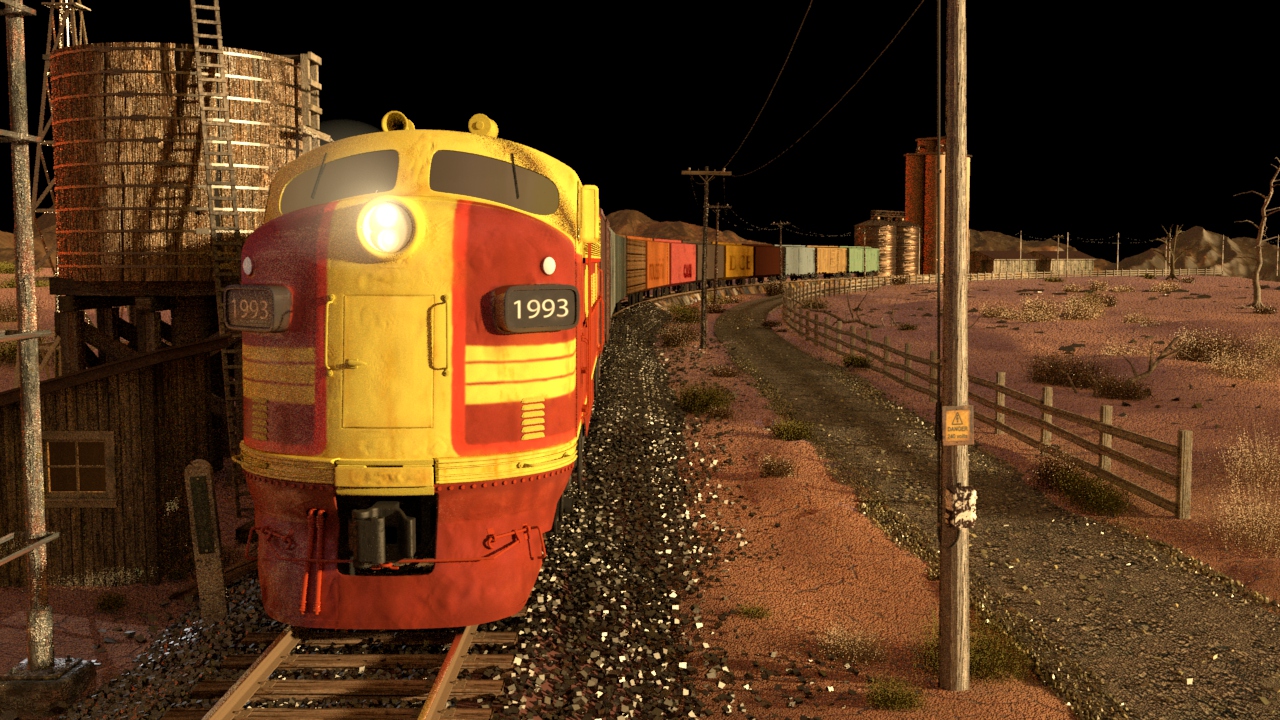
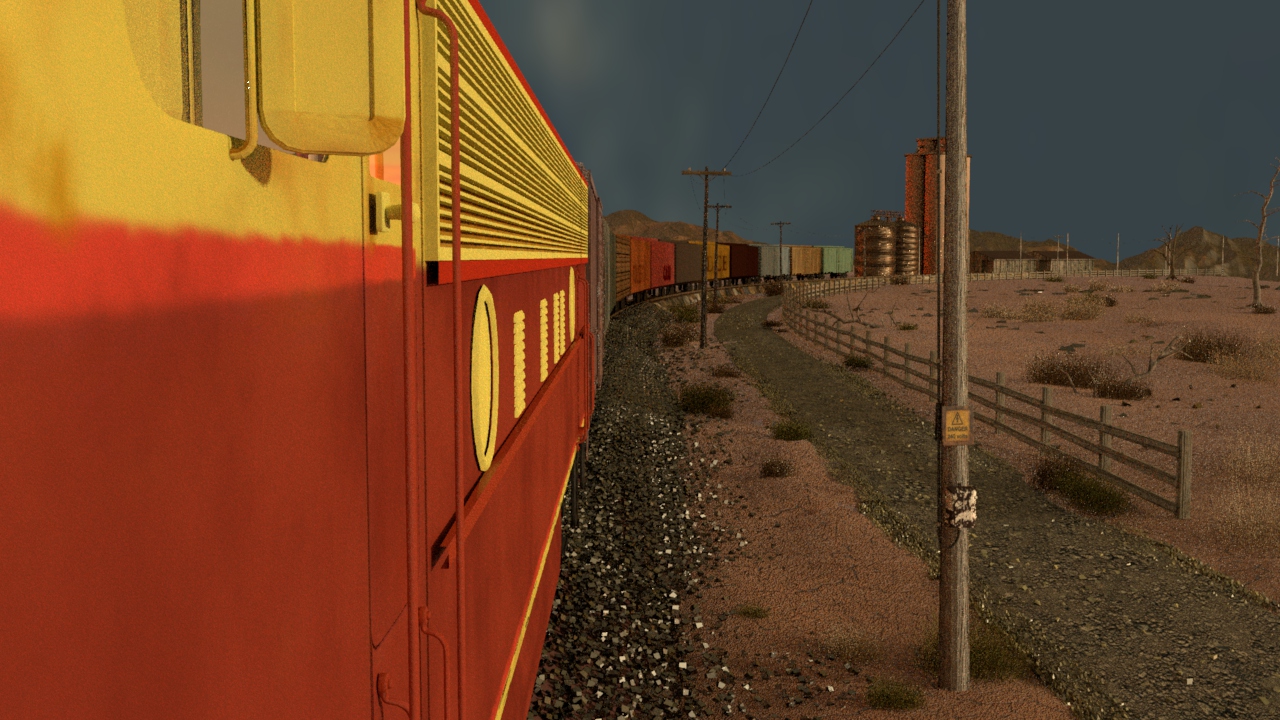
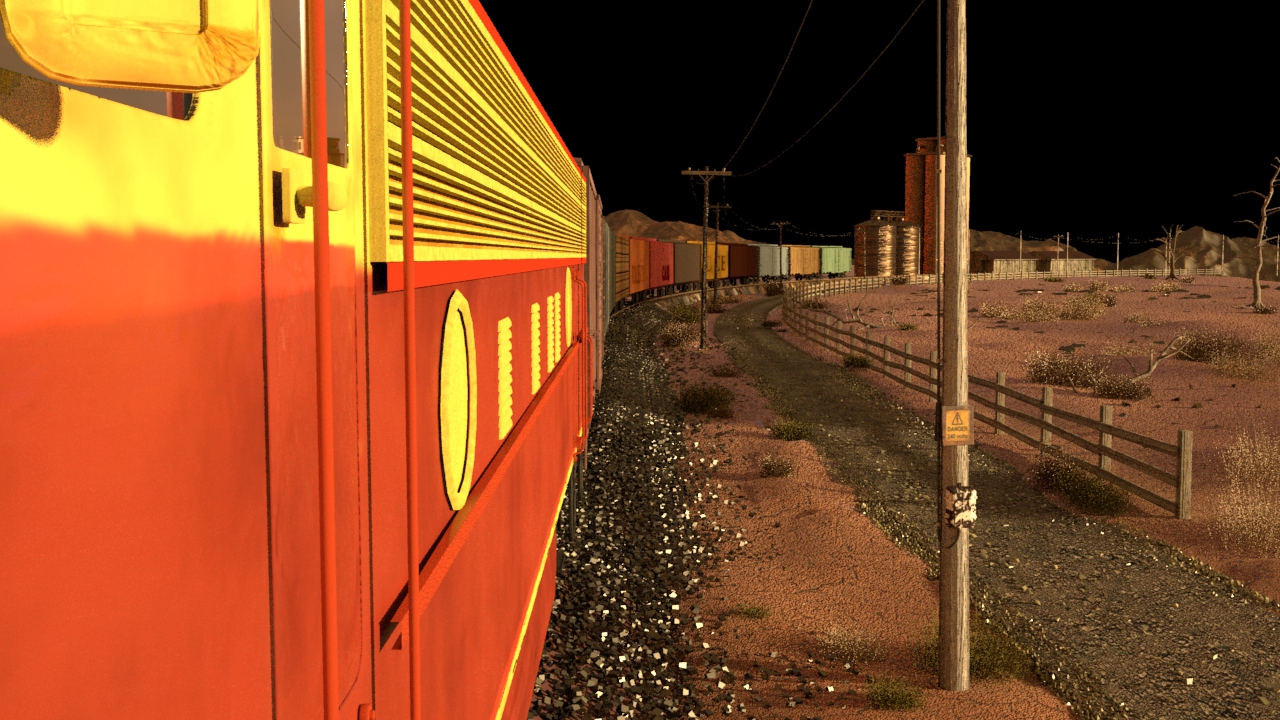
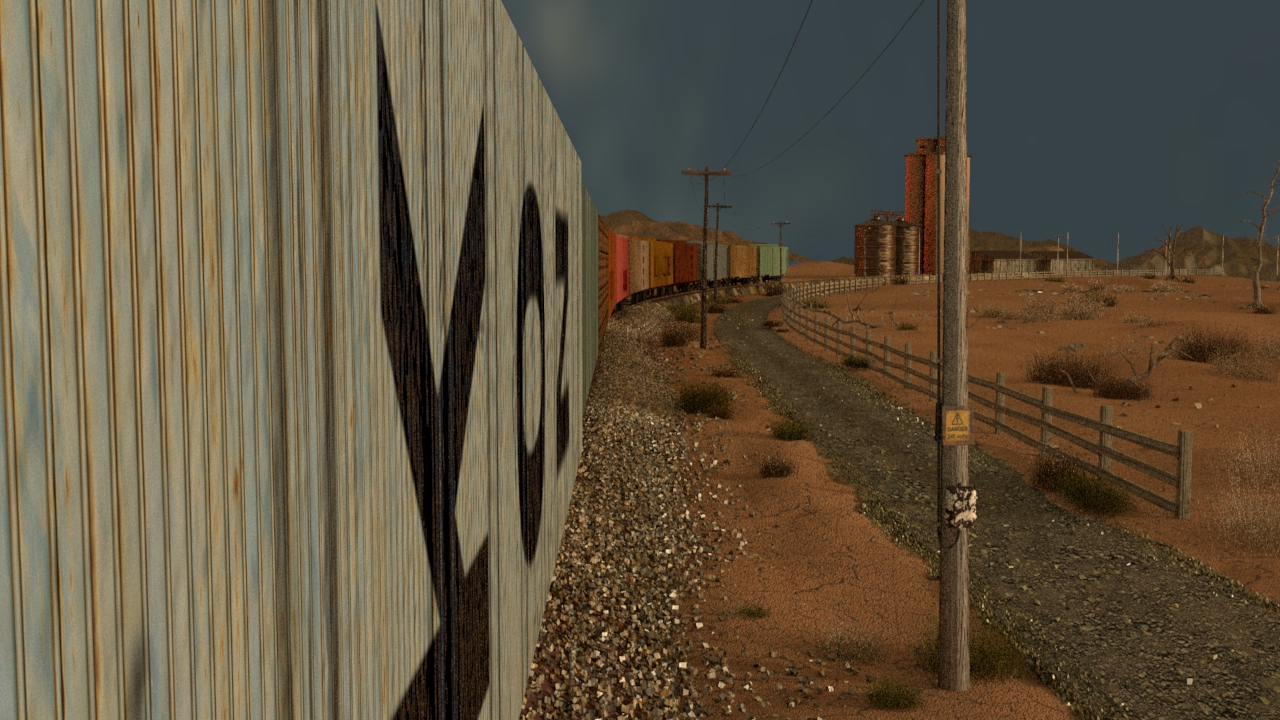
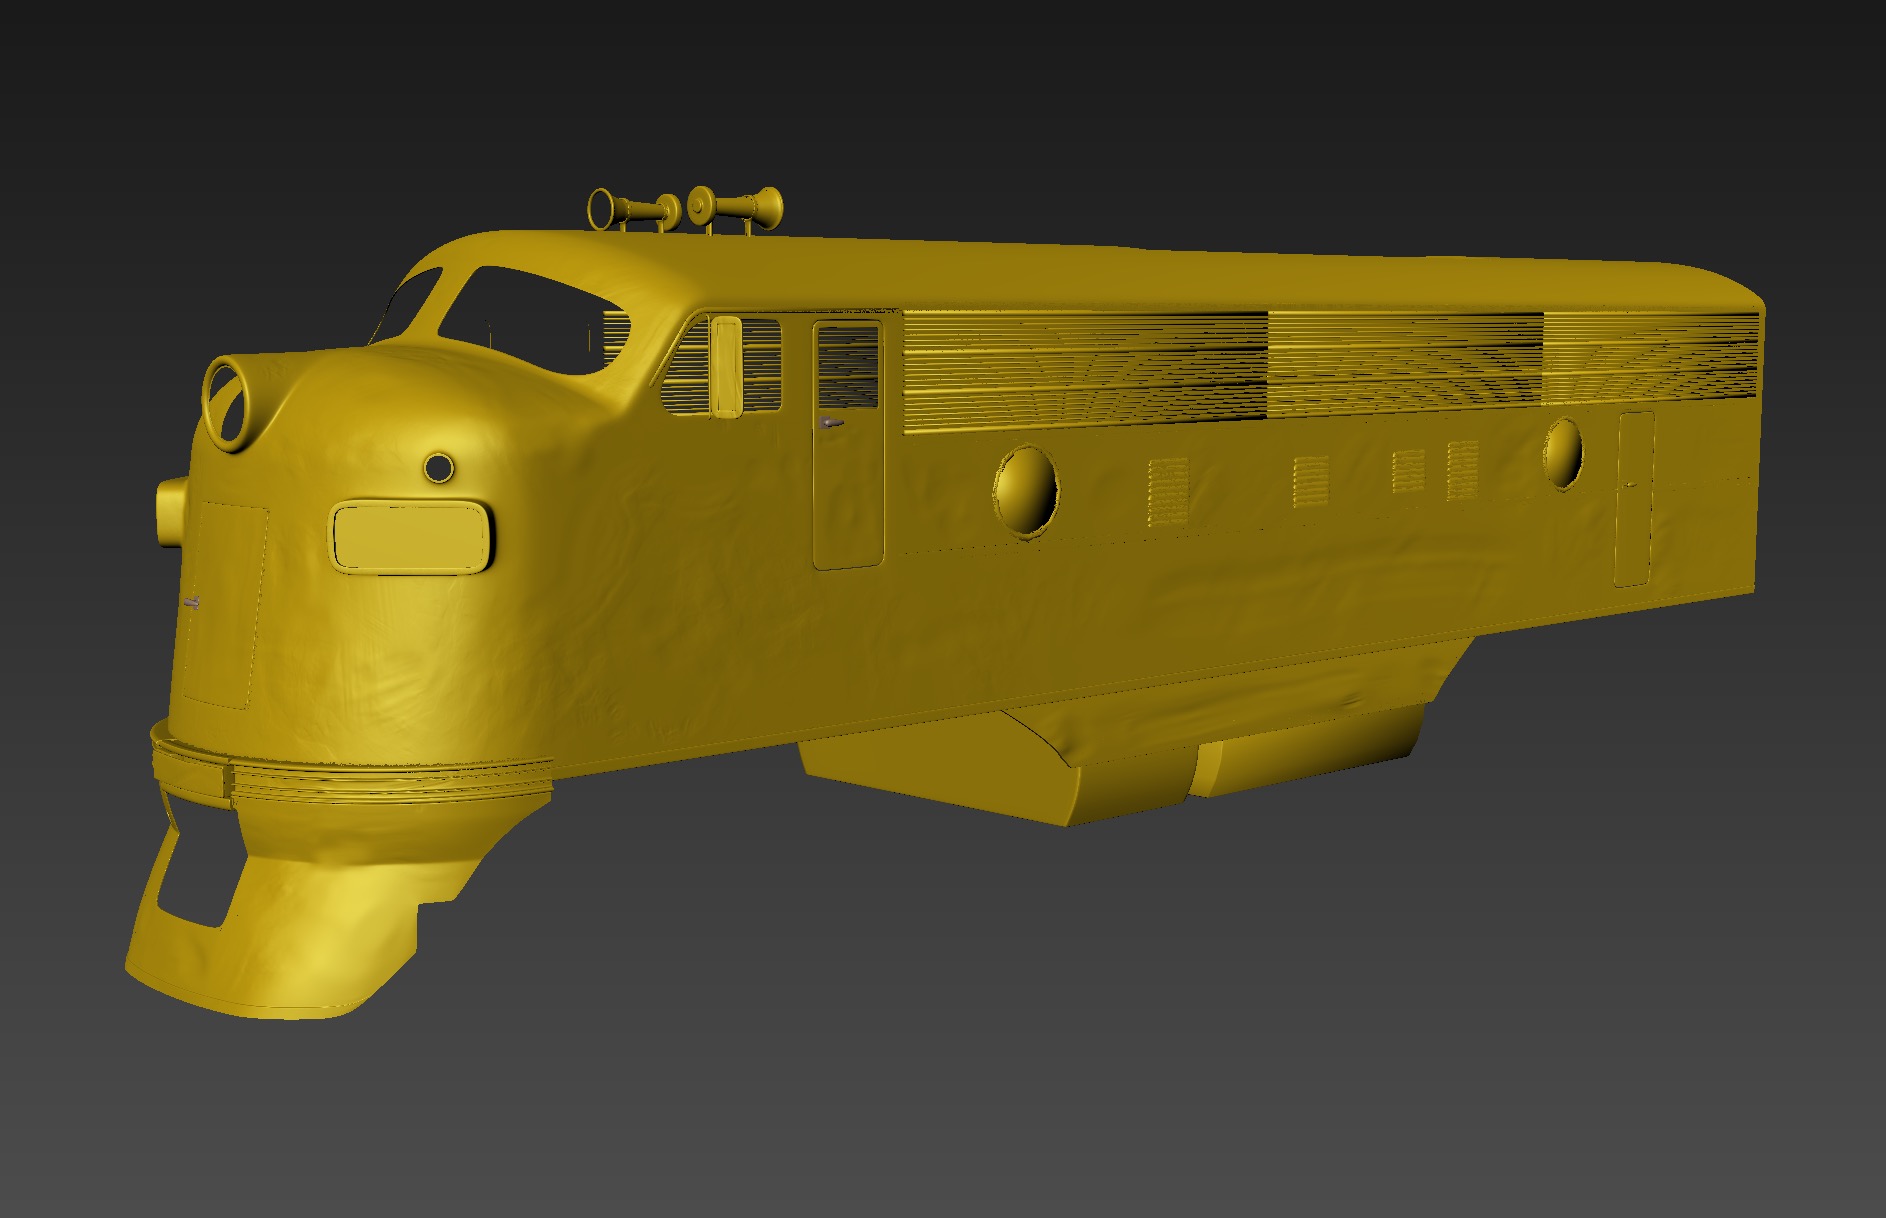
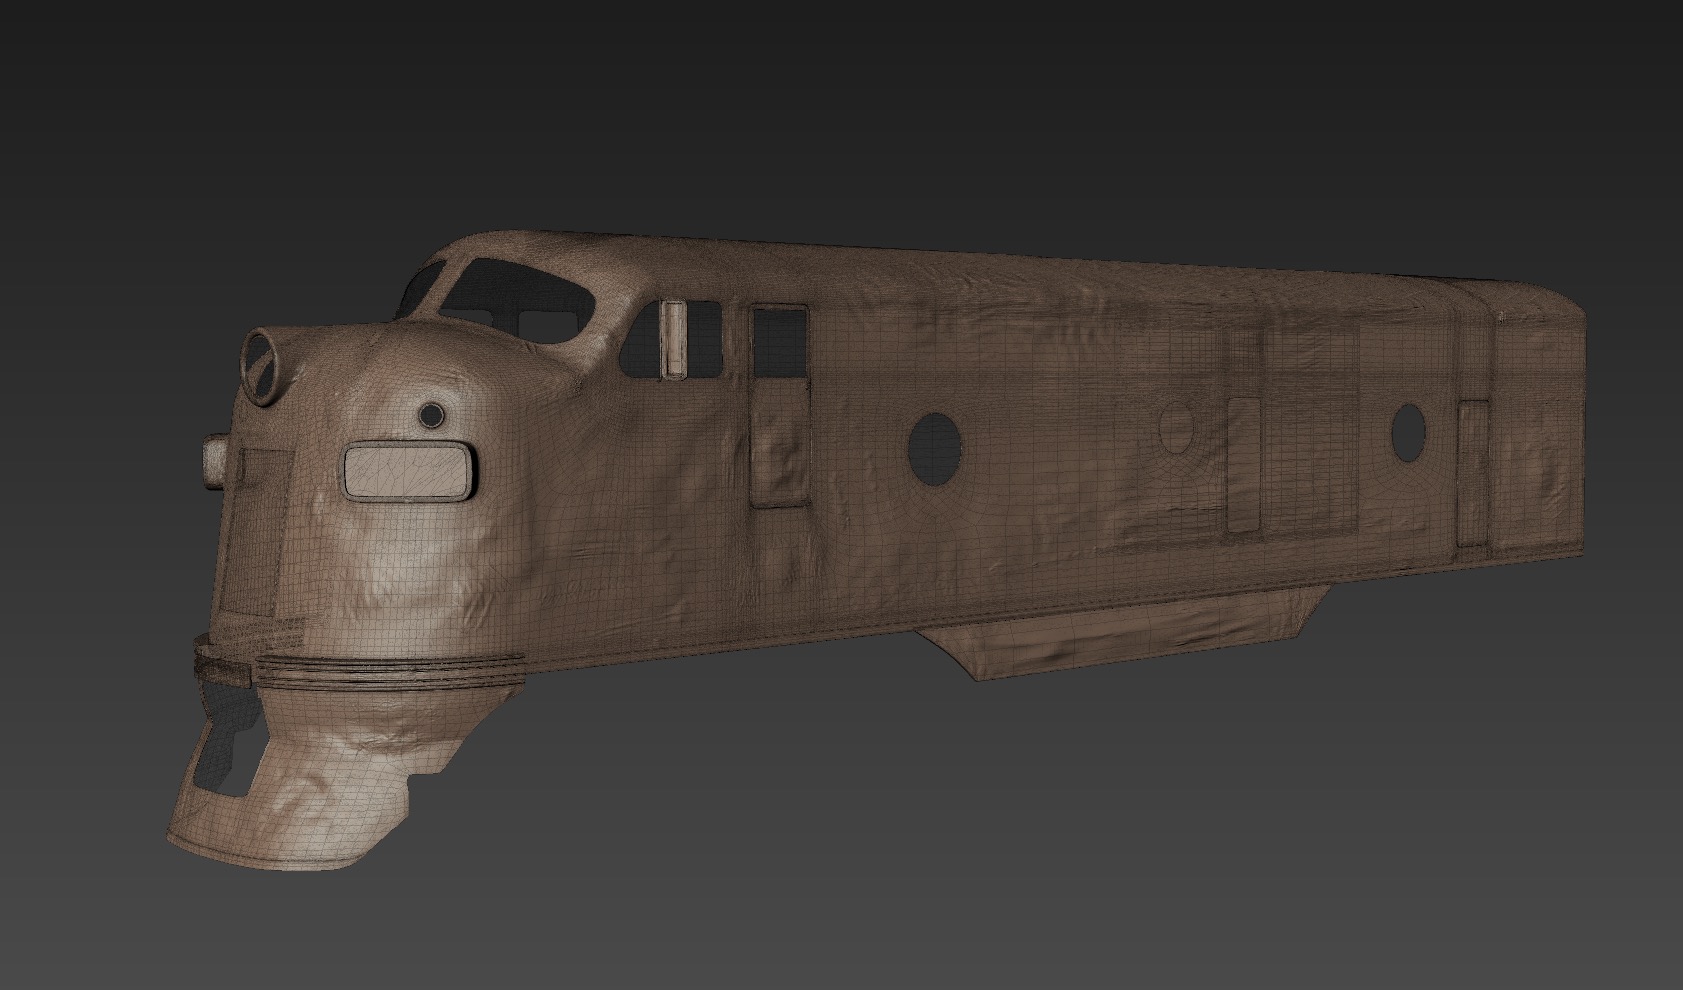
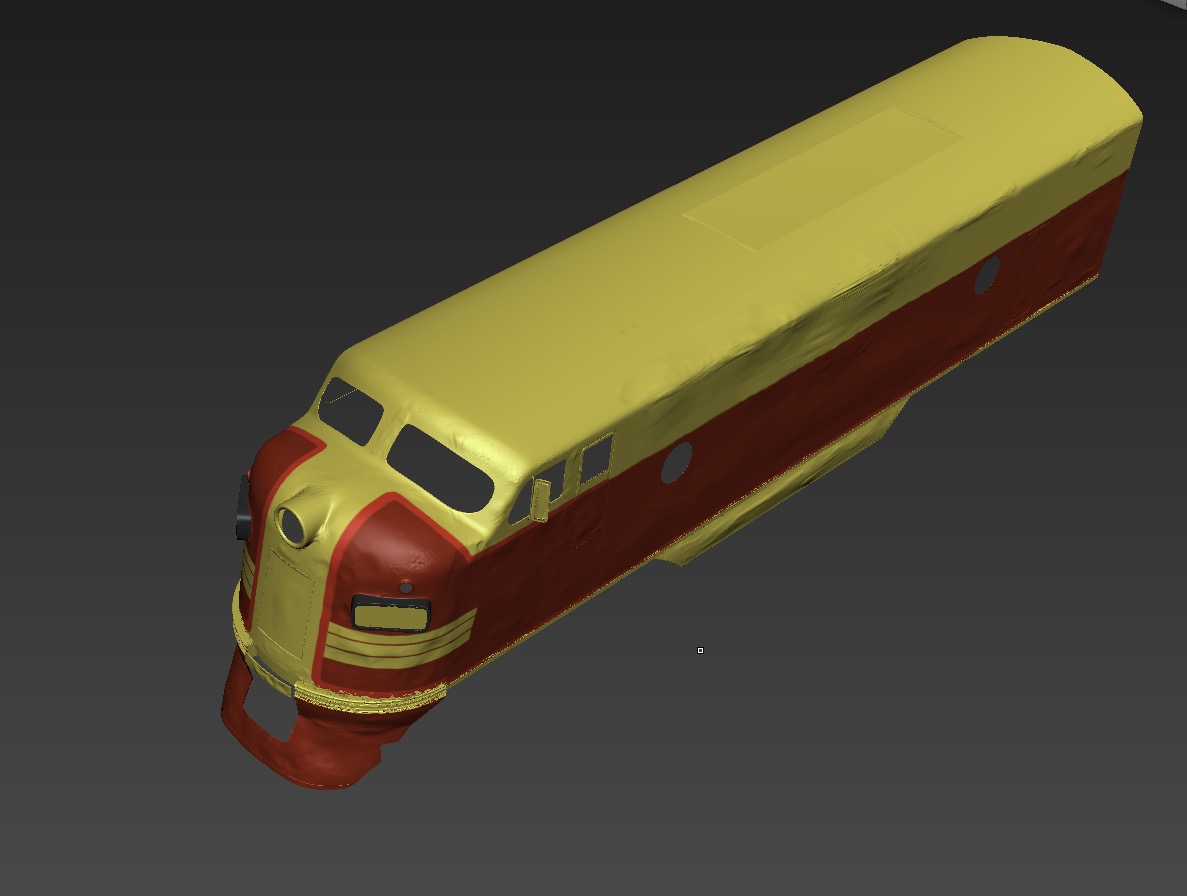
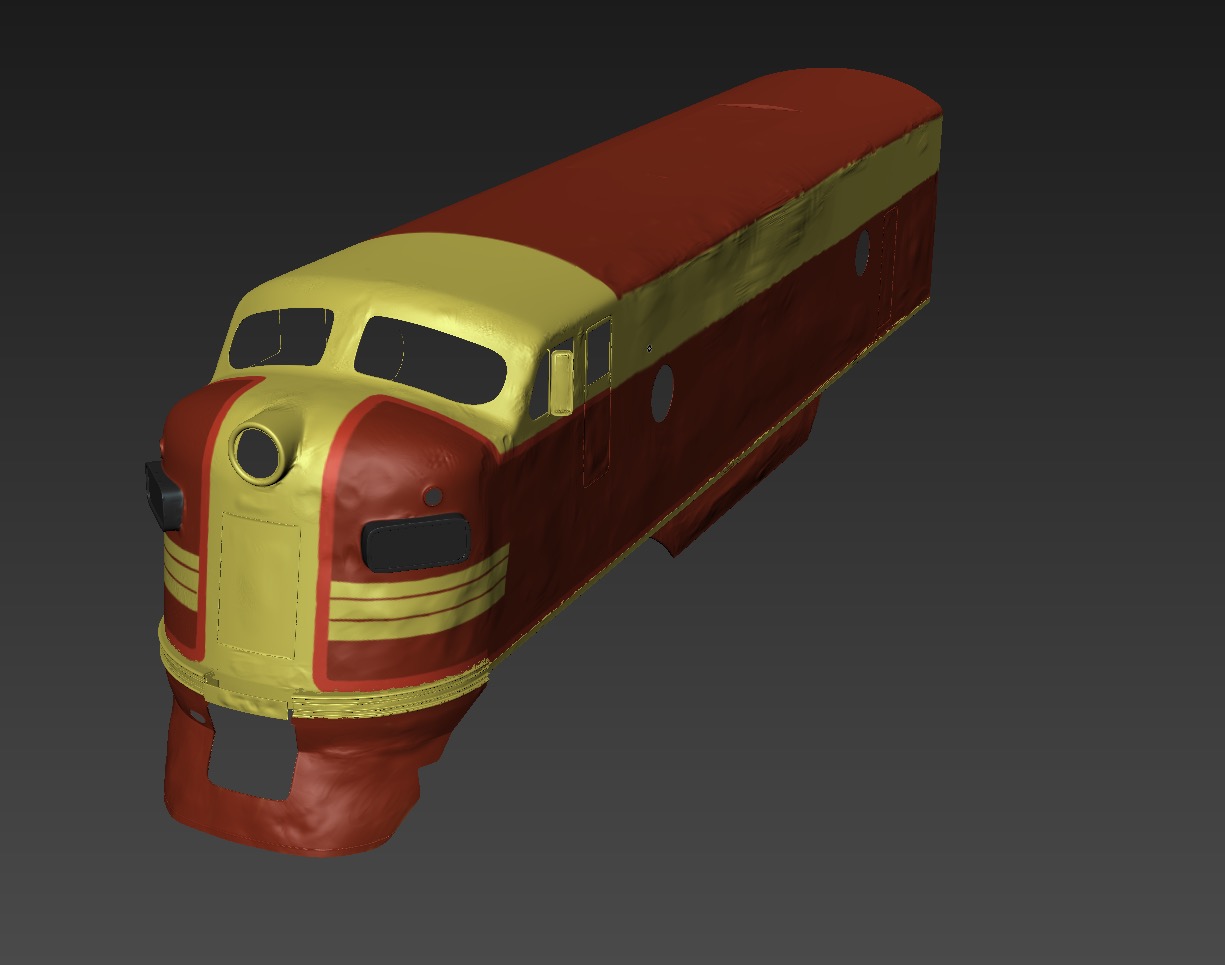
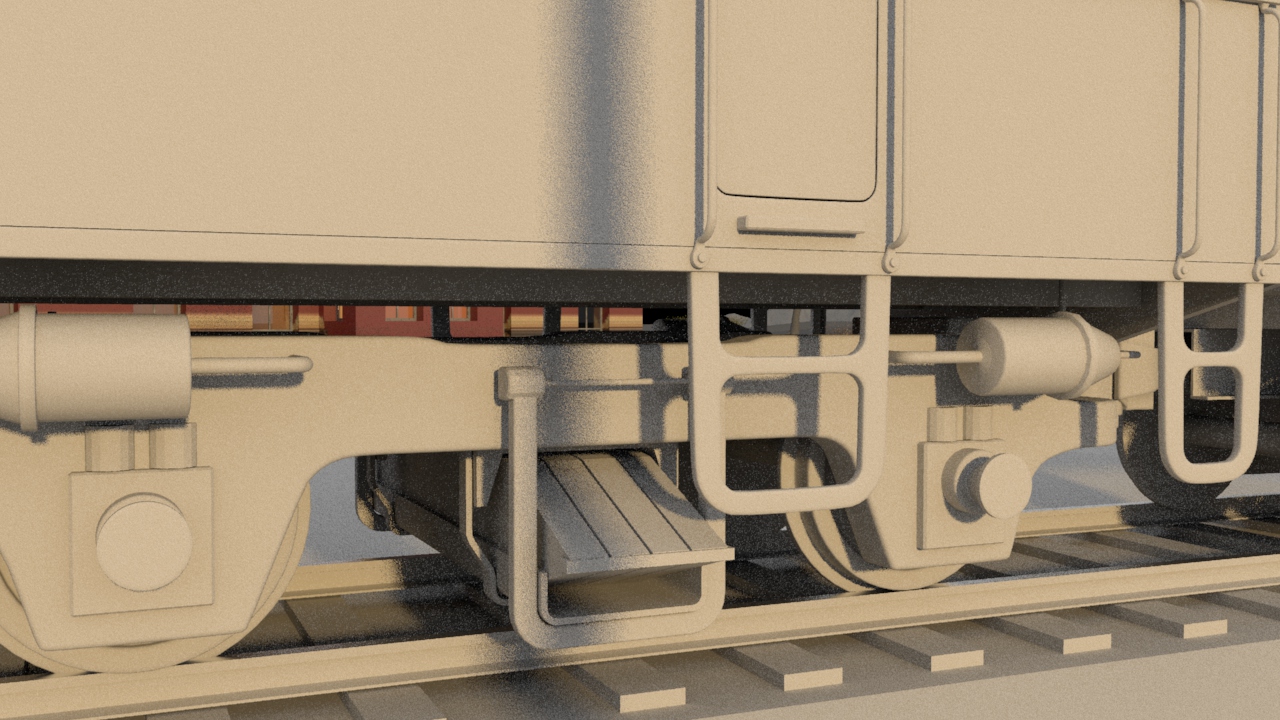
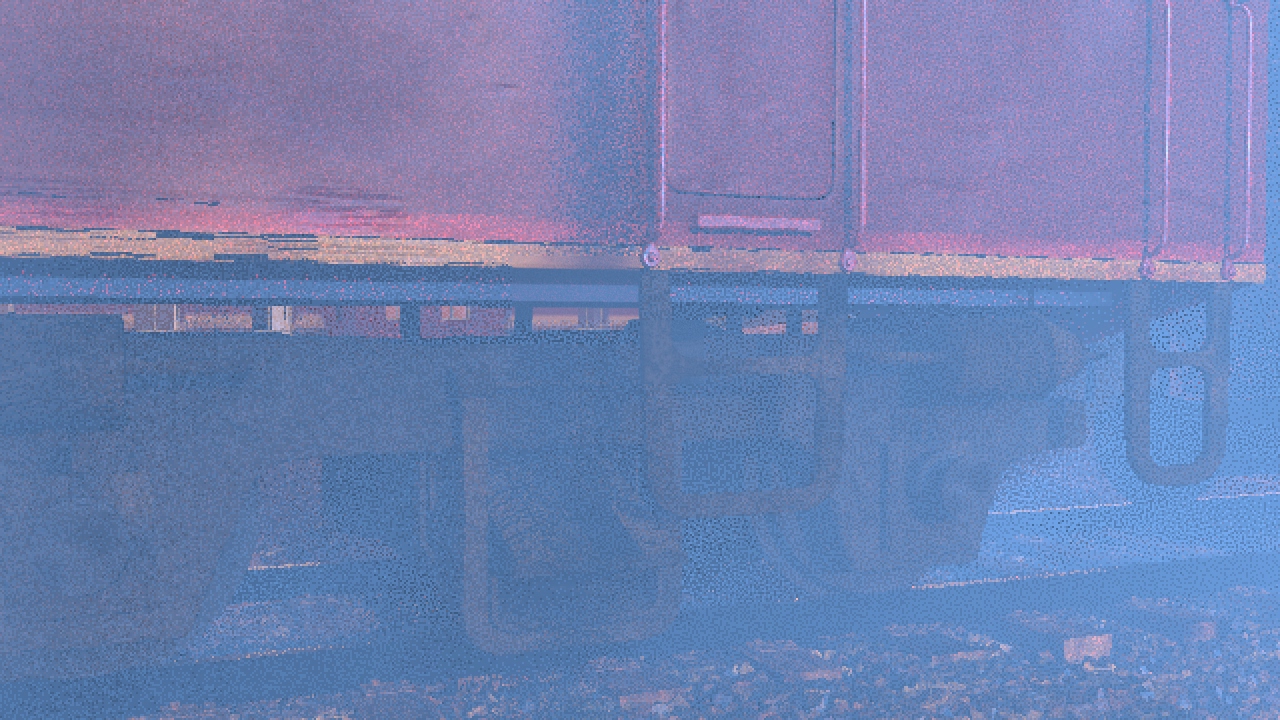
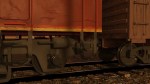
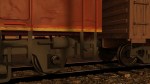
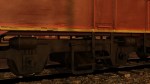
MODELS: Alvaro Luna Bautista, 3drender.com, Challenge #14
showReel_animaticCritique_B Password: train_01
Models are from 3dRender.com lighting challenges.
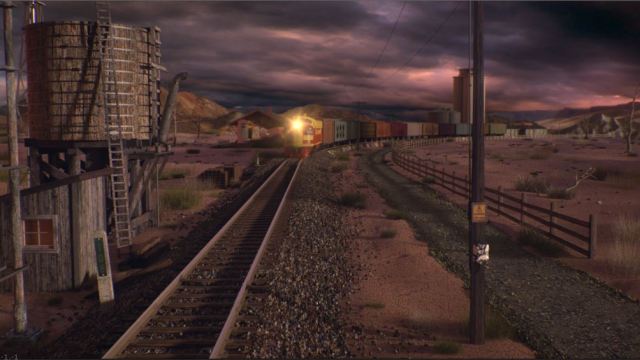
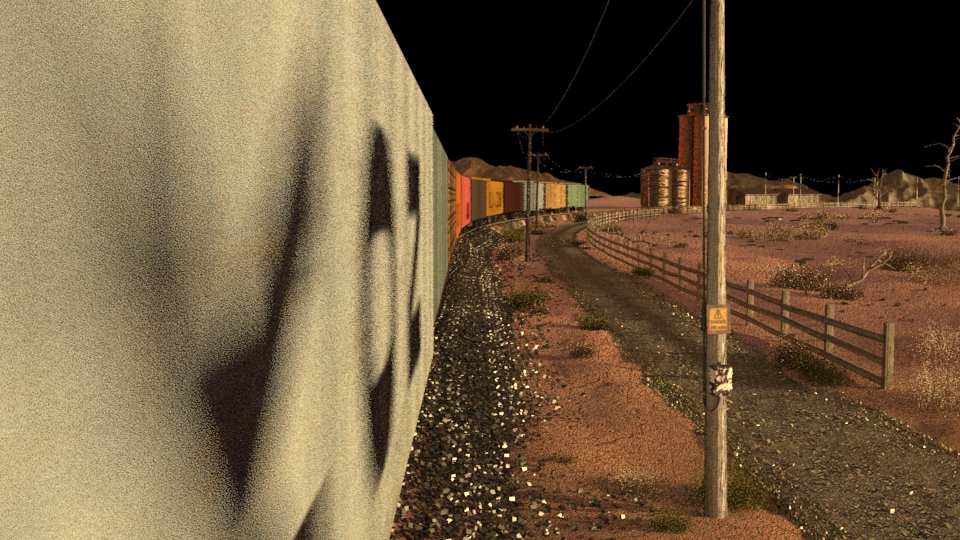
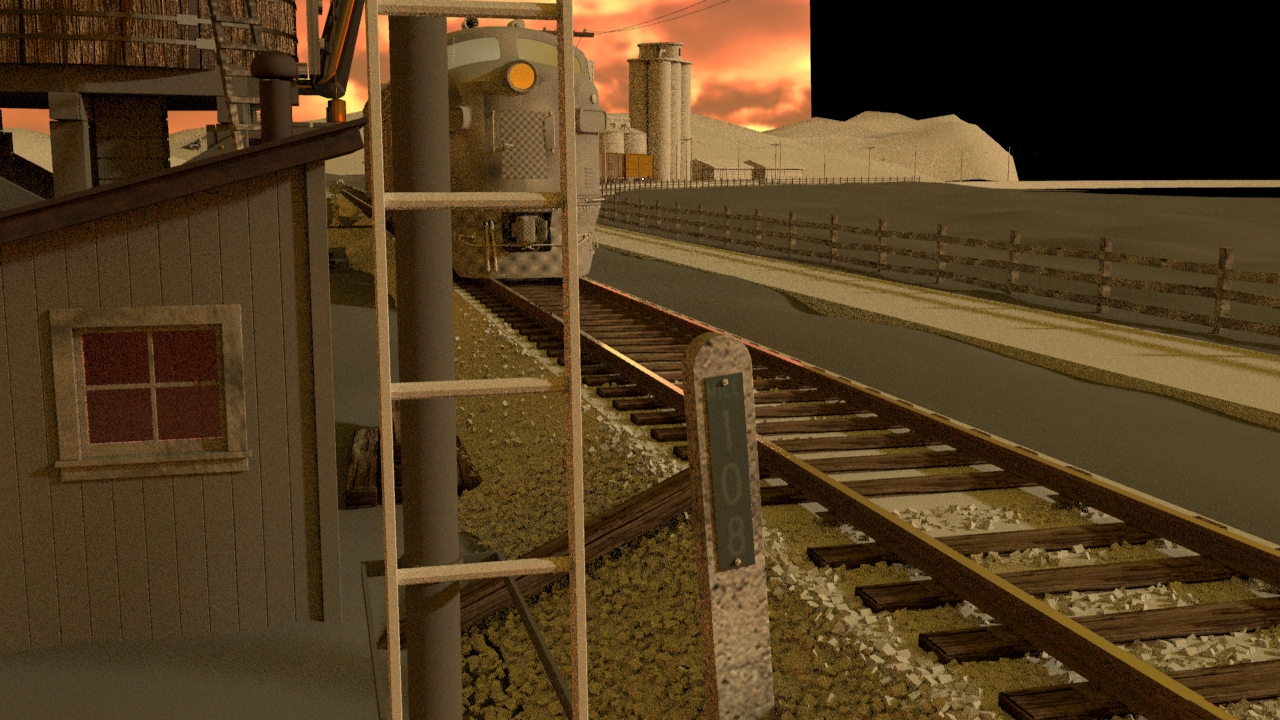
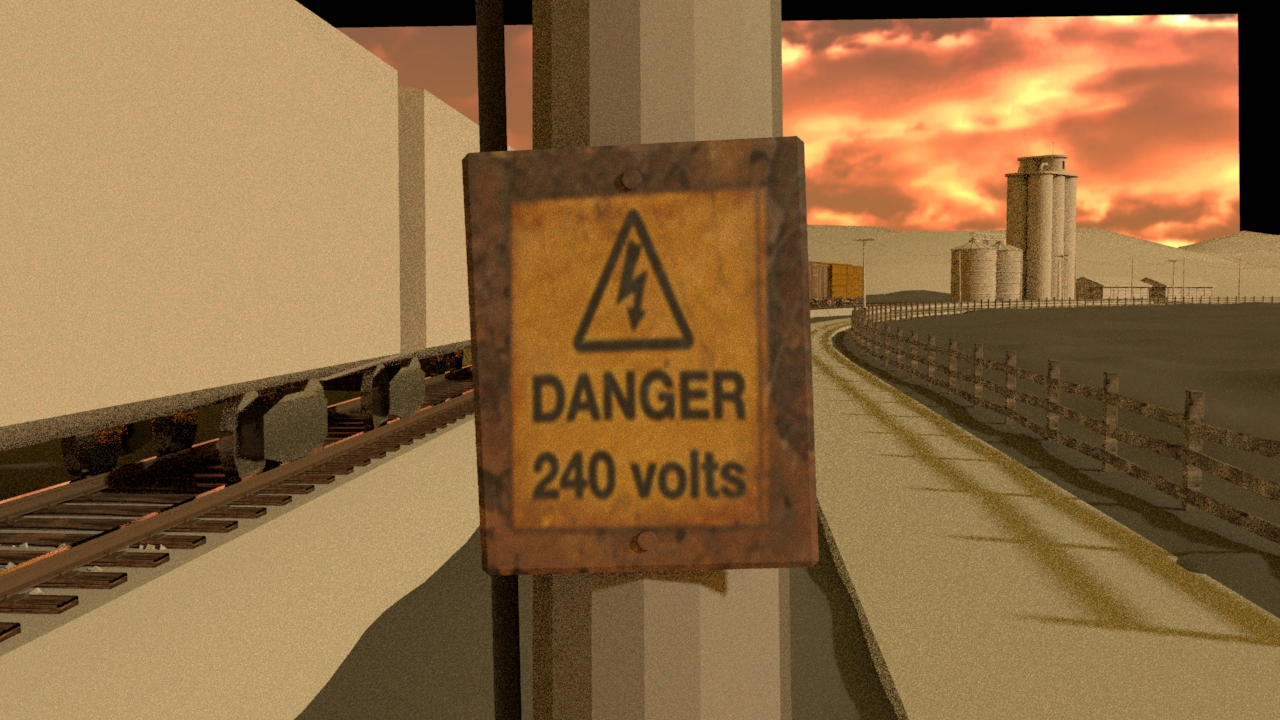
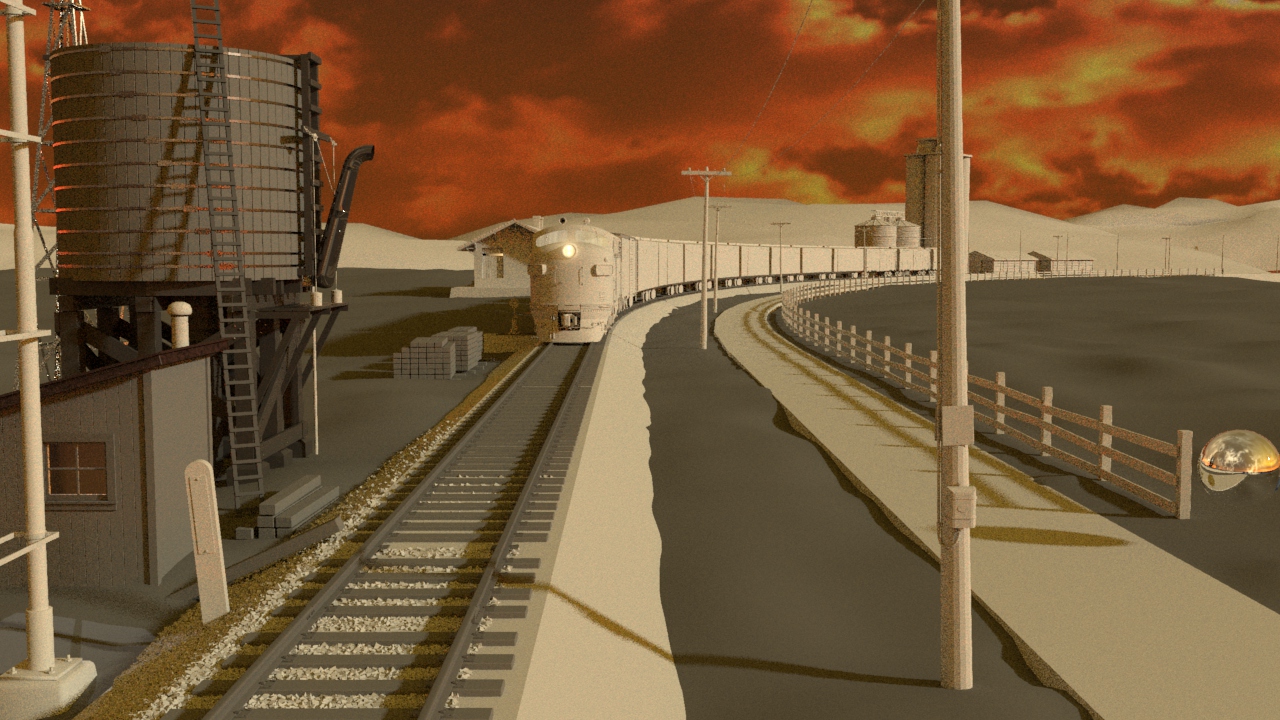
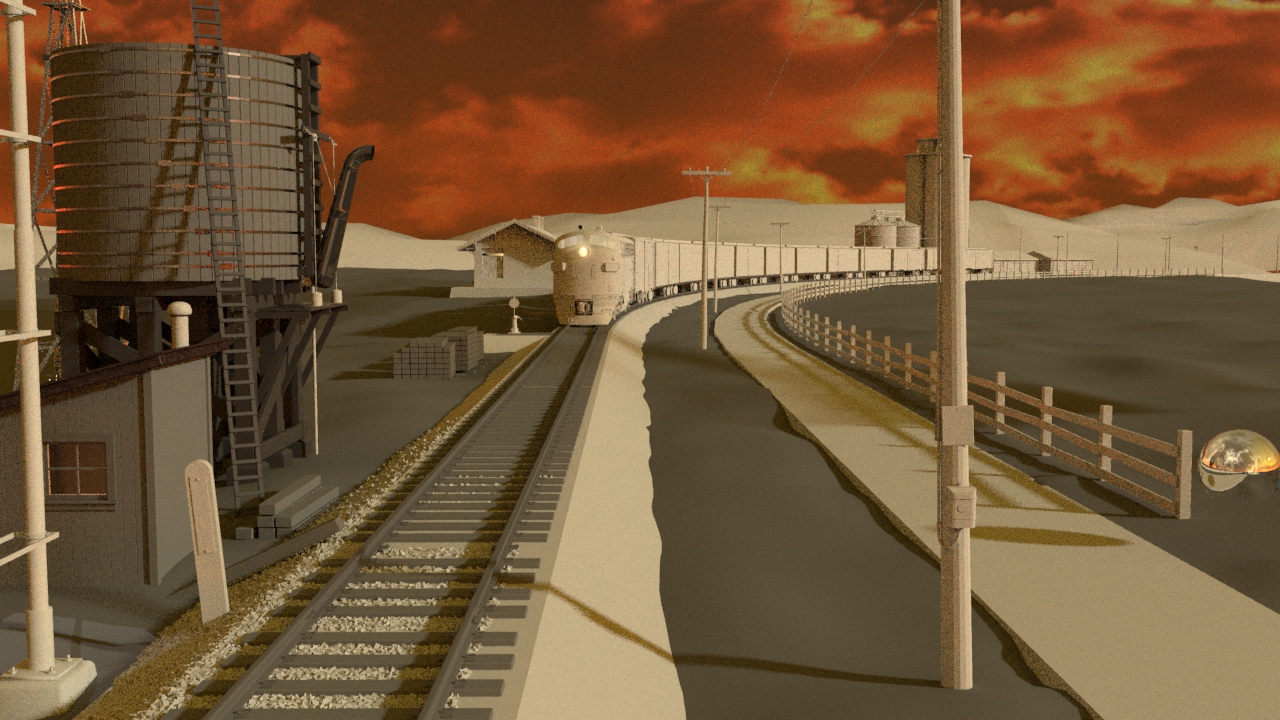
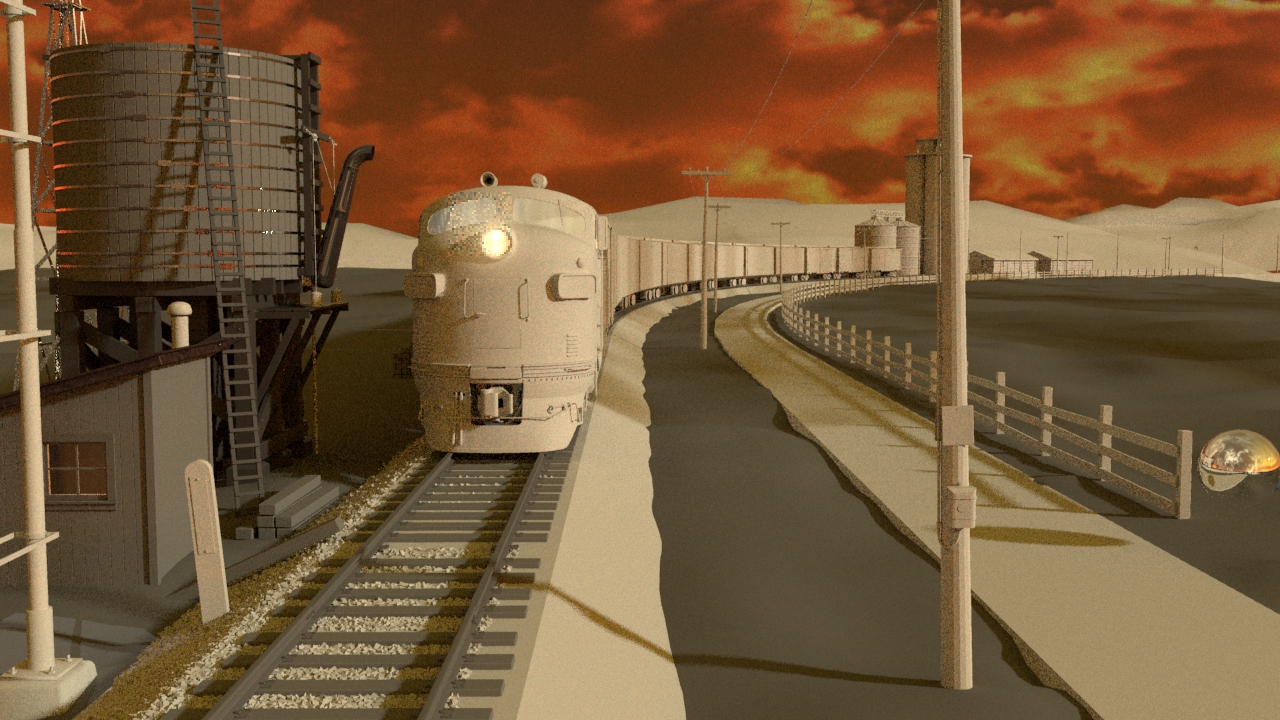
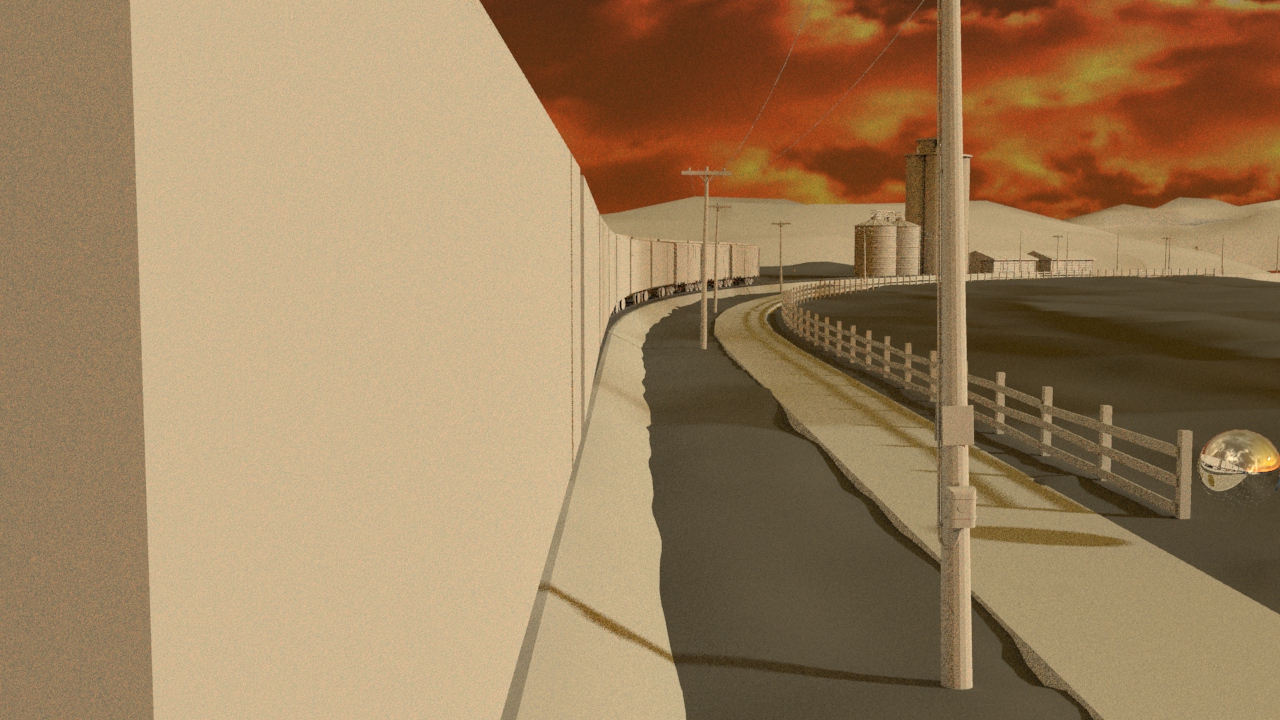
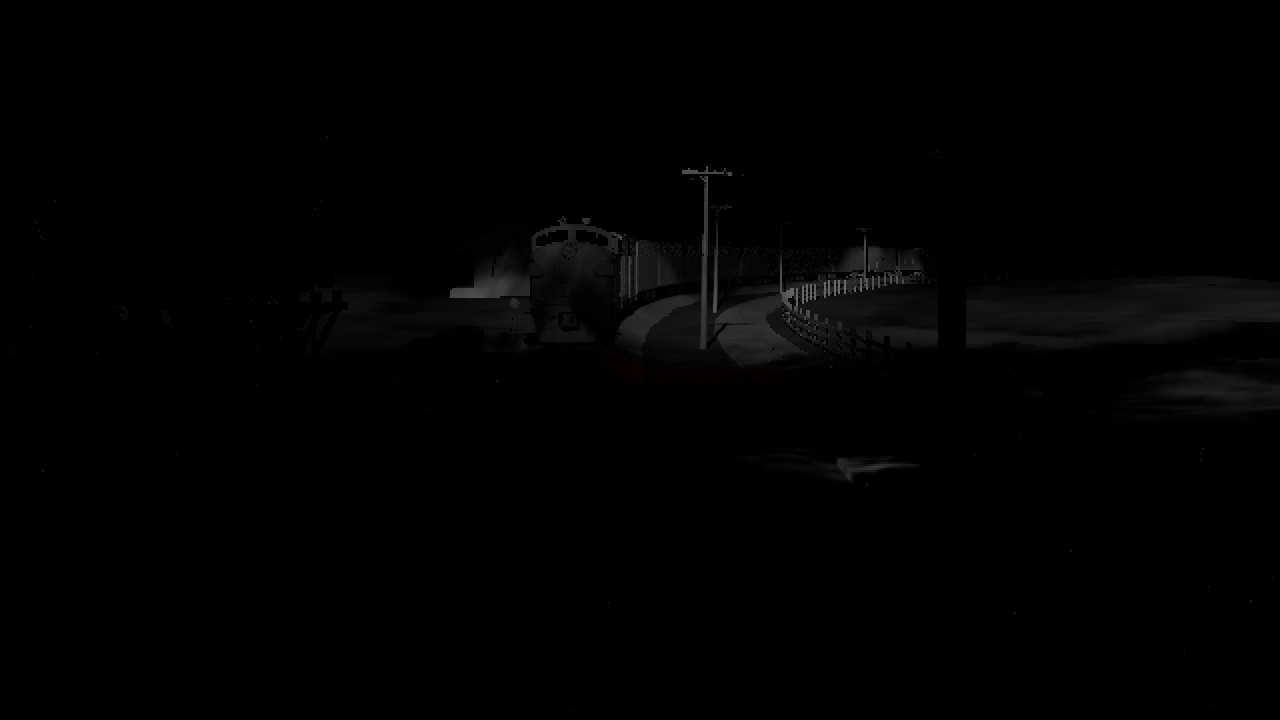
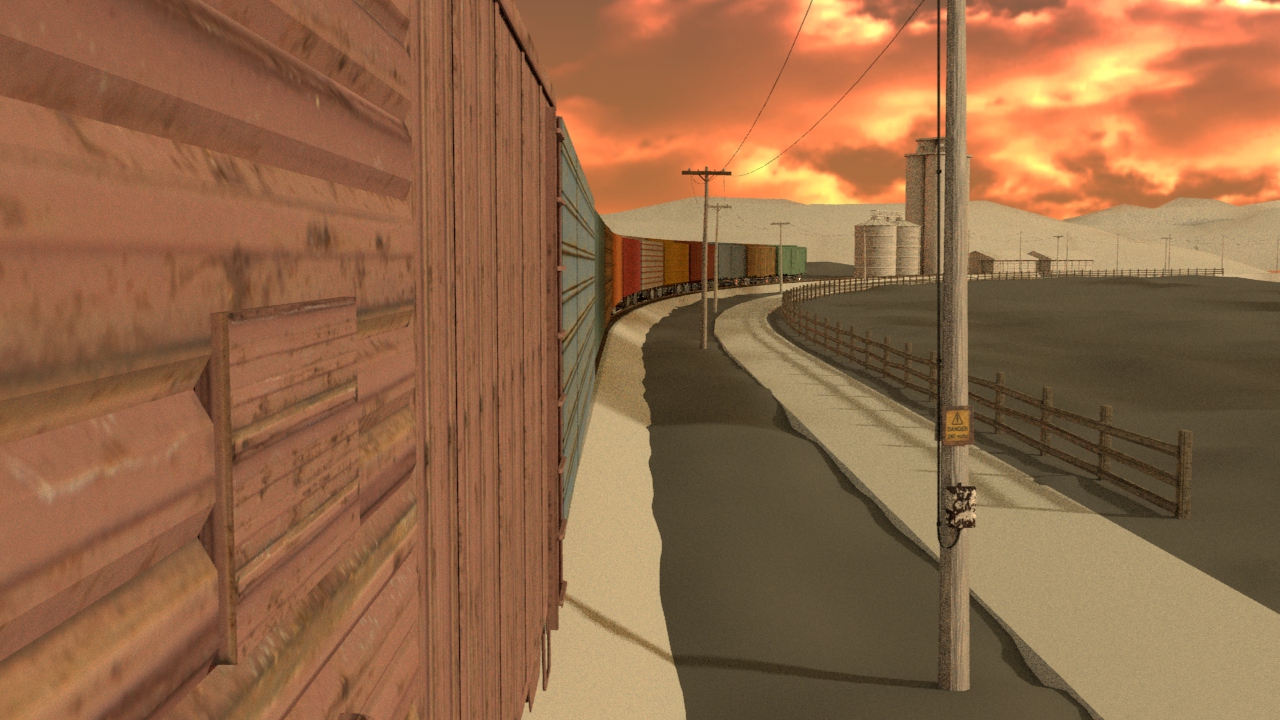
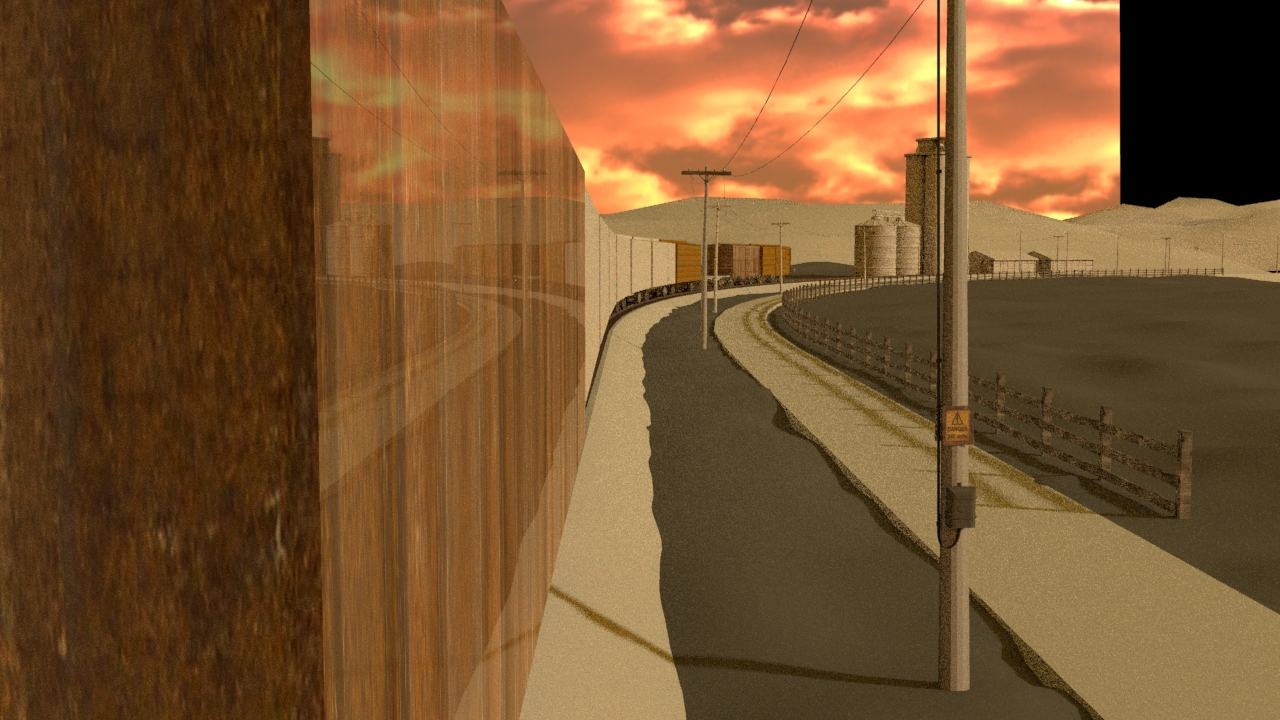
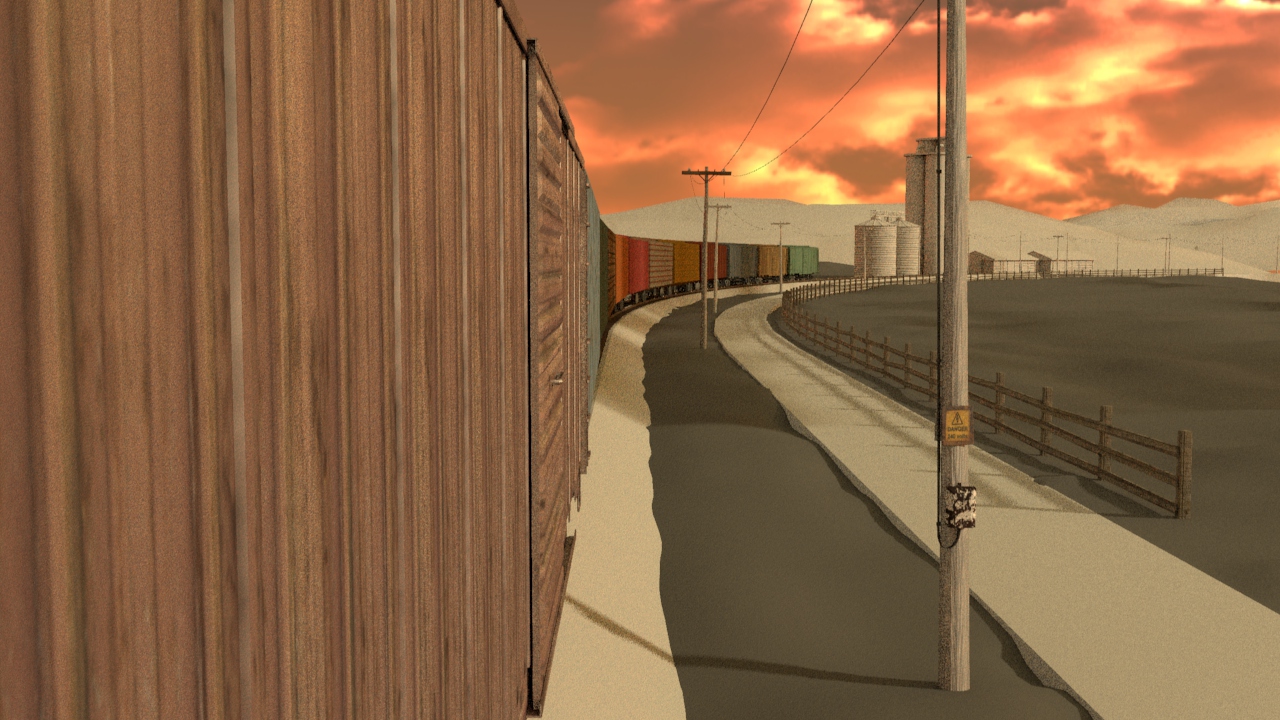
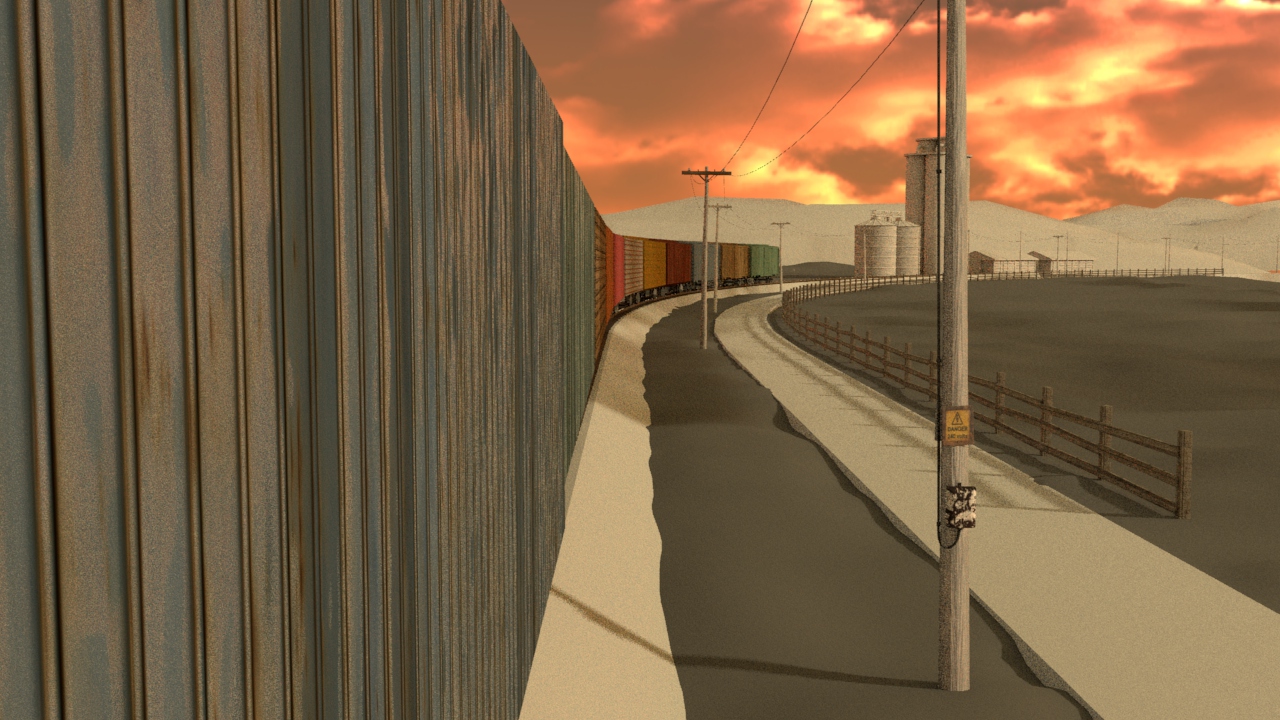
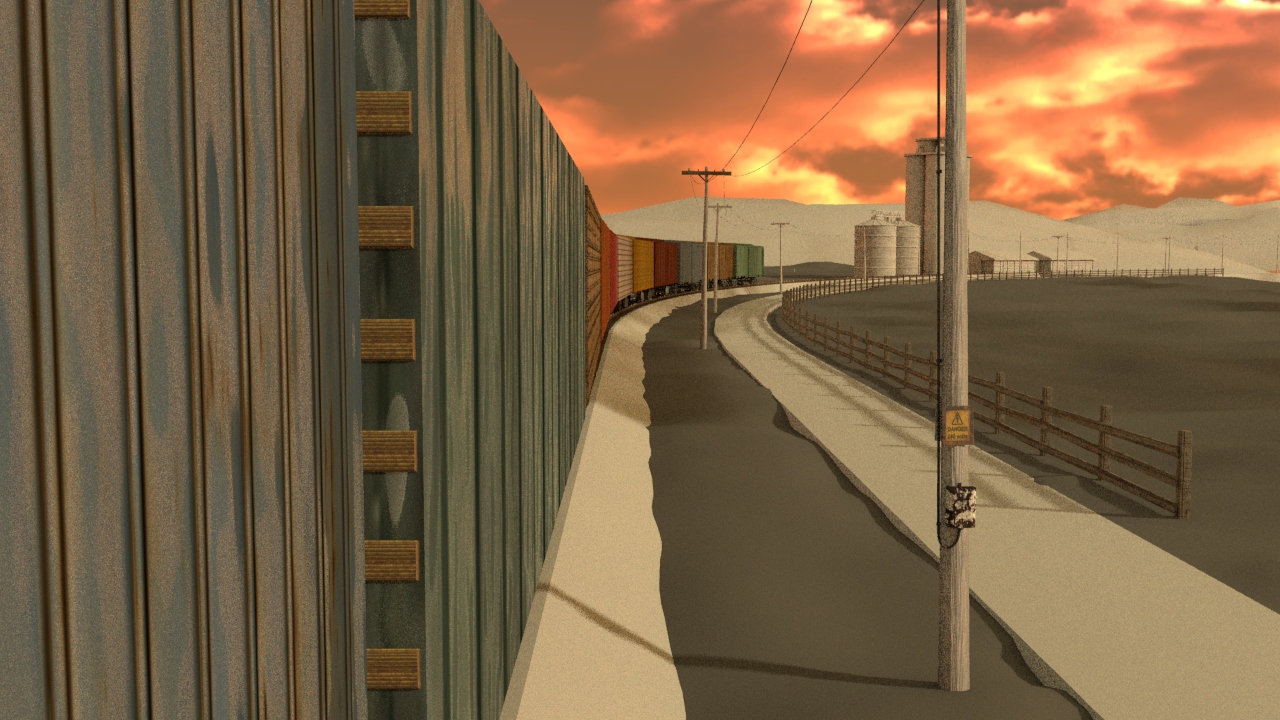
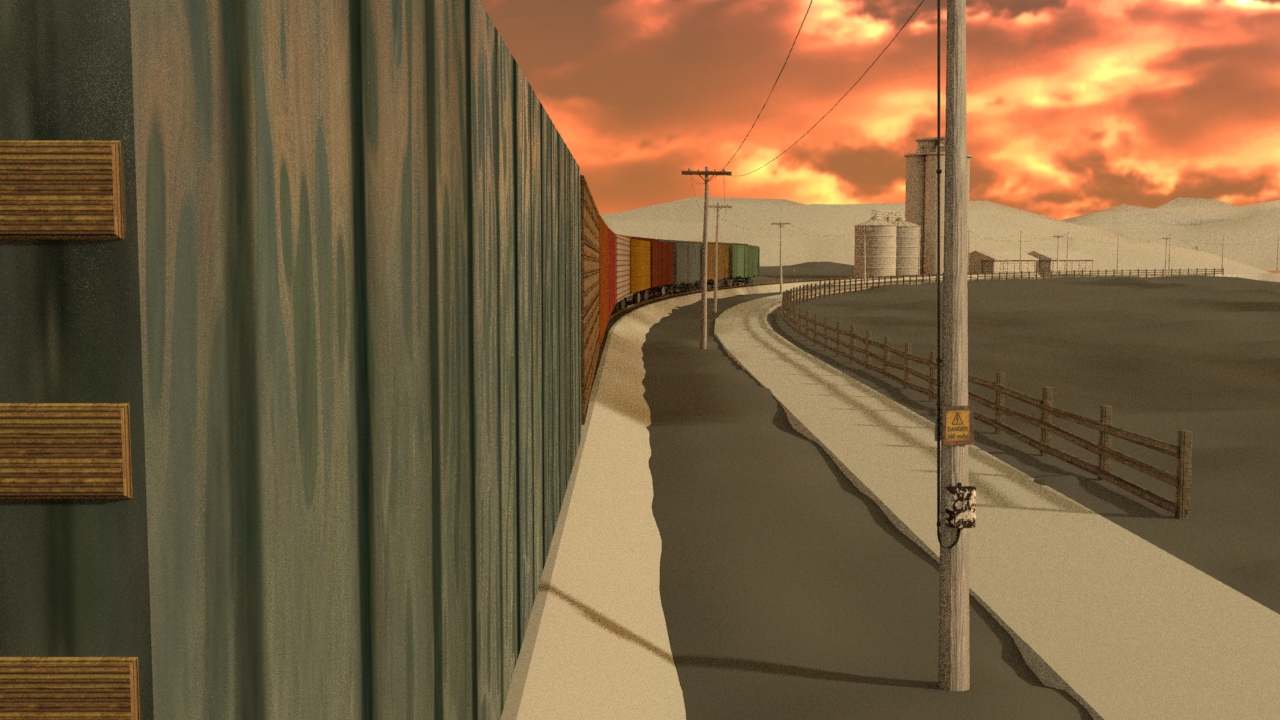
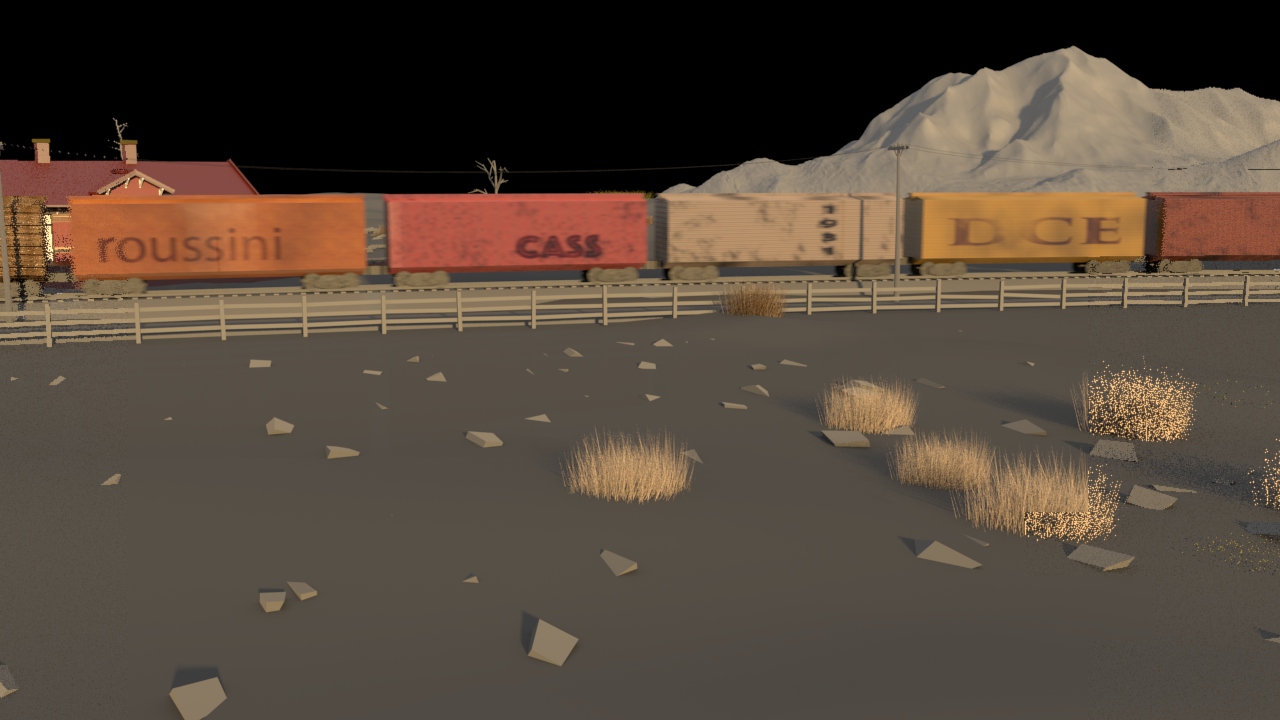
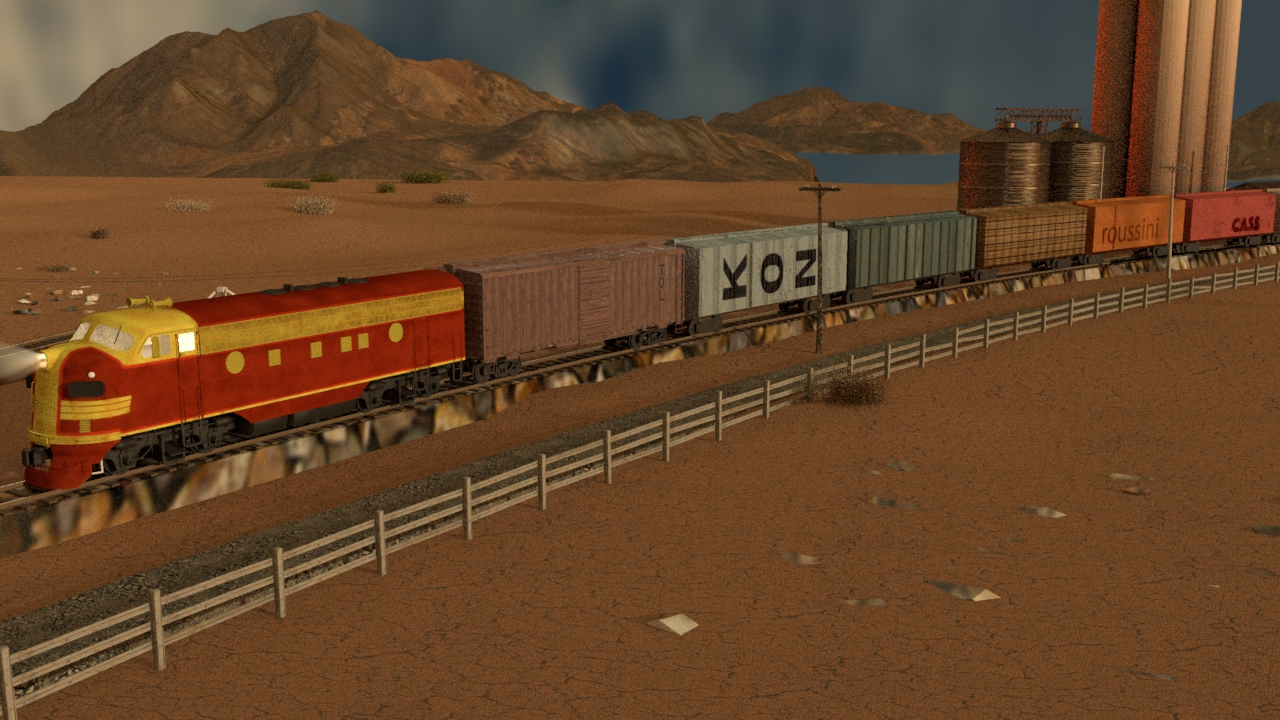
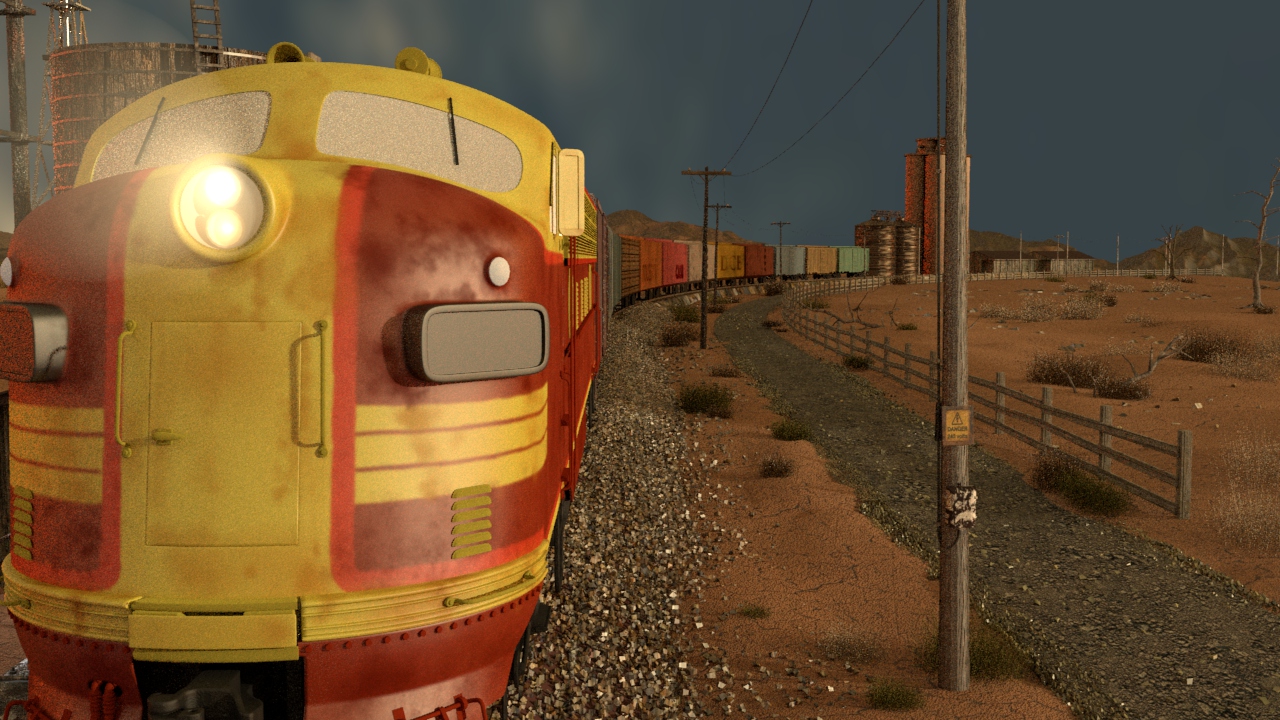
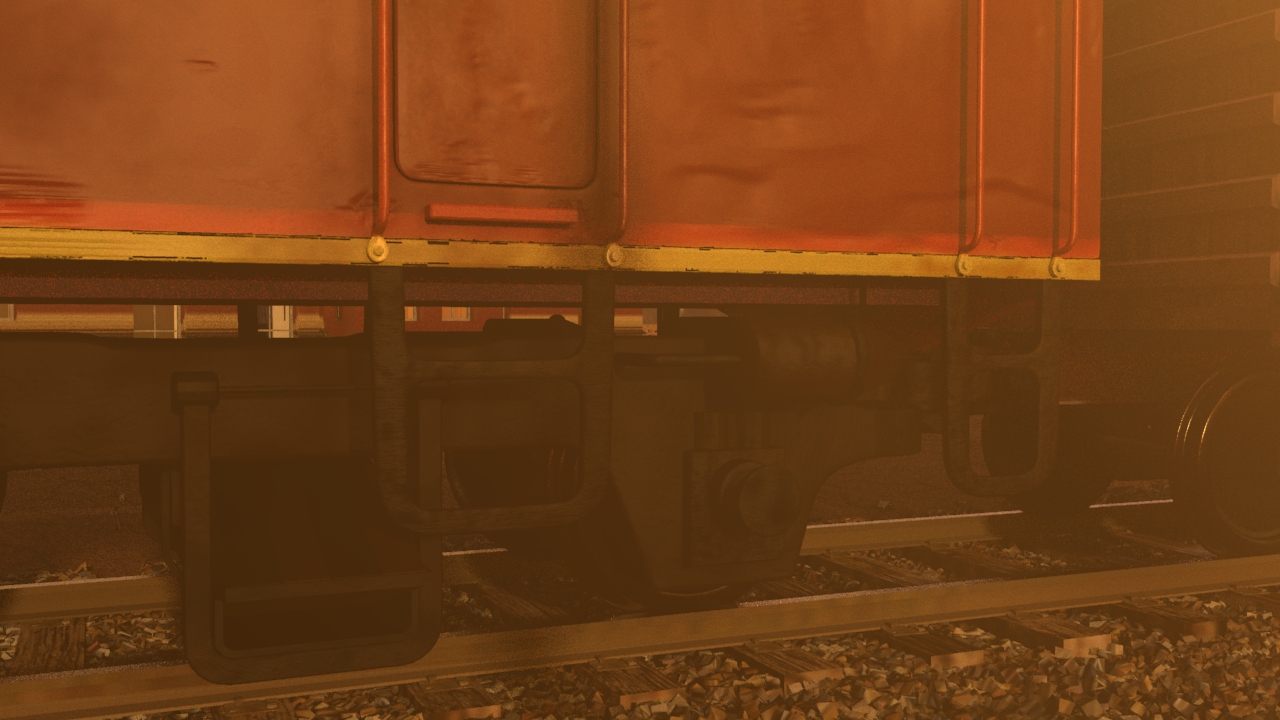
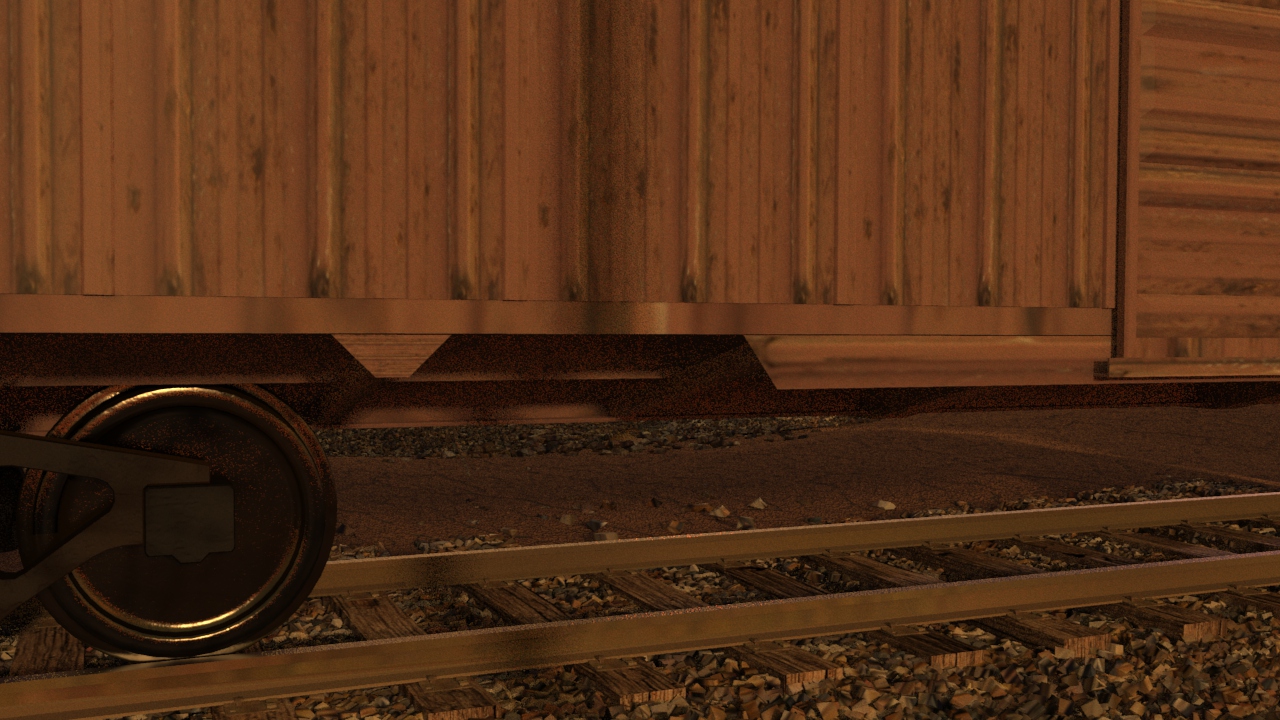
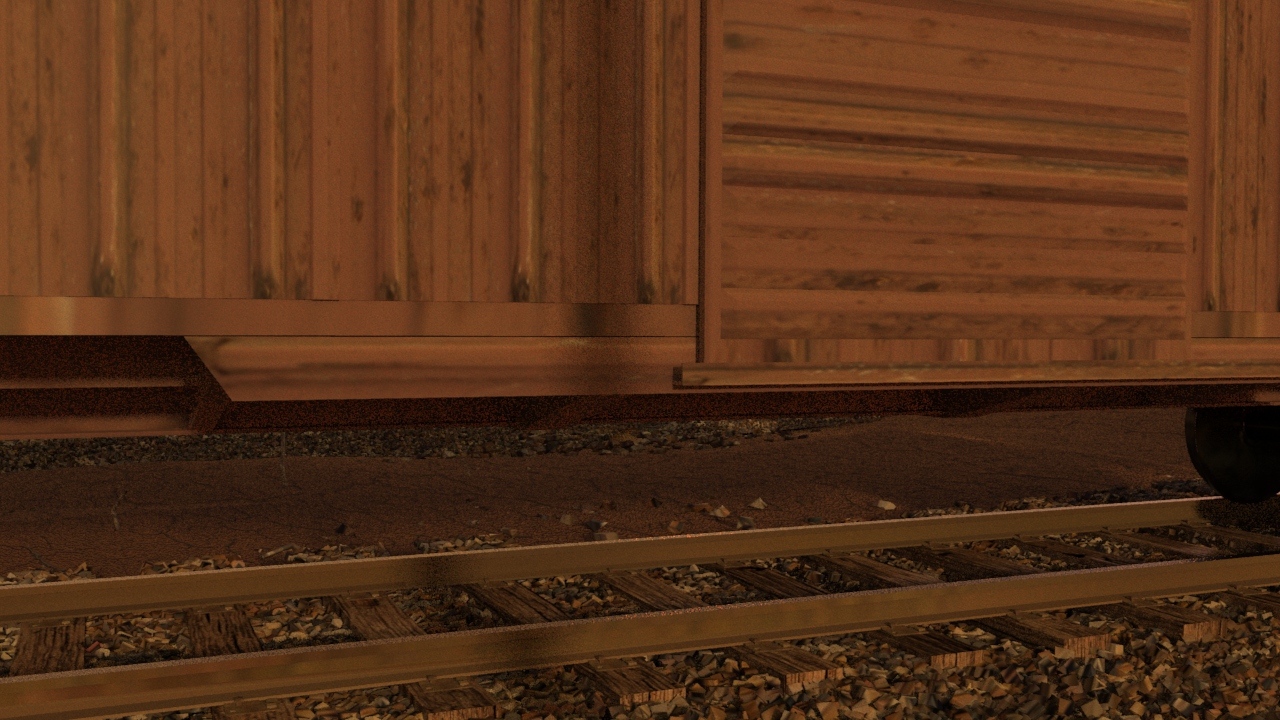
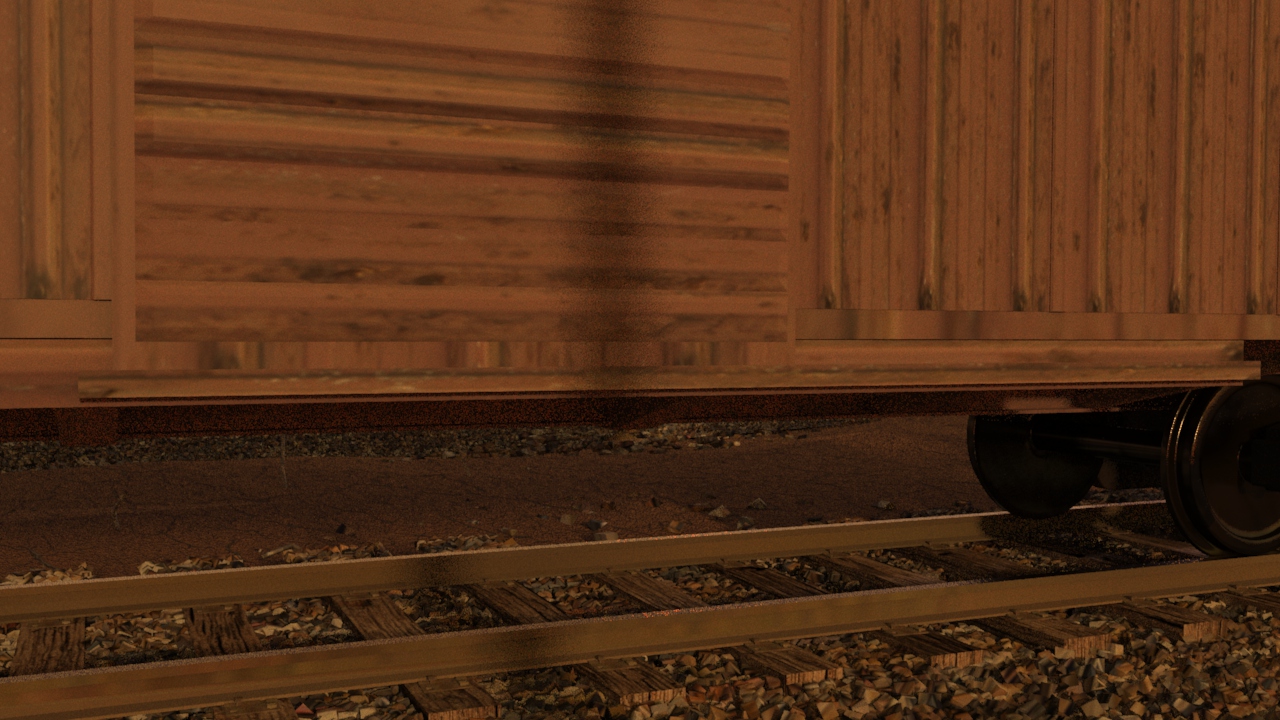
The train is travelling through the Australian outback during a storm, it is windy, lightening strikes. As the train travels to the front of the screen what is going to happen?
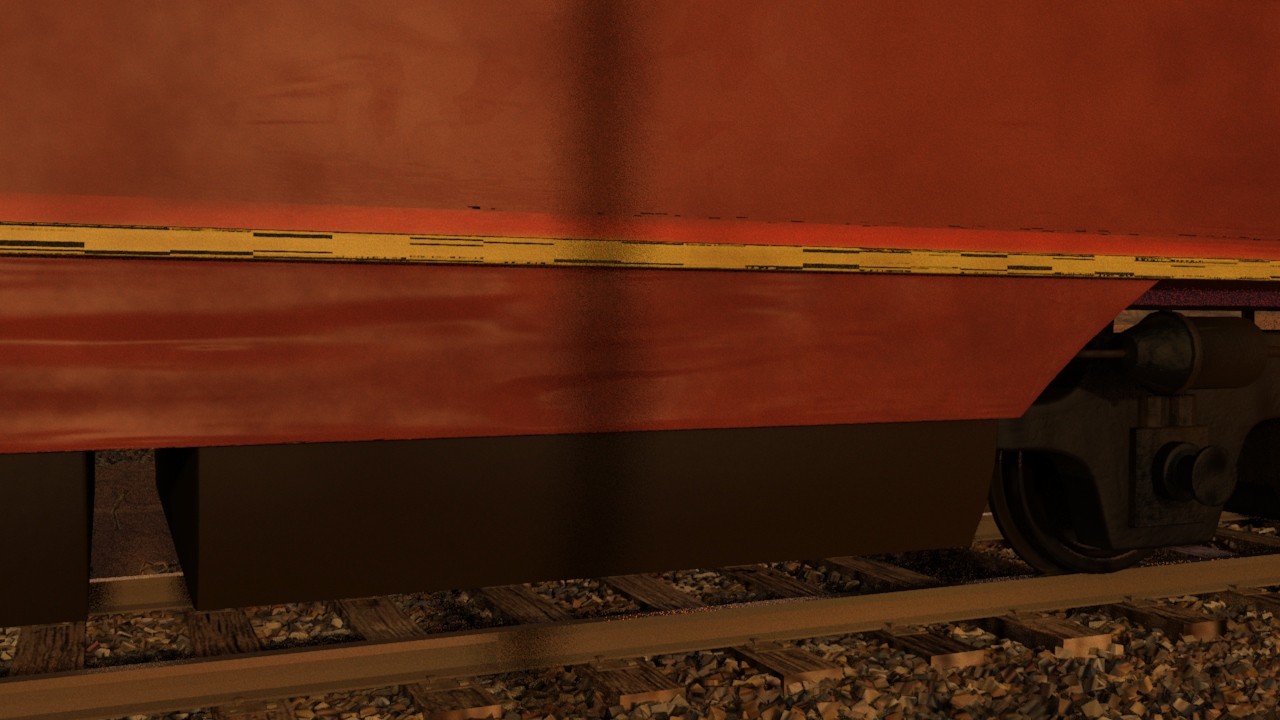
The colour palette is yellows and hot colours with some bluish purple.
Kim Nguyen and I are working together to take my student show reel from animatic to 3D.
STILL SHOTS for SEQUENCE:
-
- shot one – frame 001 to 140
-
- shot two – frame 140 to 220
-
- shot three – frame 221 to 334
-

- shot four – frame 335 to 460
-
- shot five A – frame 461 to 800
-

- shot five B
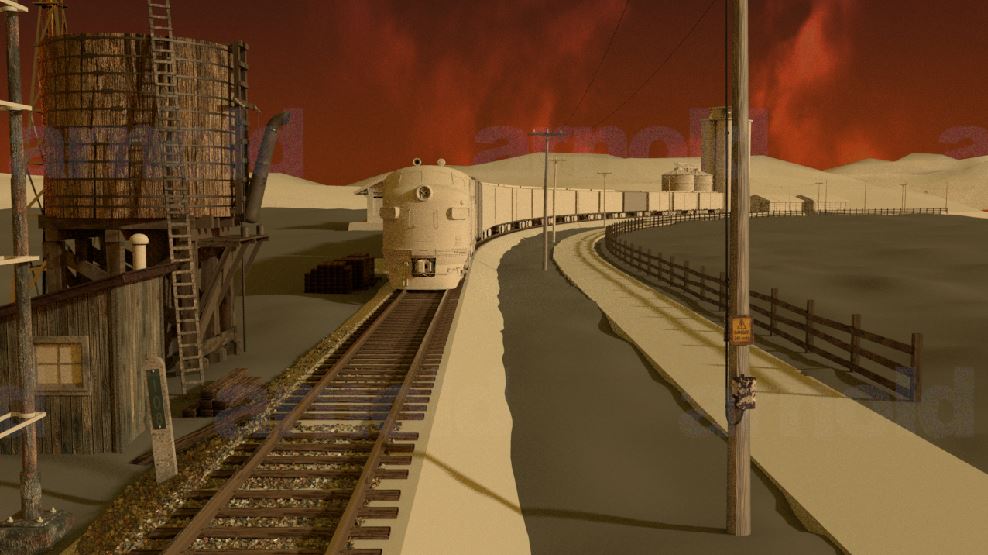
SHOT 005
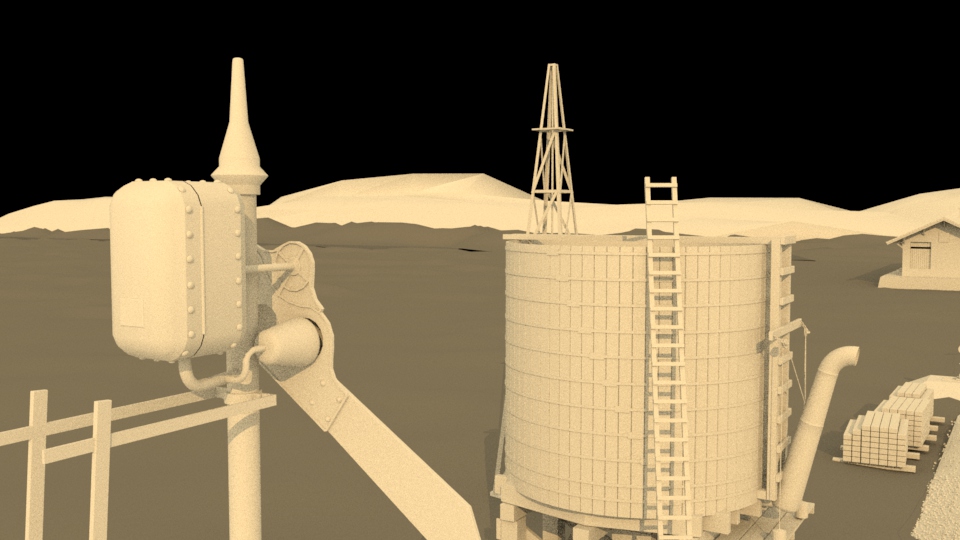
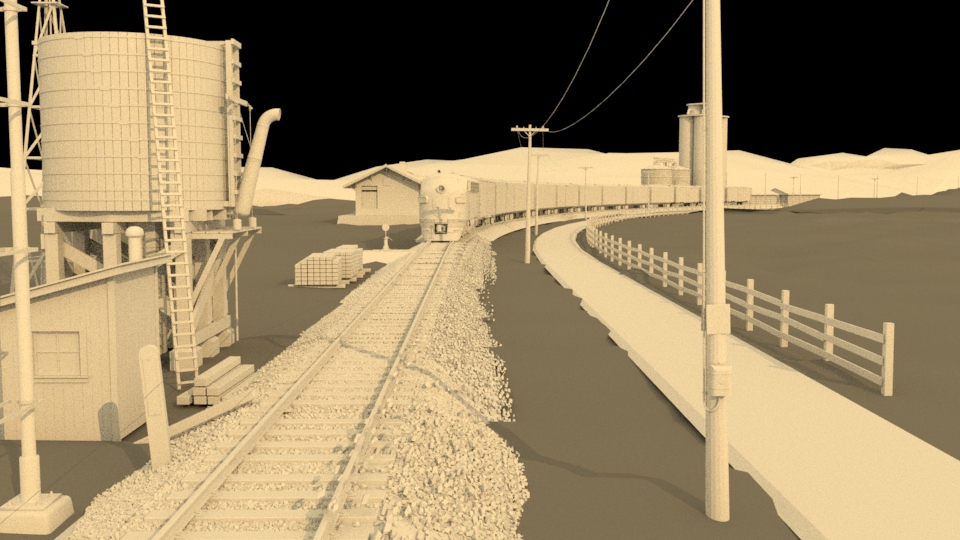
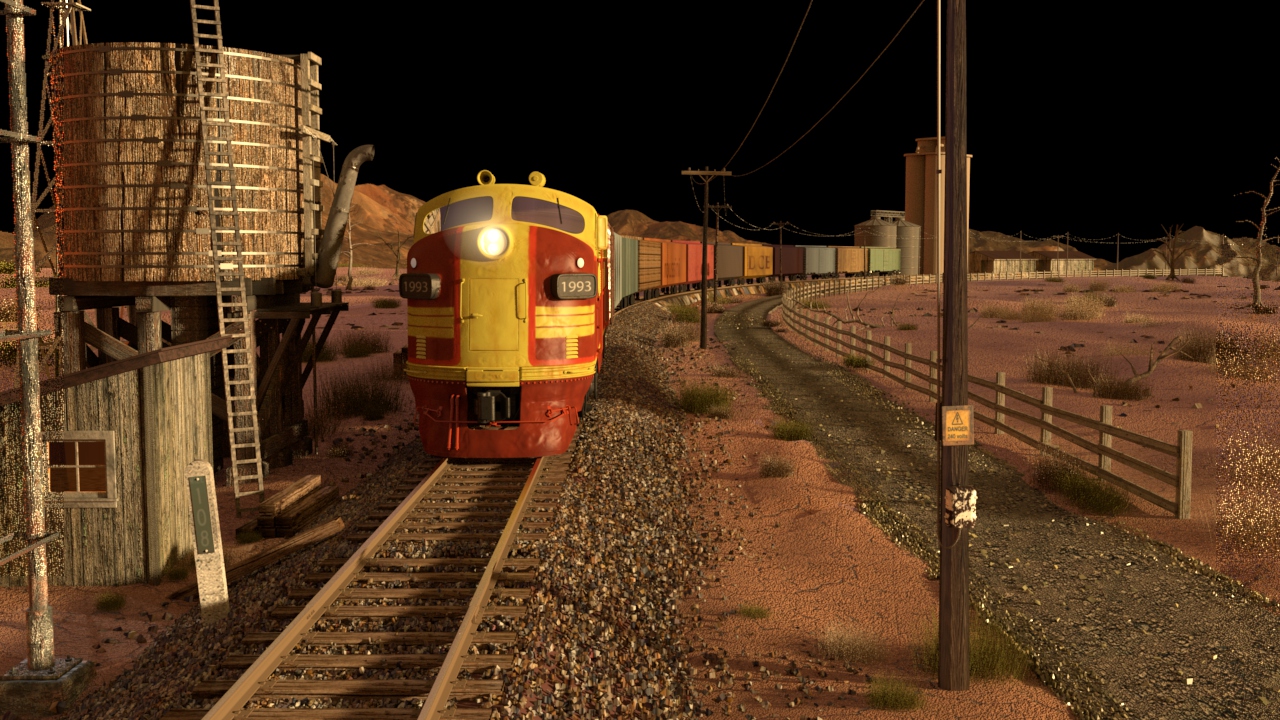
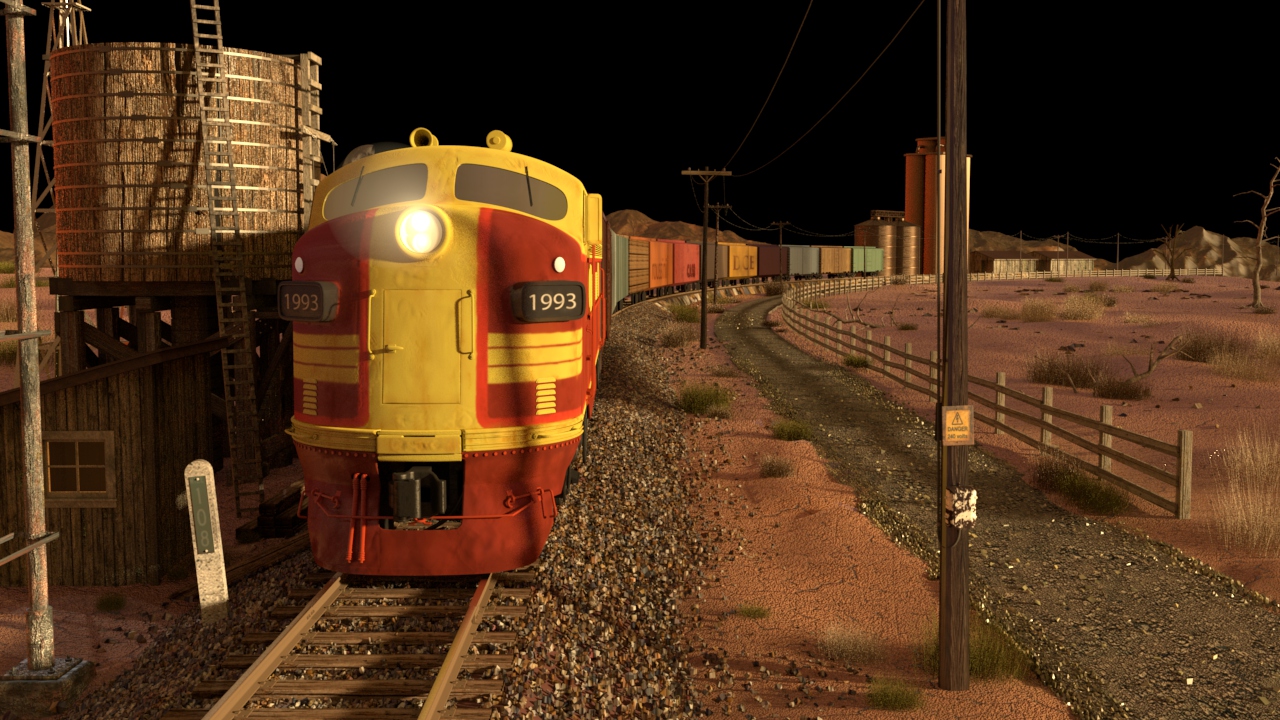
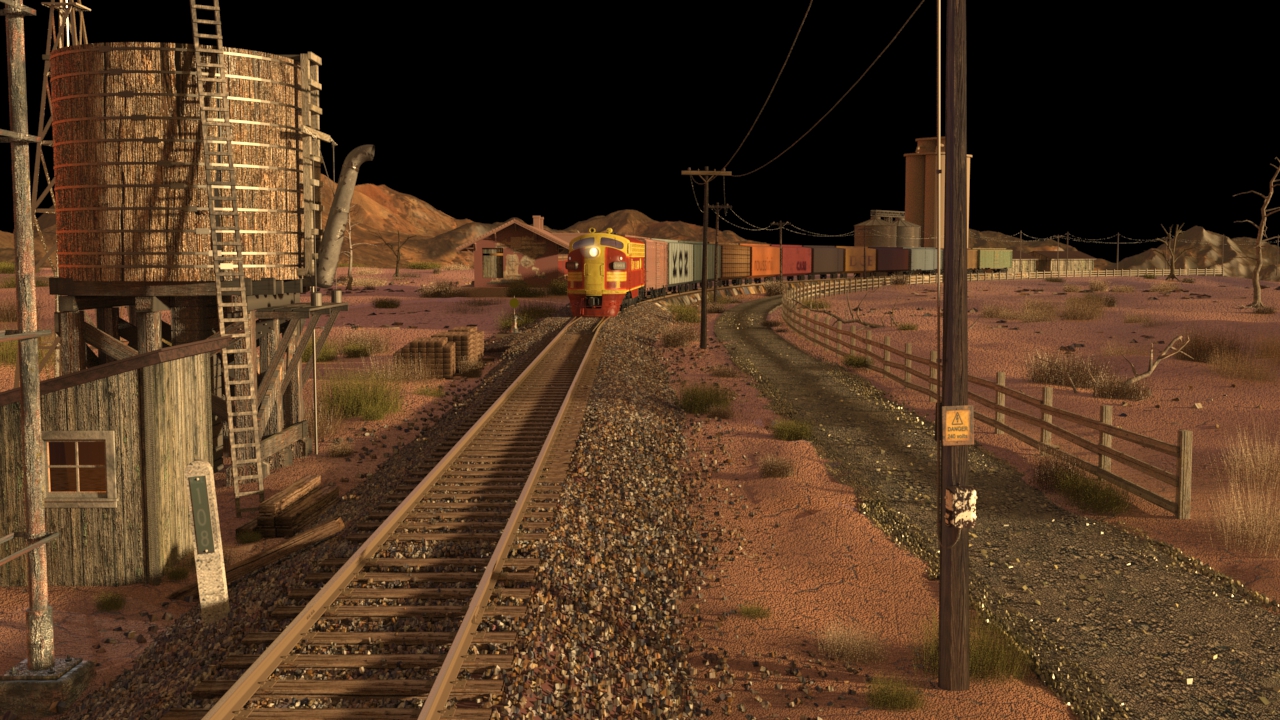
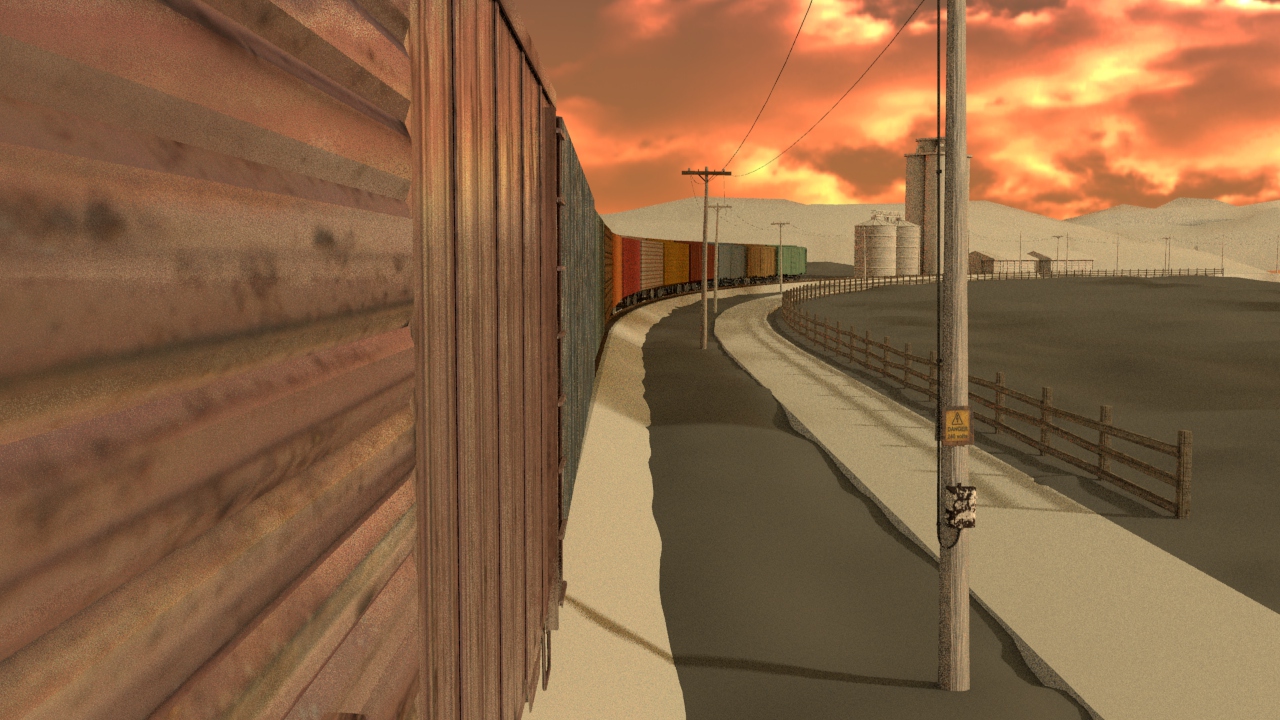
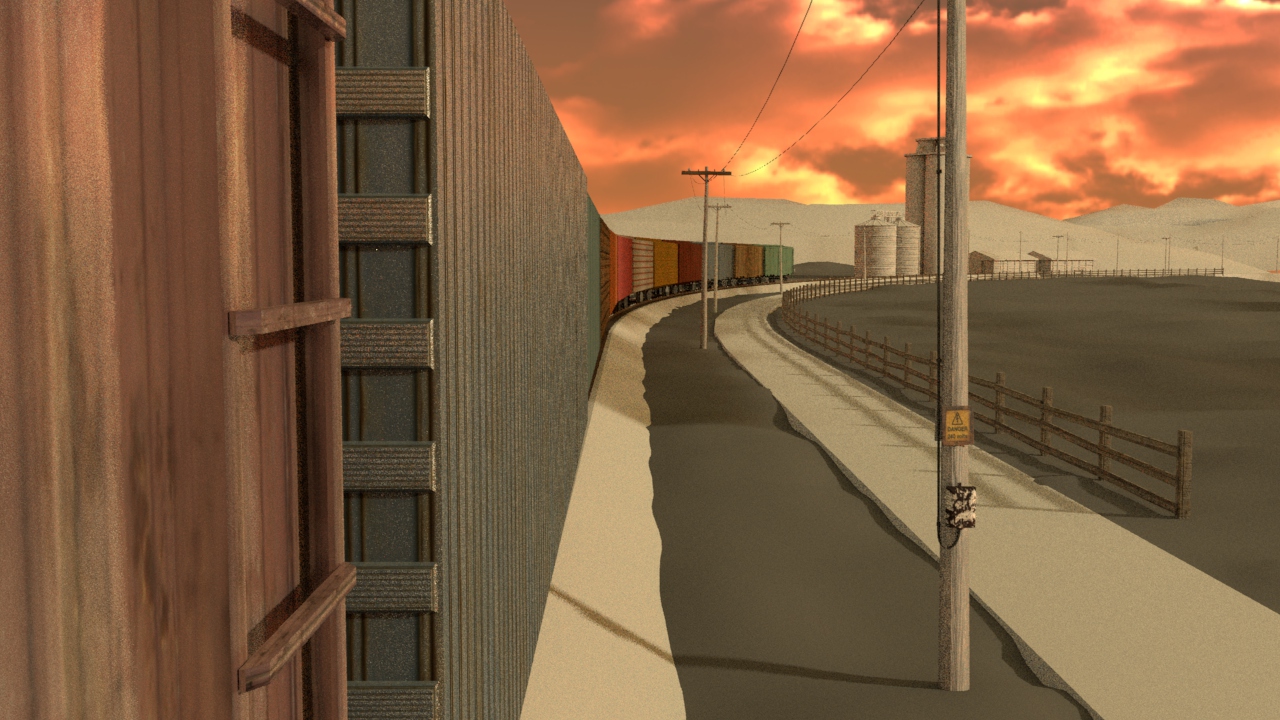
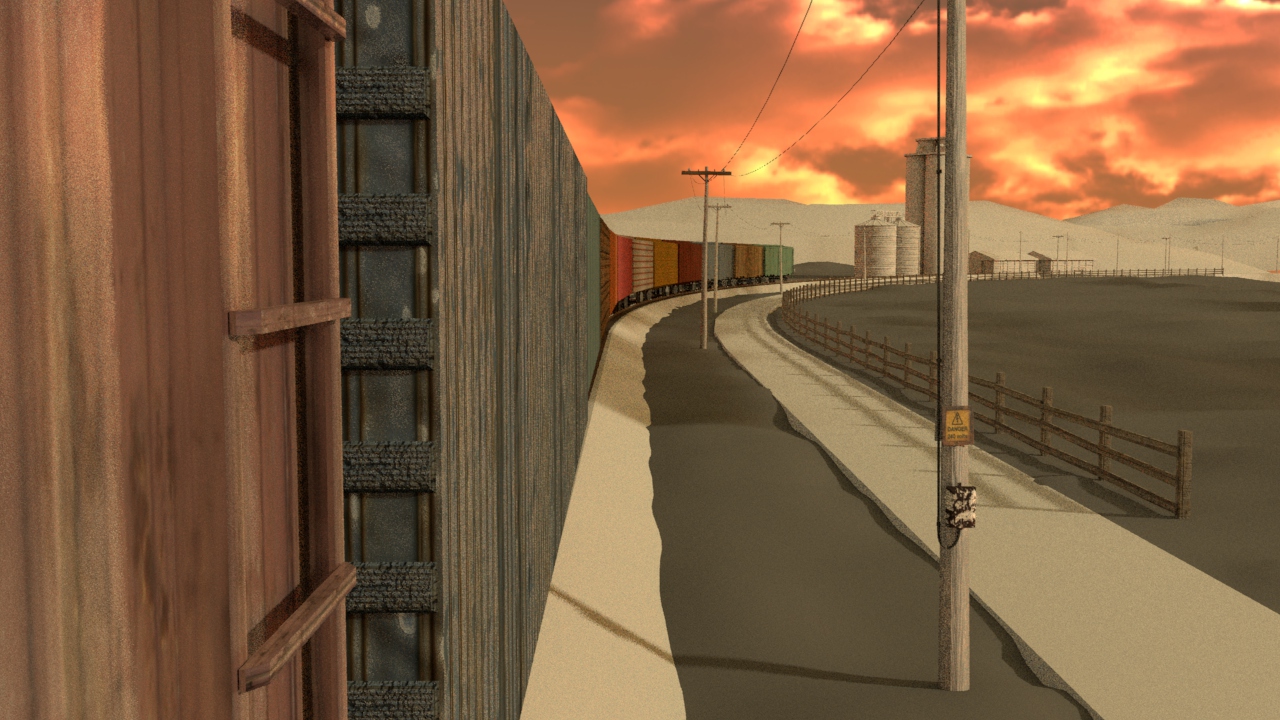
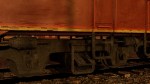
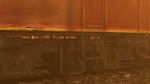
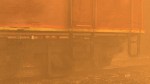
We have started on shot 5, of the 5 shots that make up the sequence as below, with the aim of completing this first and then seeing how it works within the time frame for further shots. Kim is starting on the textures and I have started with the lighting.
shot 005 render tests

shot 005 Therese working on text renders

shot 005 Kim working on test comps
Kim working on sky comp, lightening and clouds with matte painting

-

- this much purple
-

- or this much purple
SOME TEST RENDERS, jpeg:


-

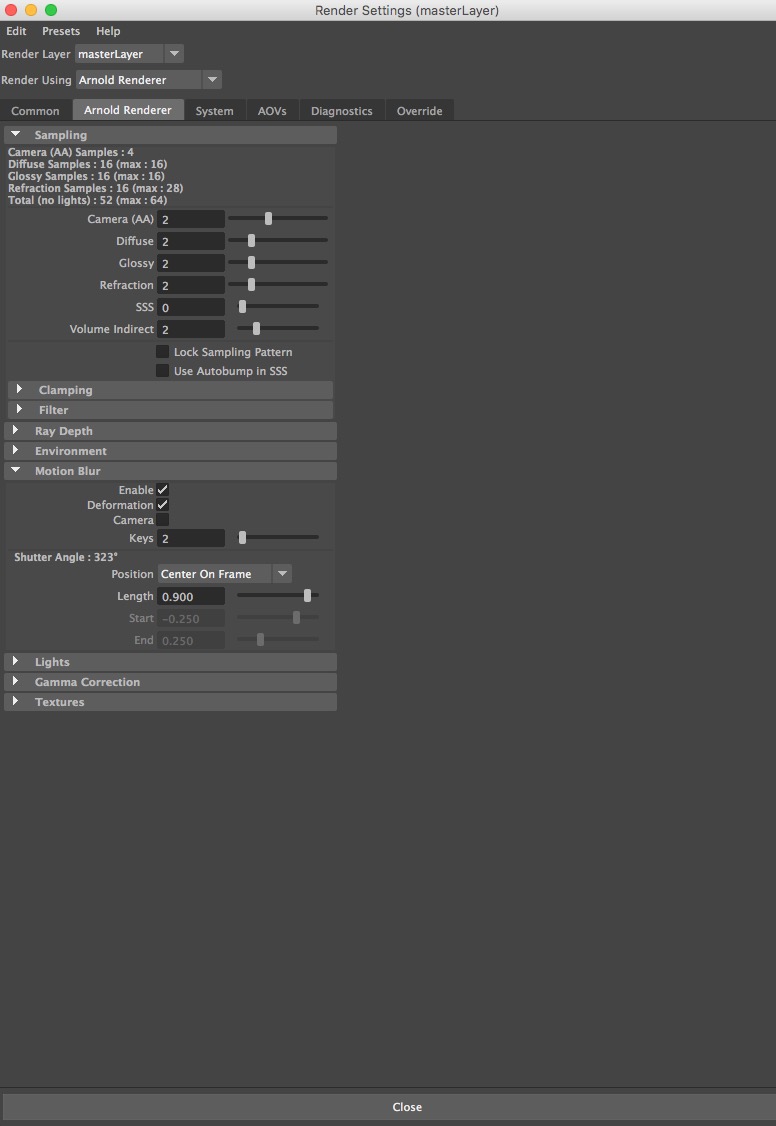
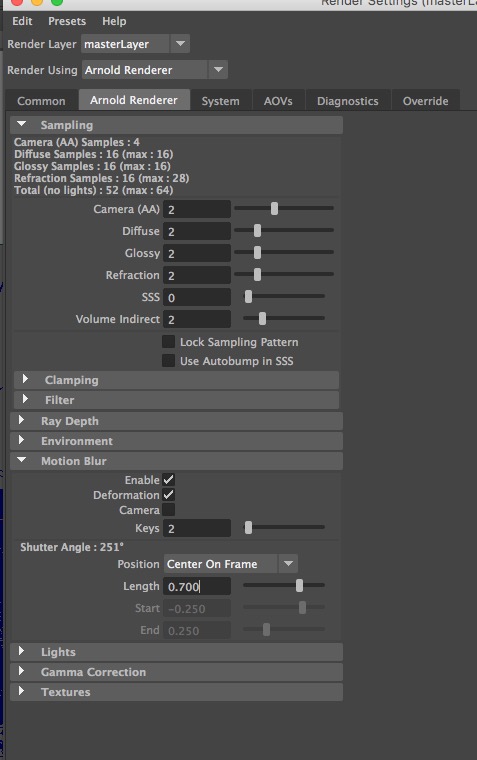
- arnold render settings
-

- arnold’s nov passes
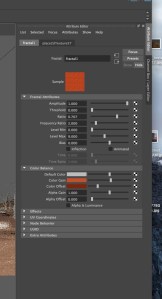
STARTING on the LIGHTING and TEXTURES

Kim working on the environment and environment textures
SOME RENDERING ISSUES with SPECULAR:


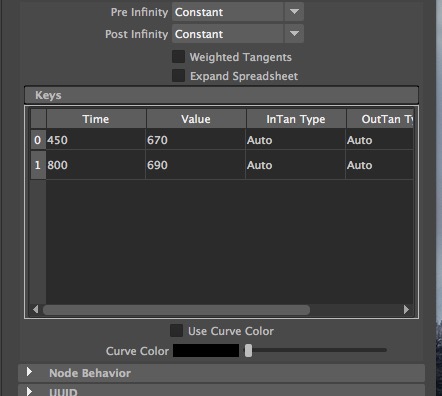
EXPERIMENTS with CLOUD SHADOW SPEED and MOTION BLUR:


-

- creating cloud shadows

-
- arnold render settings
-
- maya uvs

SELECTION of SHOTS showing some of our work as as we have progressed and developed:
-
- Kim texturing
-

- Therese and Kim testing cloud lighting
-

- Therese and Kim testing cloud lighting
-
- testing with different HDR images
-
- Kim, texturing
-
- Kim’s texture tests
-
- Kim’s texture tests
-

- Kim texturing
-
- working on uvs
-
- maya uvs
-

- Therese starting on the lighting for shot 005

-
- Therese lighting
-
- cloud blocker tests frame 530
-
- cloud blocker tests frame 700
-
- cloud blocker tests frame 800
-
- experimenting with cloud gobo and blocker
-
- Kim’s textures, adding rocks and ground
-
- Kim adding more environment texture detail and building up the scene


KIM’S SKY MATTE PAINTING:


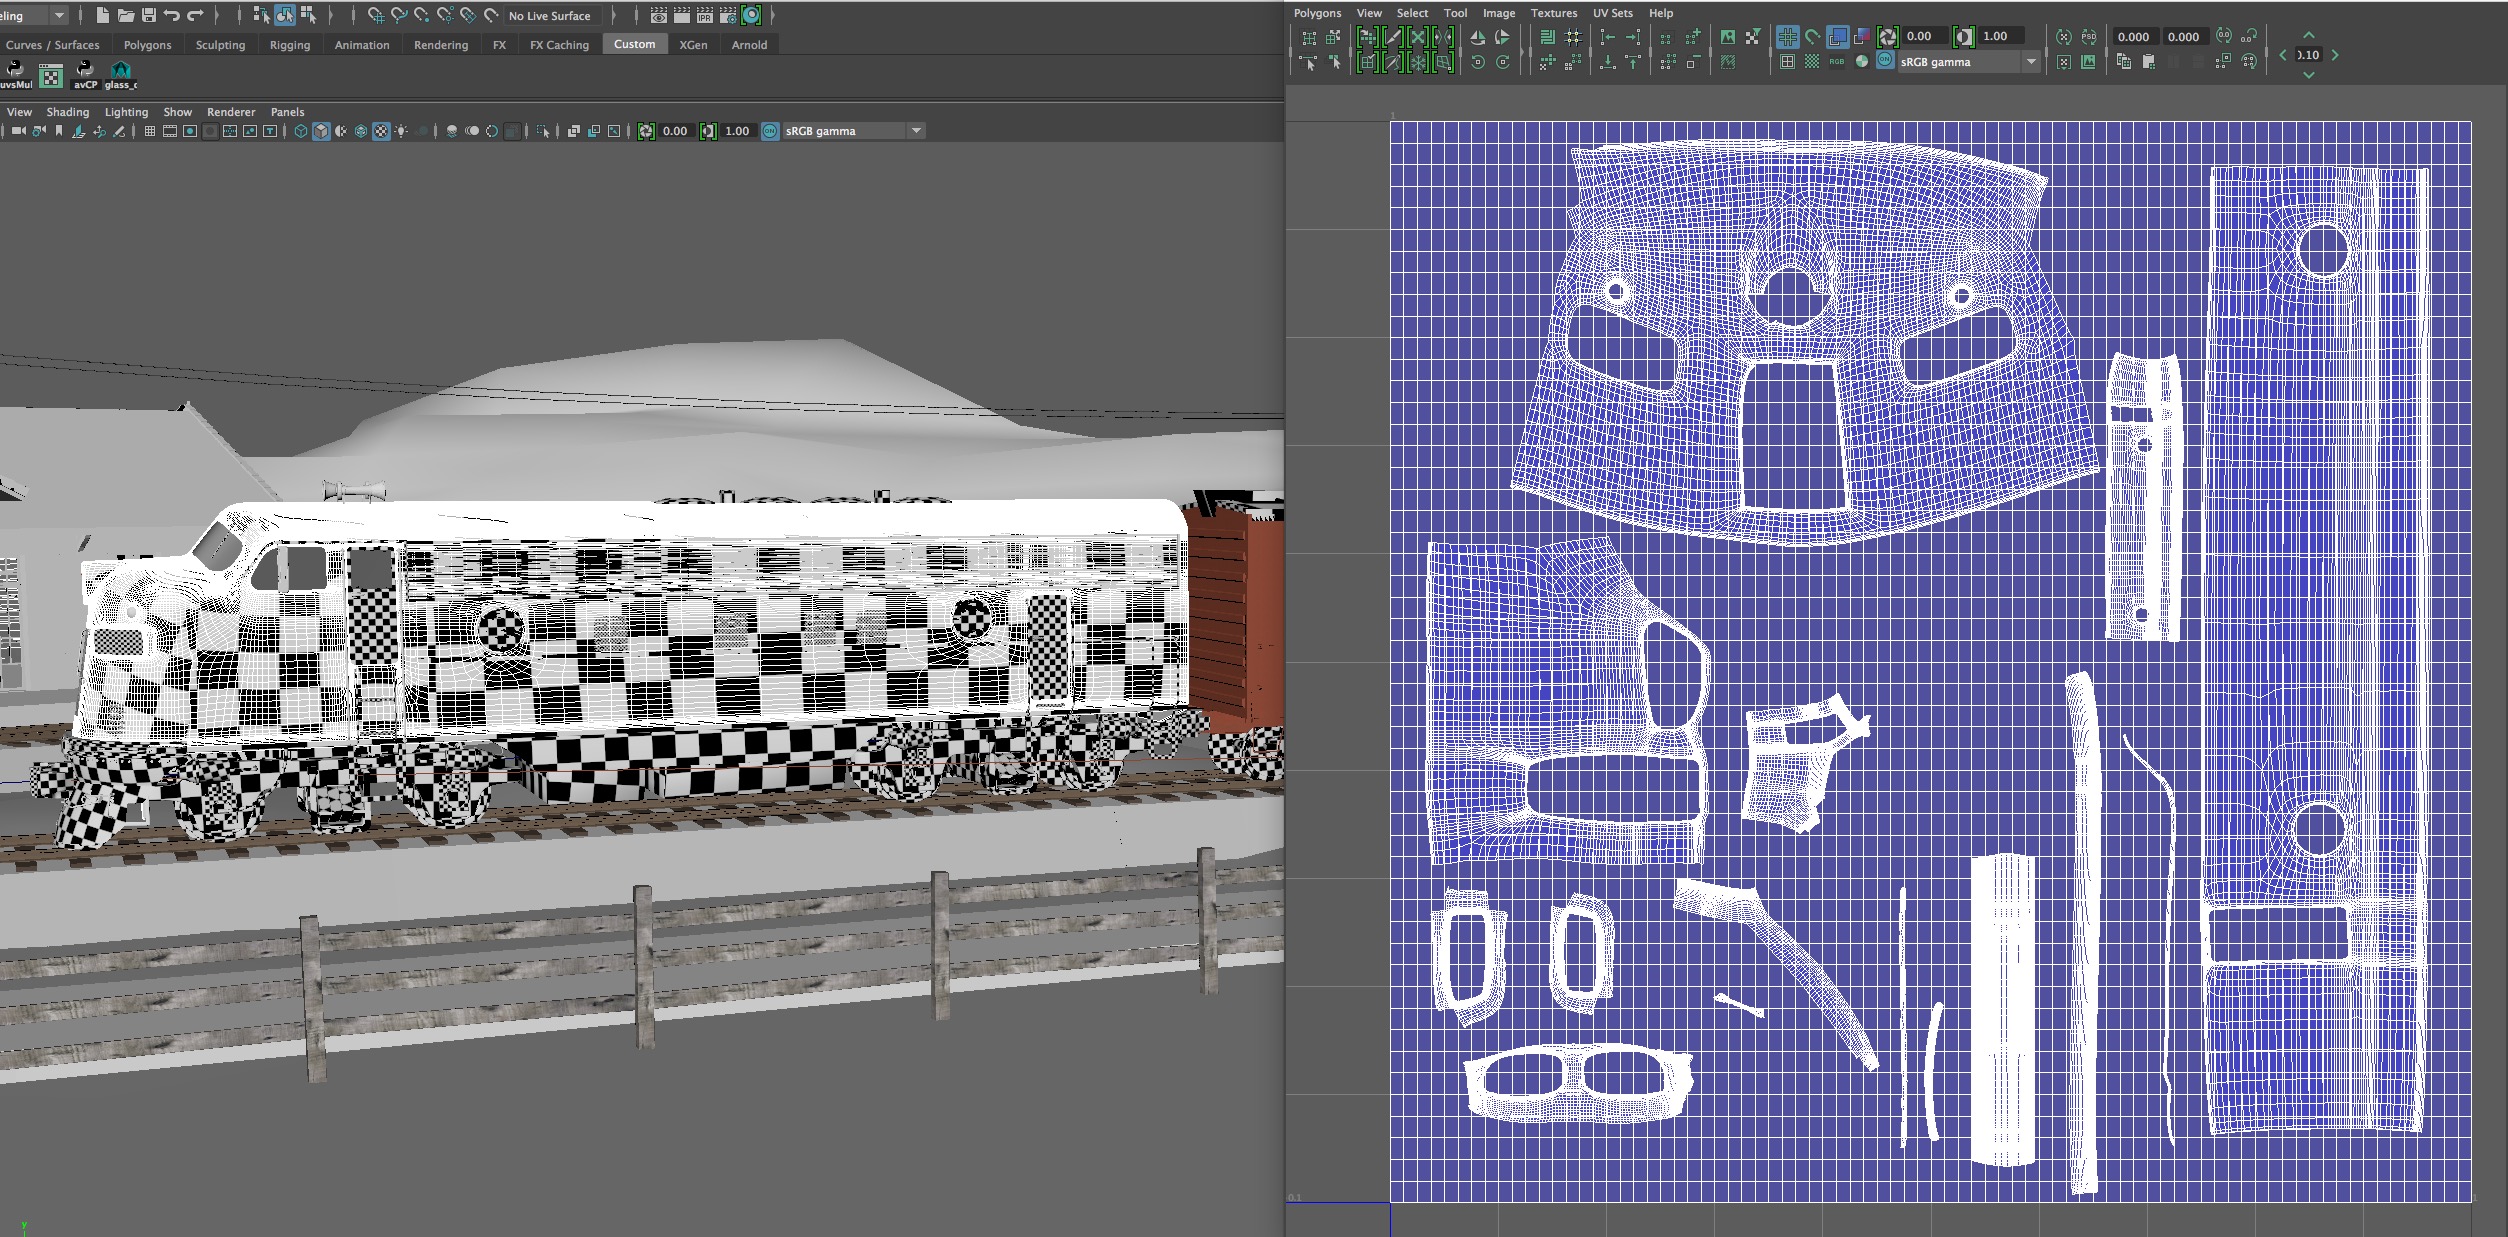
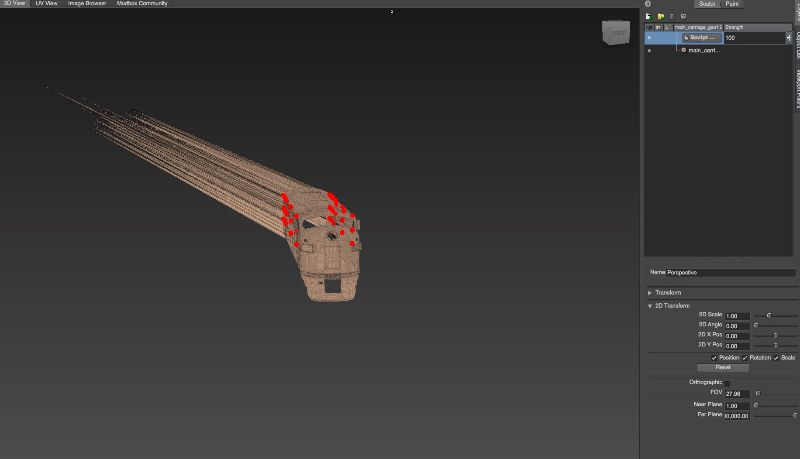
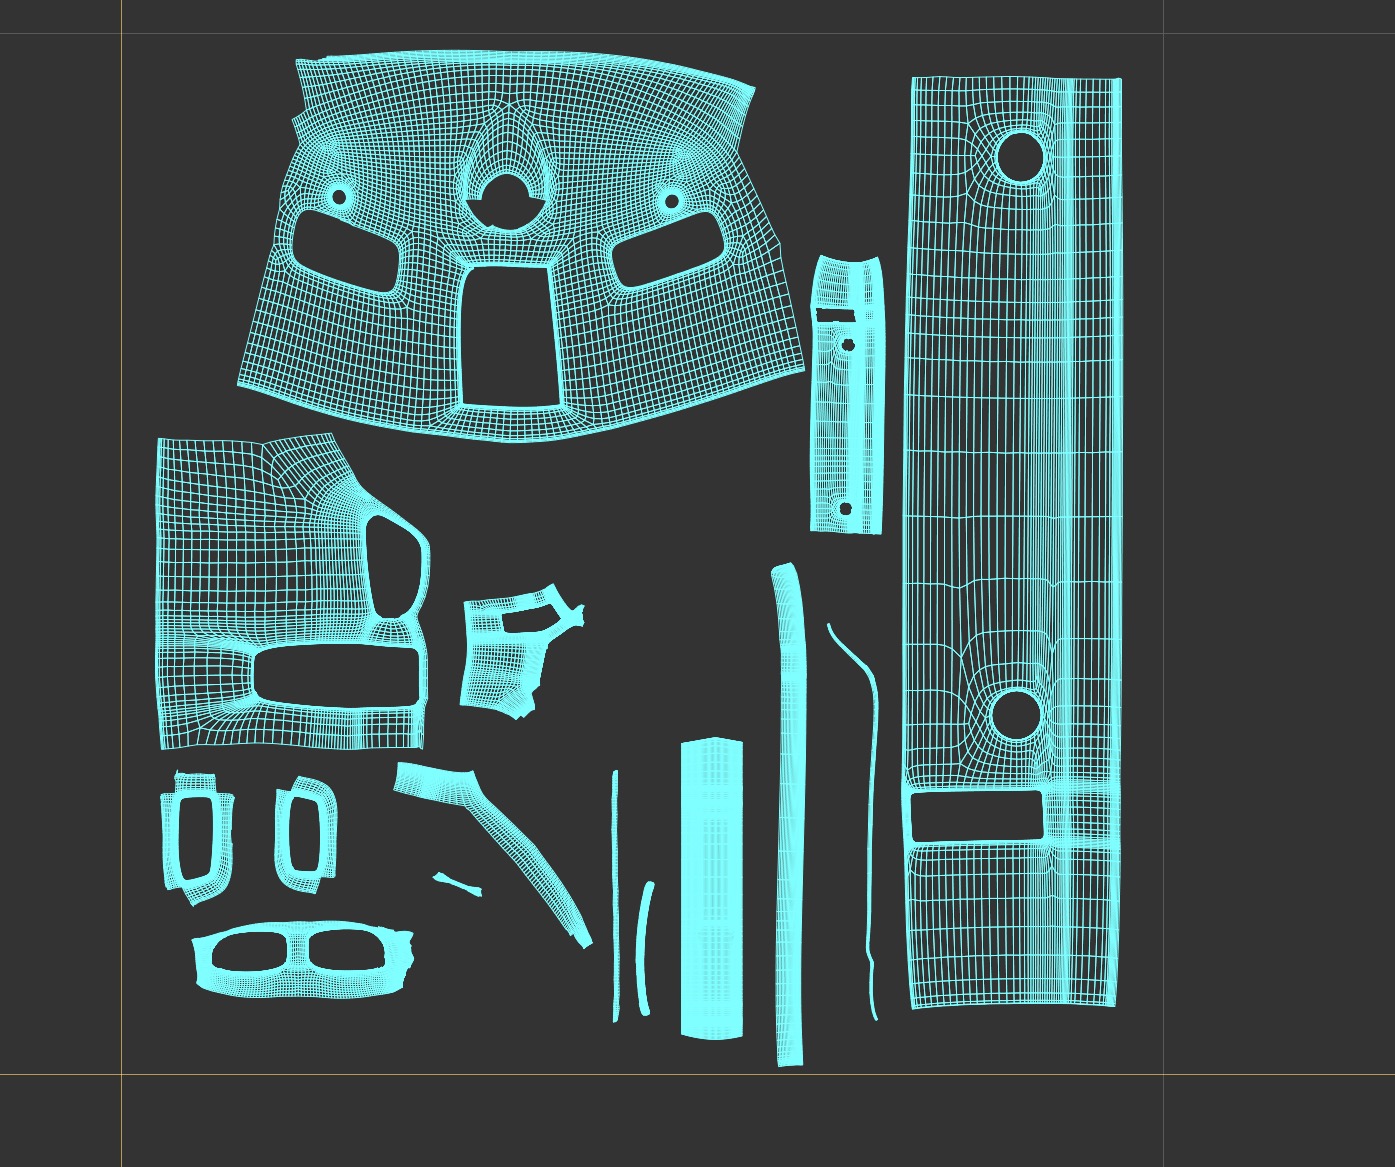
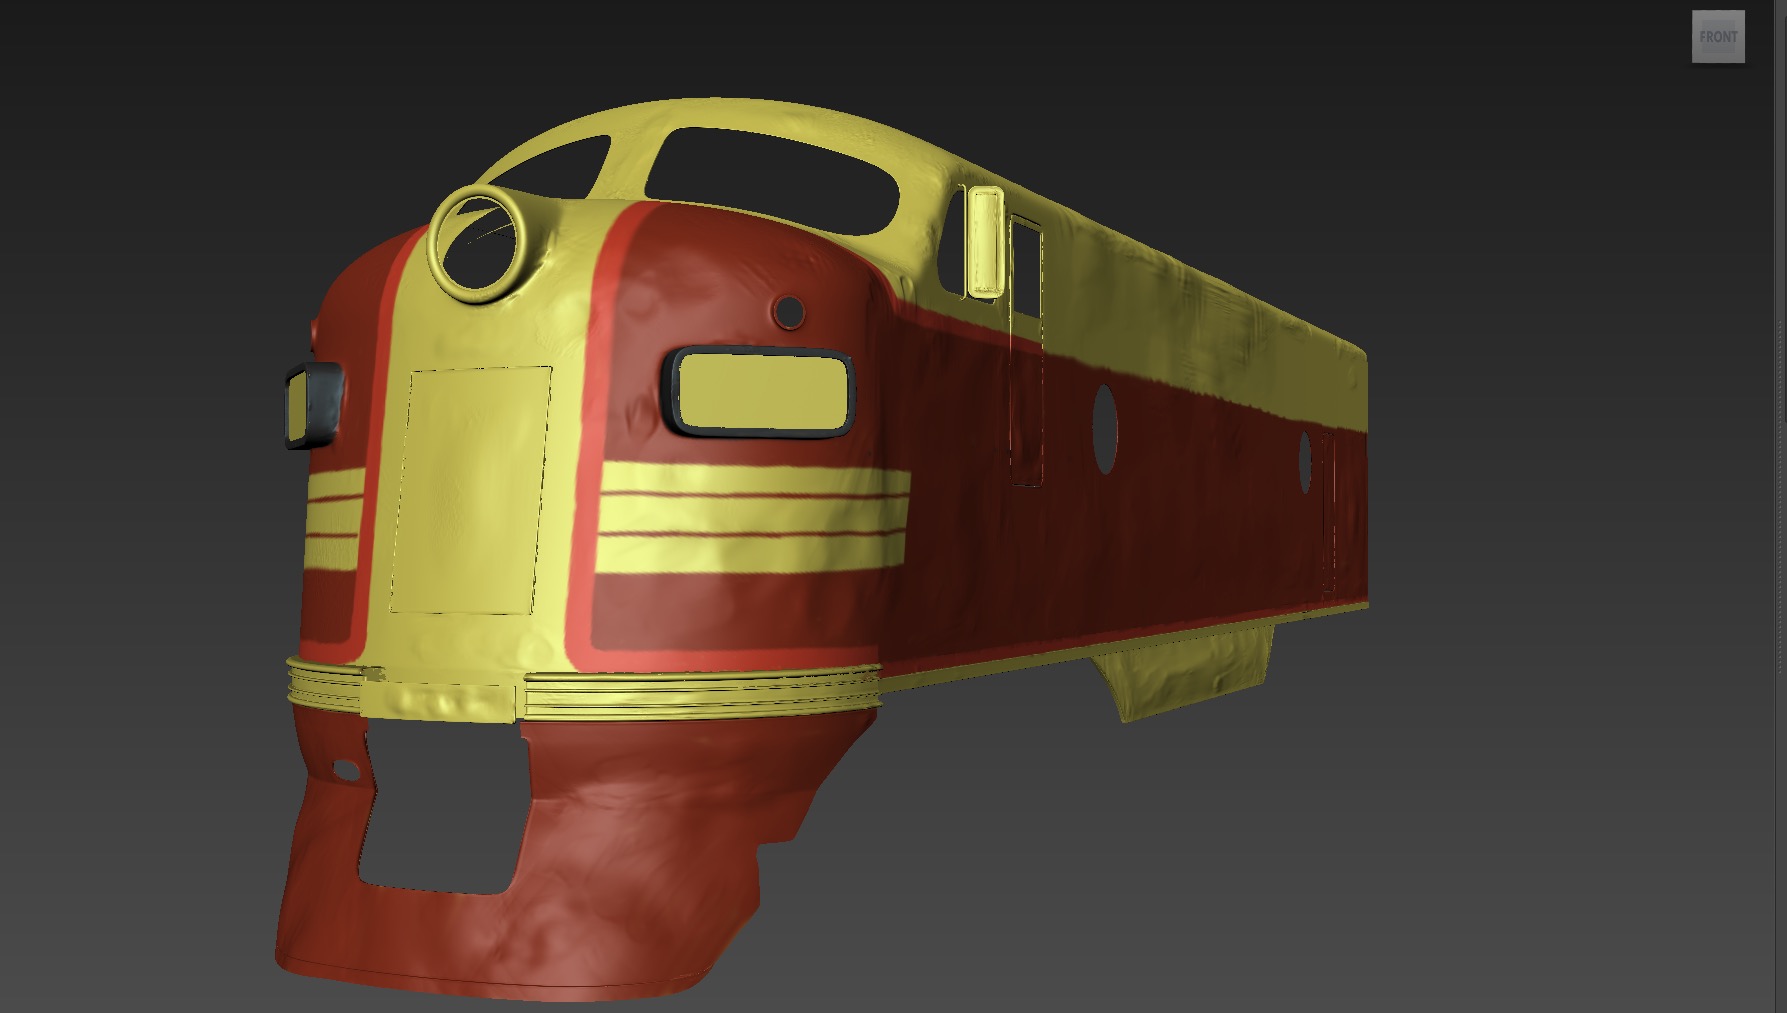
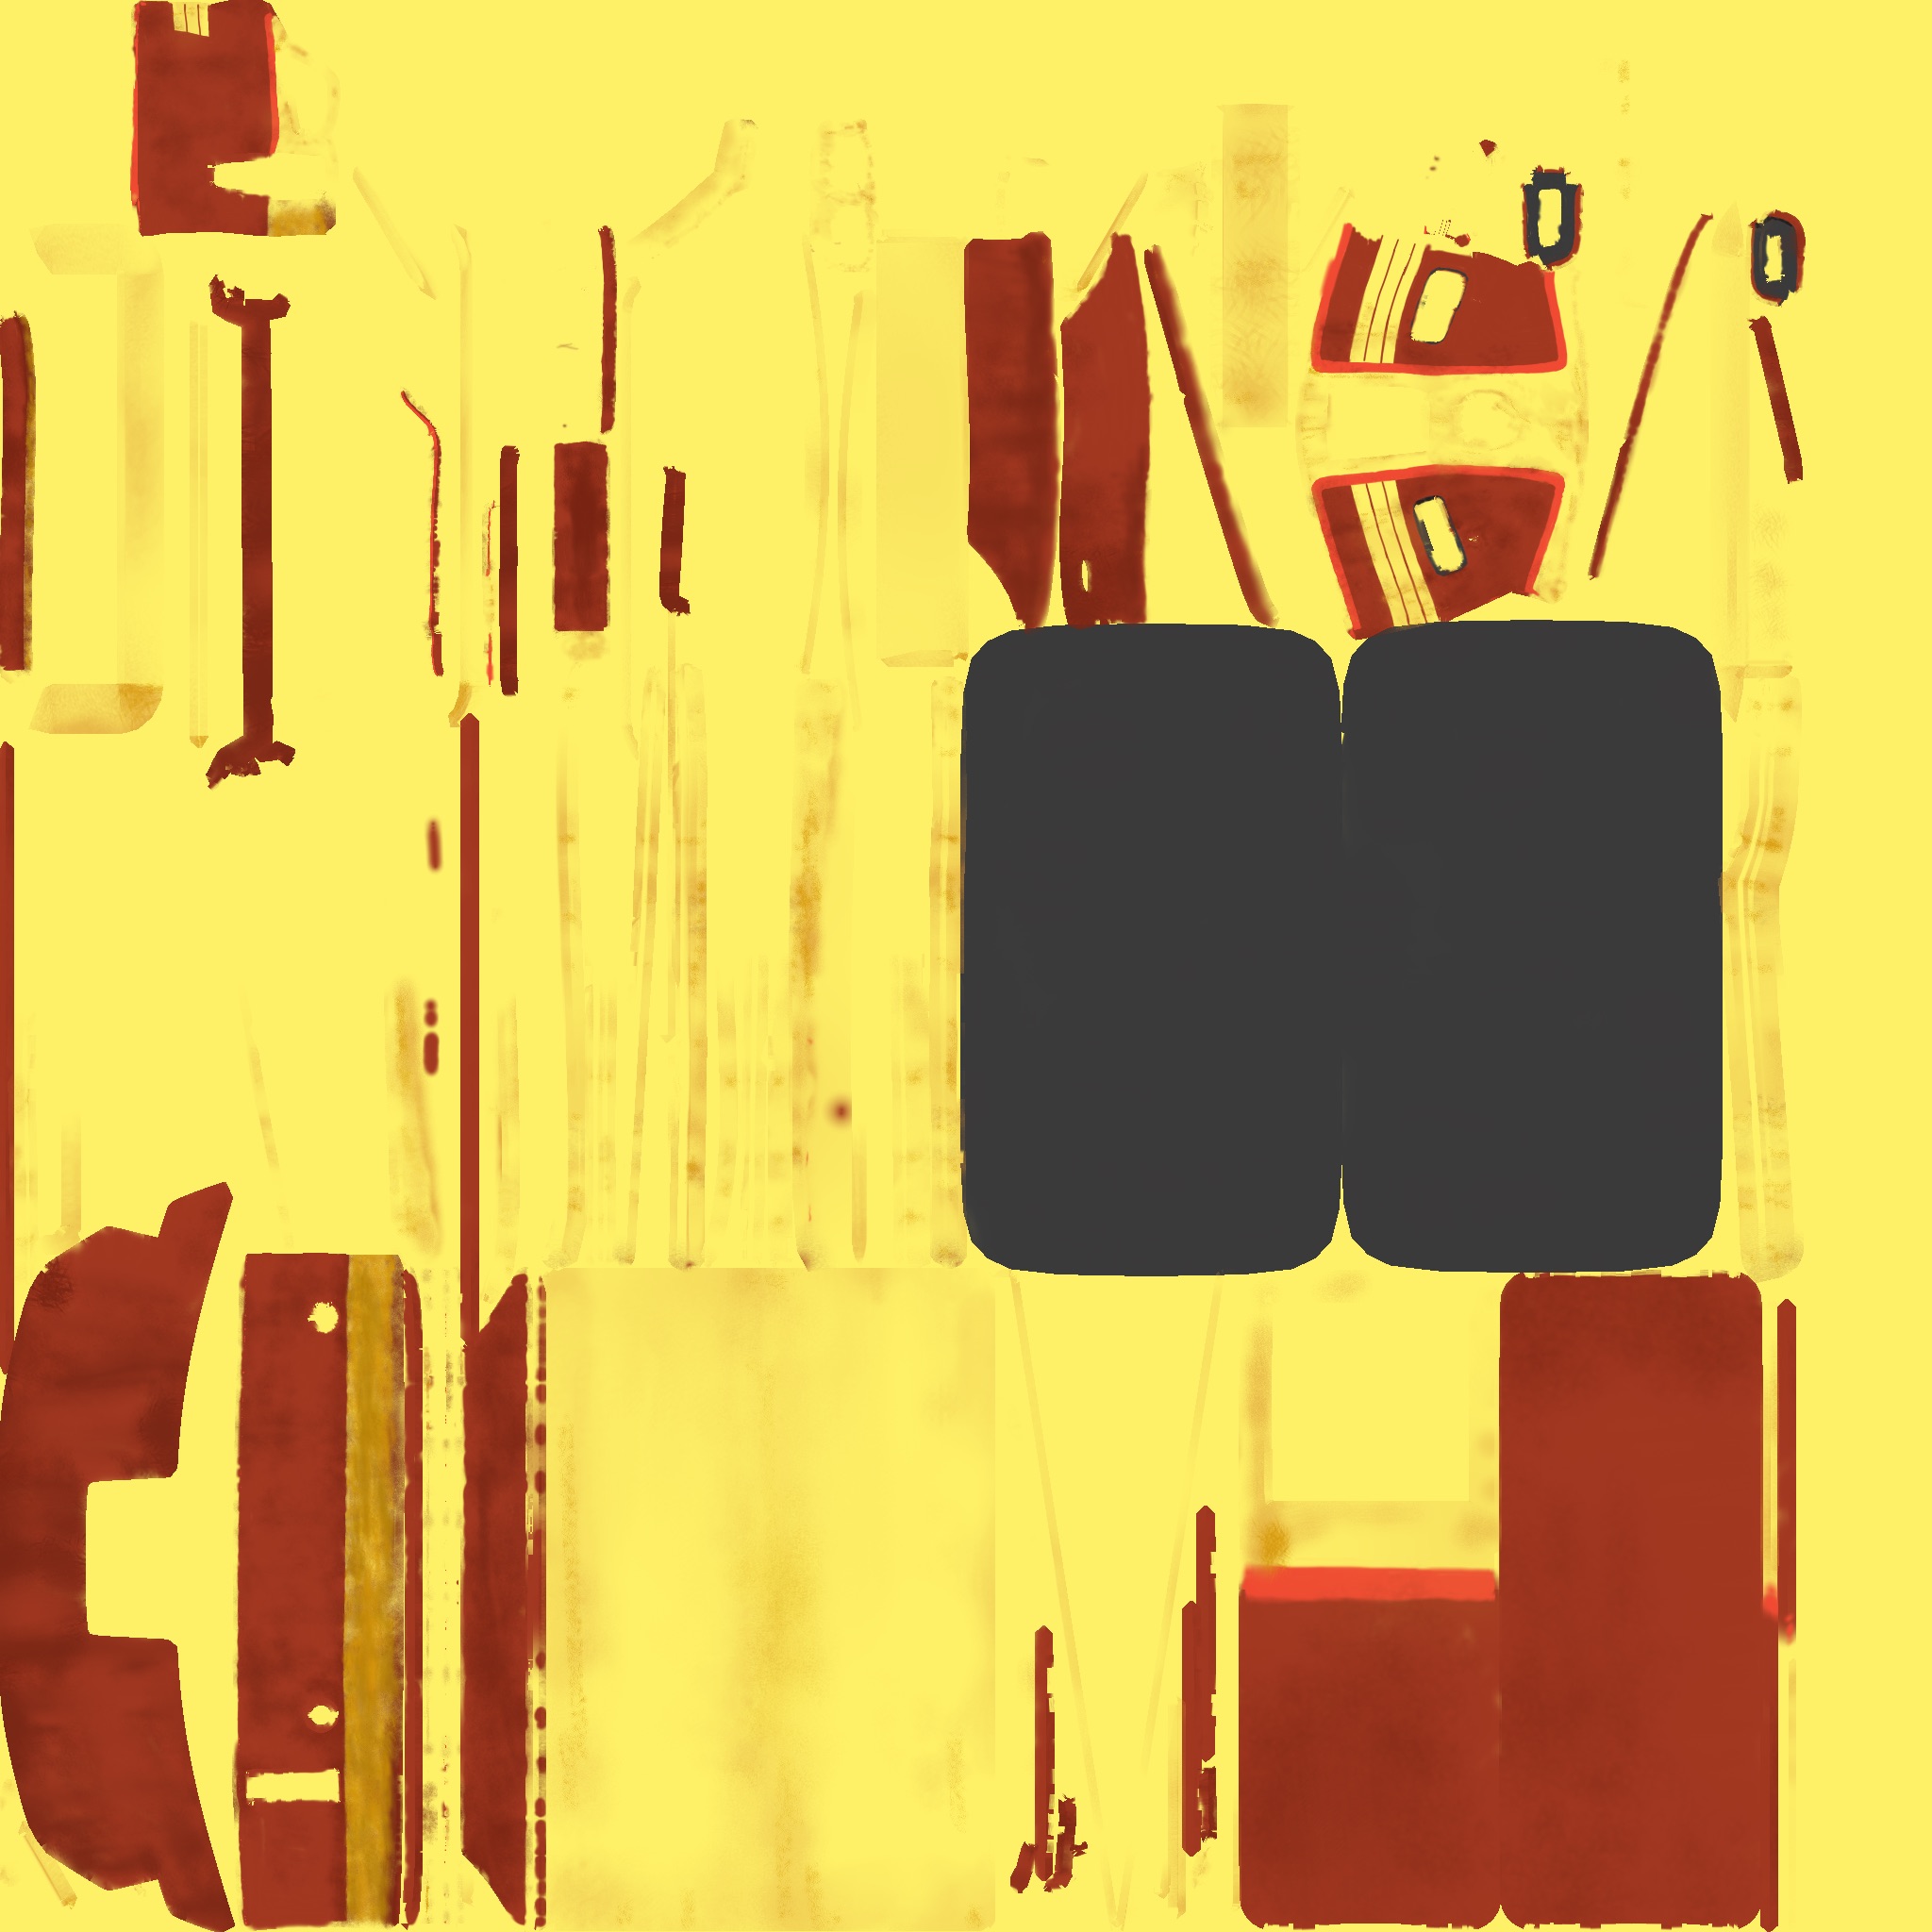
THERESE’S PROCEDURAL TEXTURES for CARRIAGES and MUDBOX for the ENGINE:

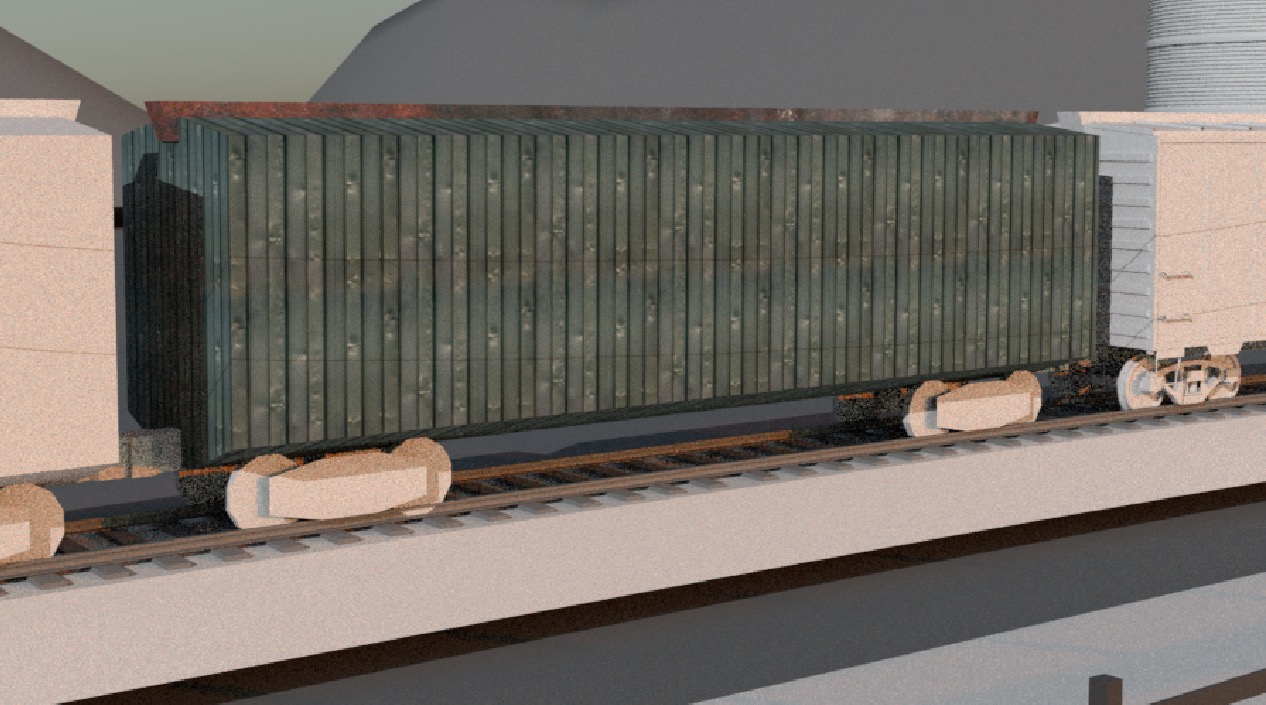


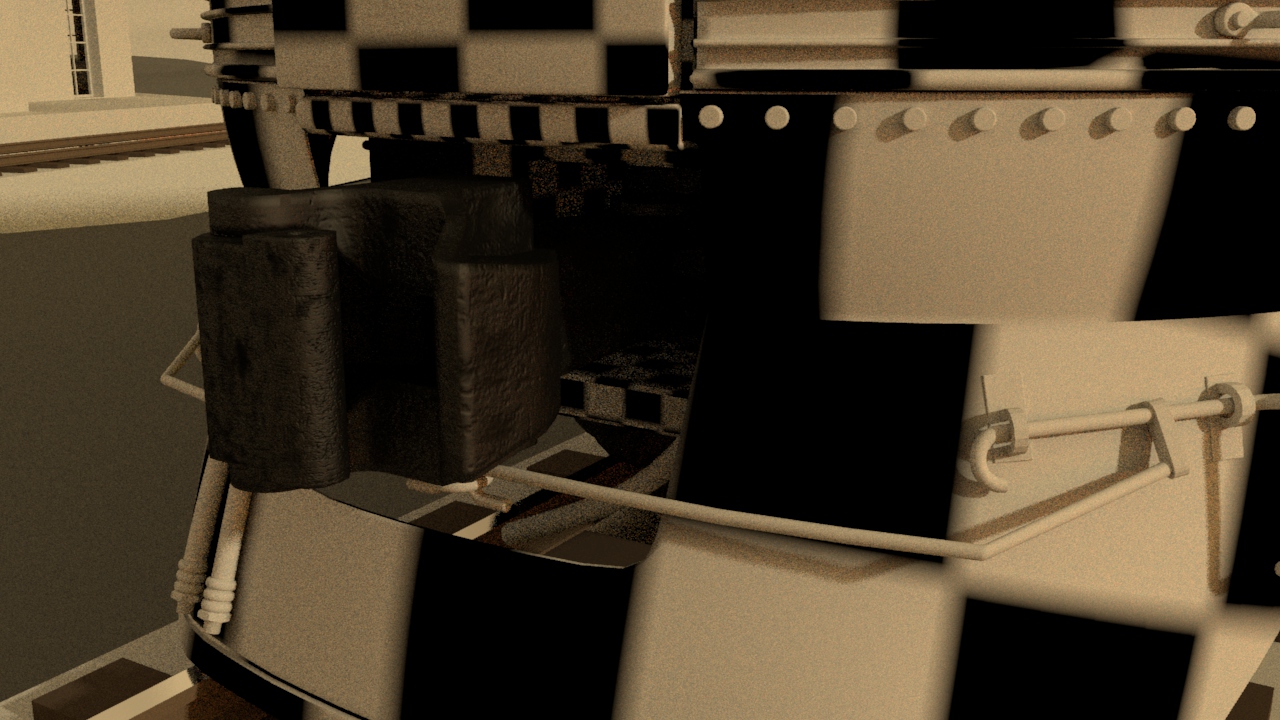

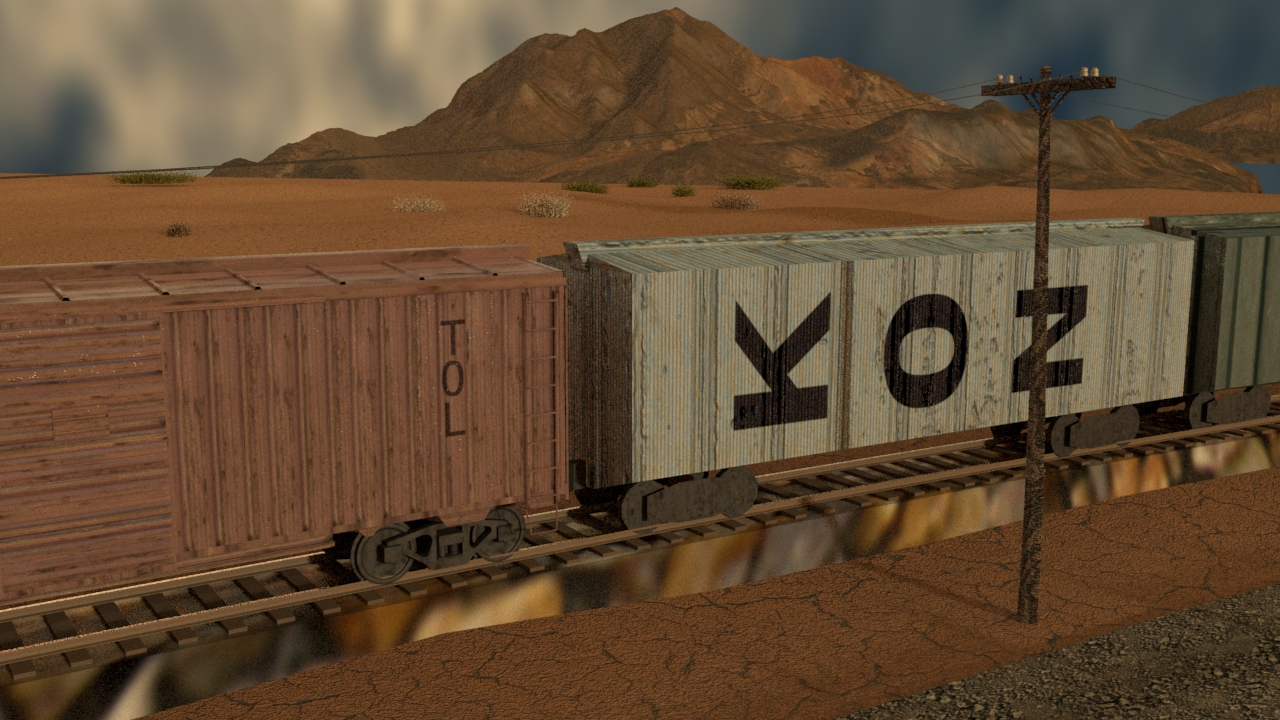


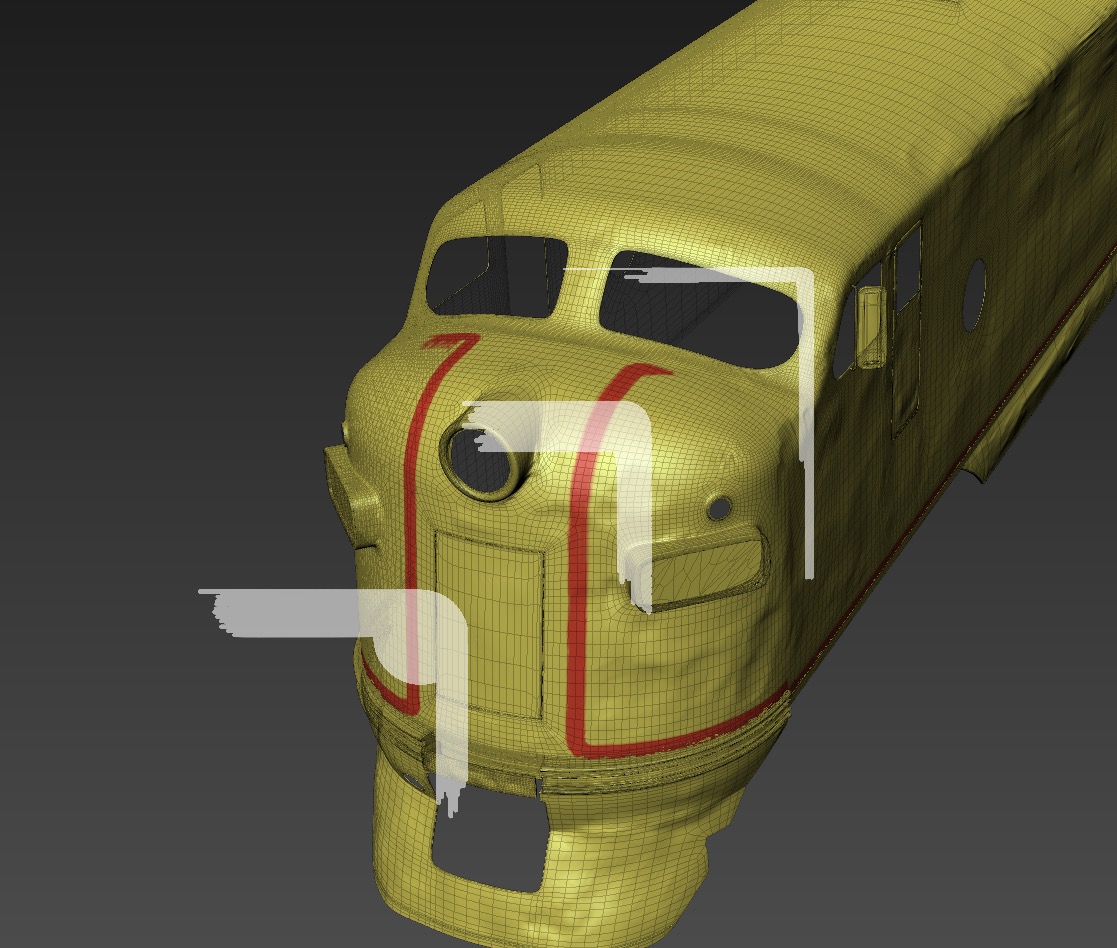
MAYA to MUDBOX and some issues with the downloaded geo:


-
- mudbox


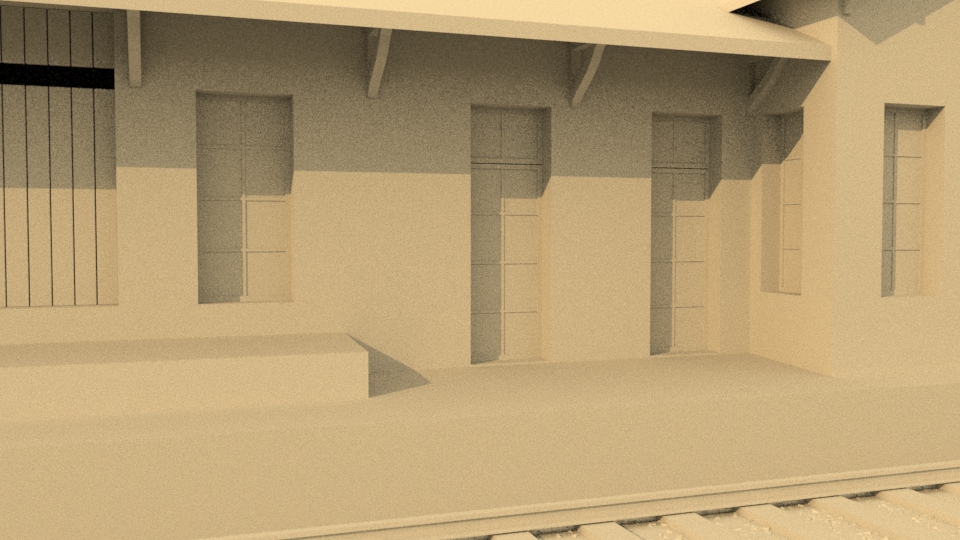
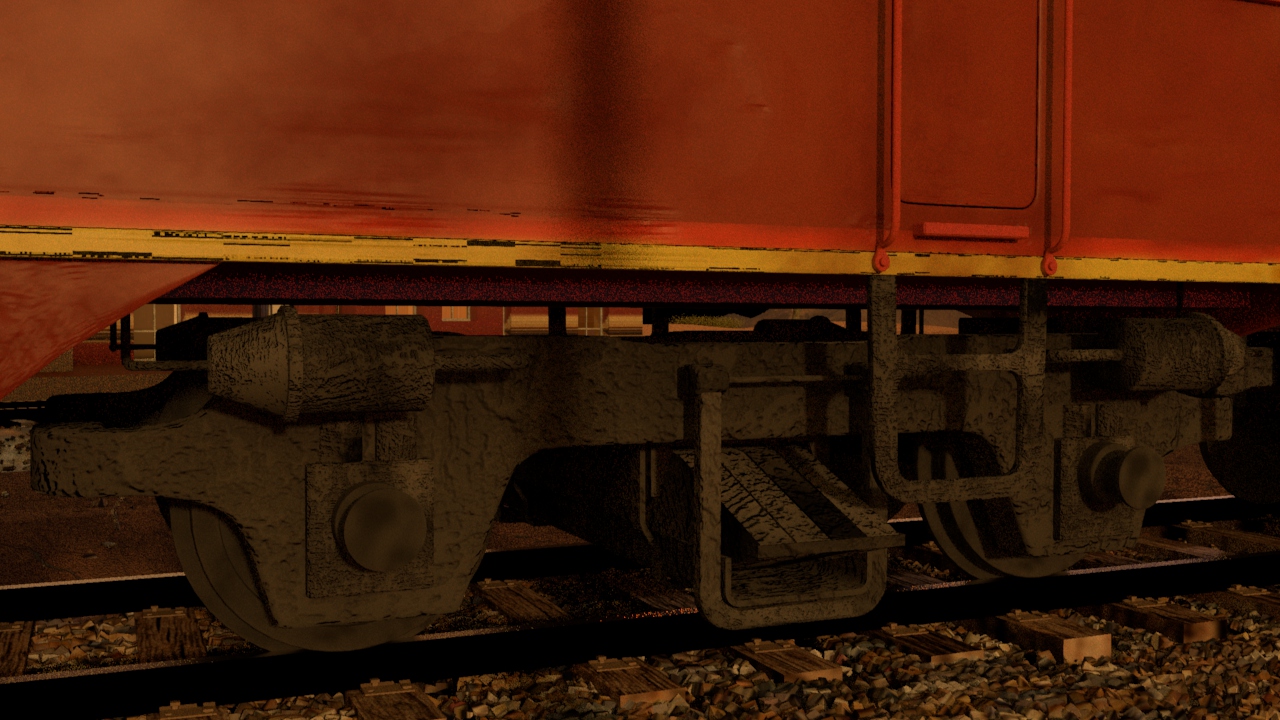
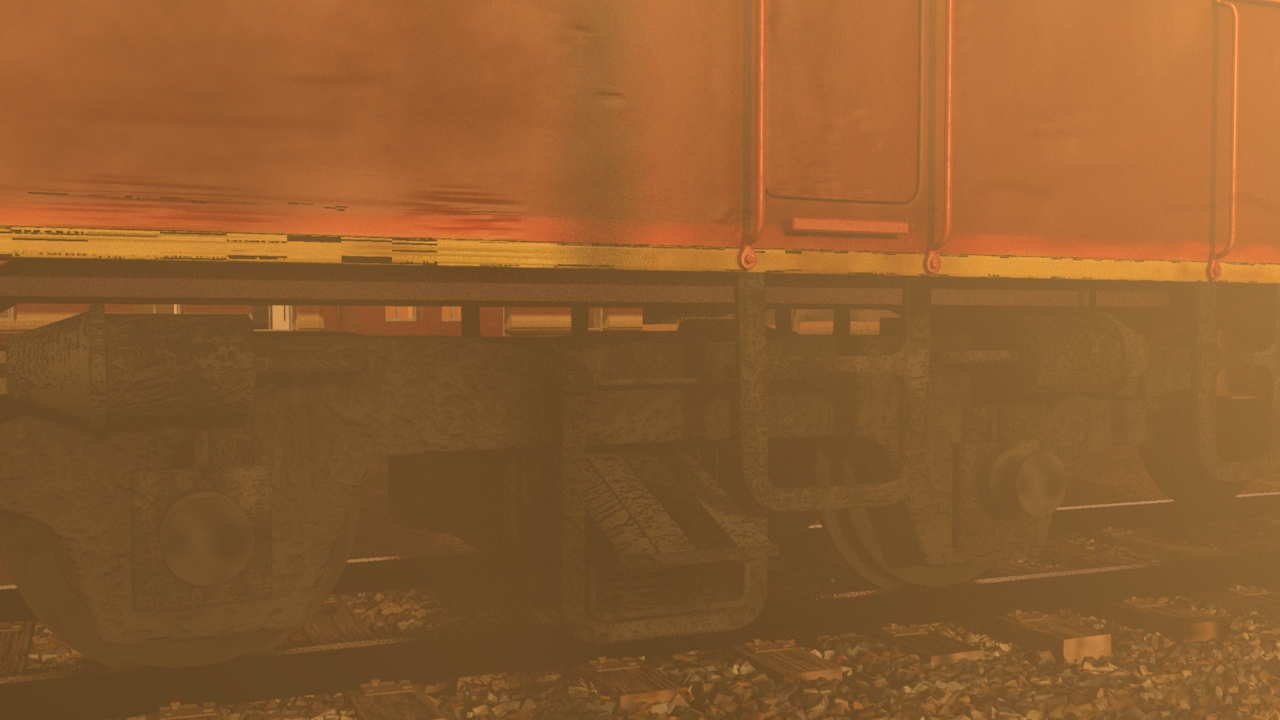
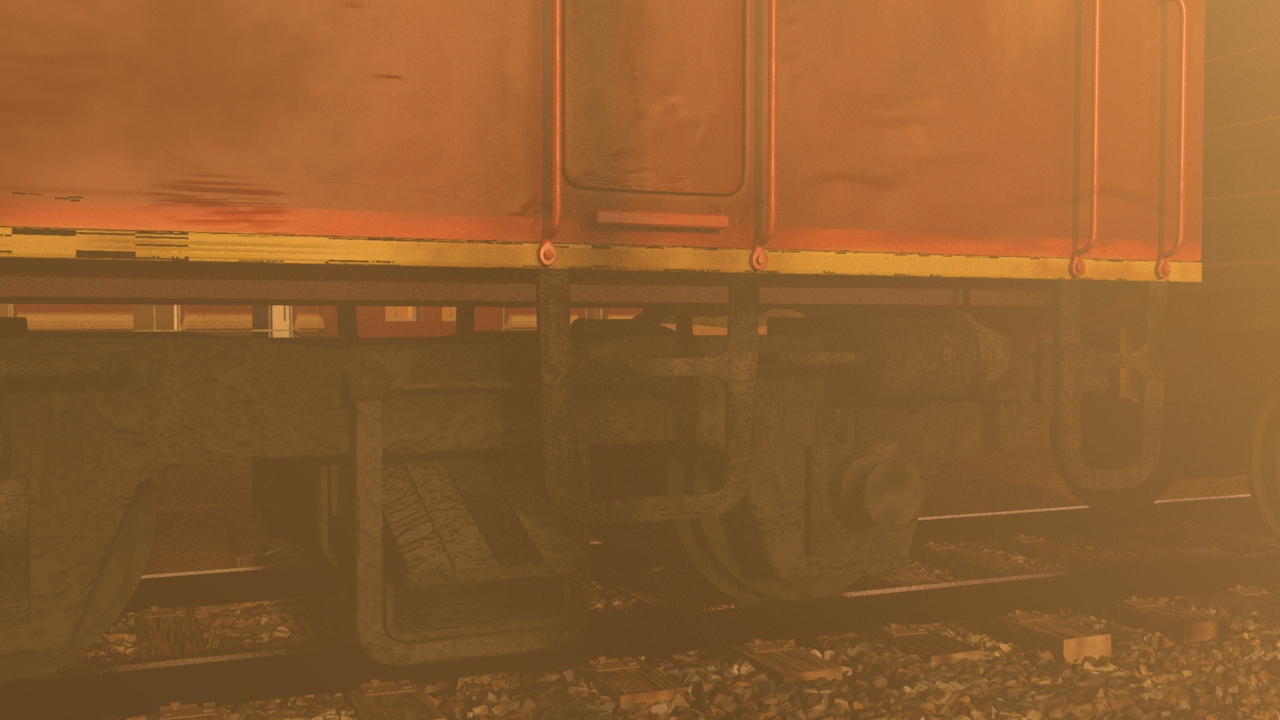
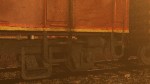
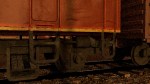
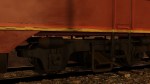
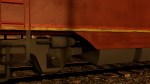
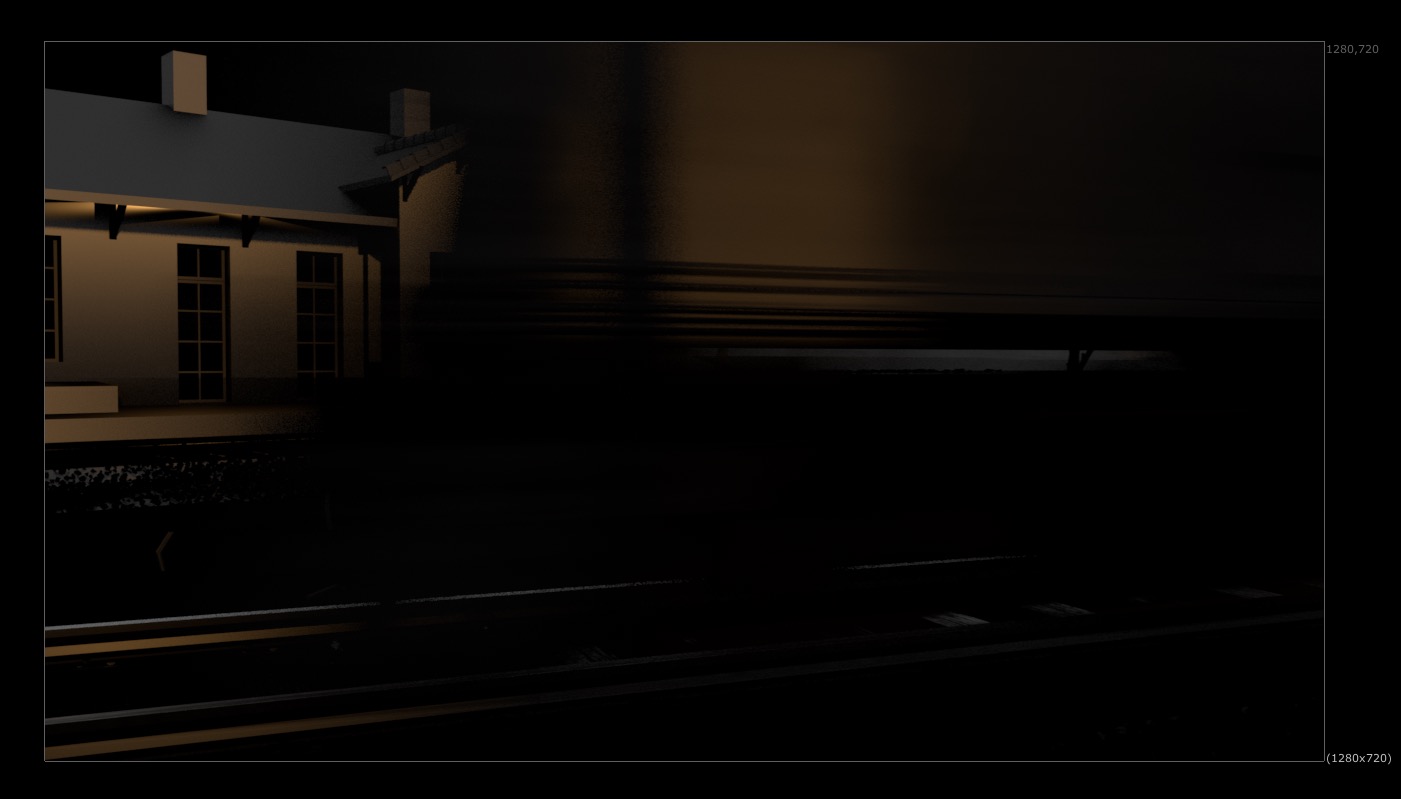
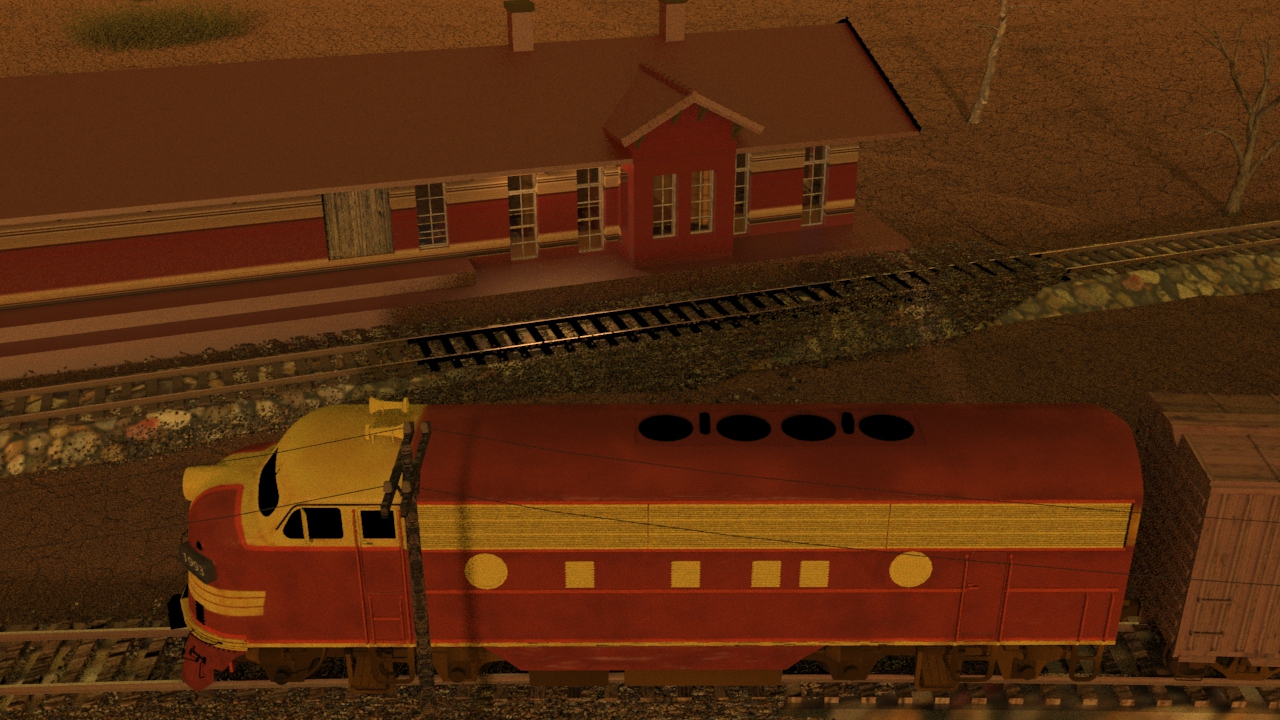
SHOT 003
Then next shot is shot 3, being able to use some of the work done for shot 5 such as main lighting, UVs and textures. Animation of the wheels has been done and working on the lighting for the station depo and lightening flash.


-
- frame 250
-

- frame 251
-

- frame 252
-
- frame 253
-

- frame 254
-

- frame 255
-

- frame 256
-
- frame 257
-

- frame 258
-

- frame 259
-

- colour temperature 6500
-
- colour temperature 10000
-

- colour temperature 3000


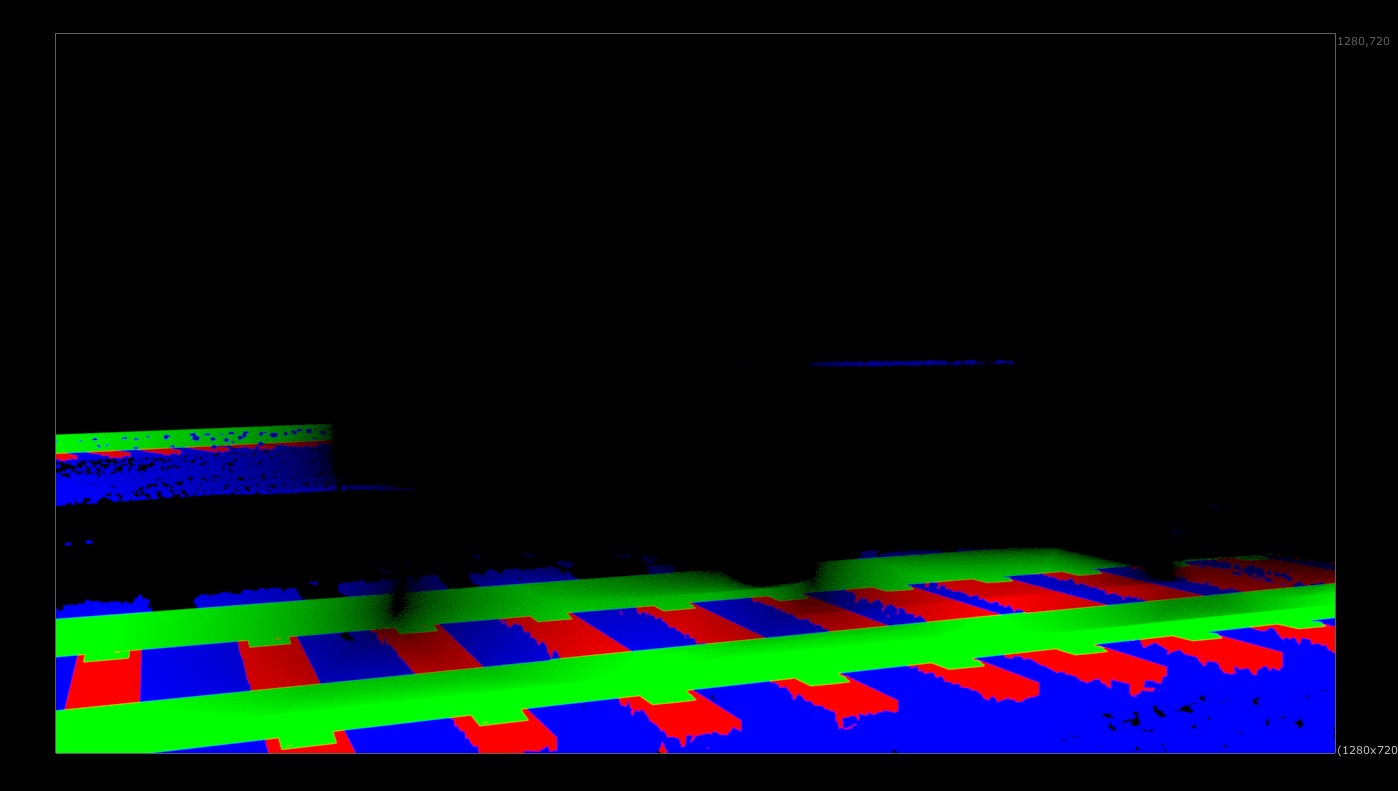
lightening flash test with aiArea light exposure
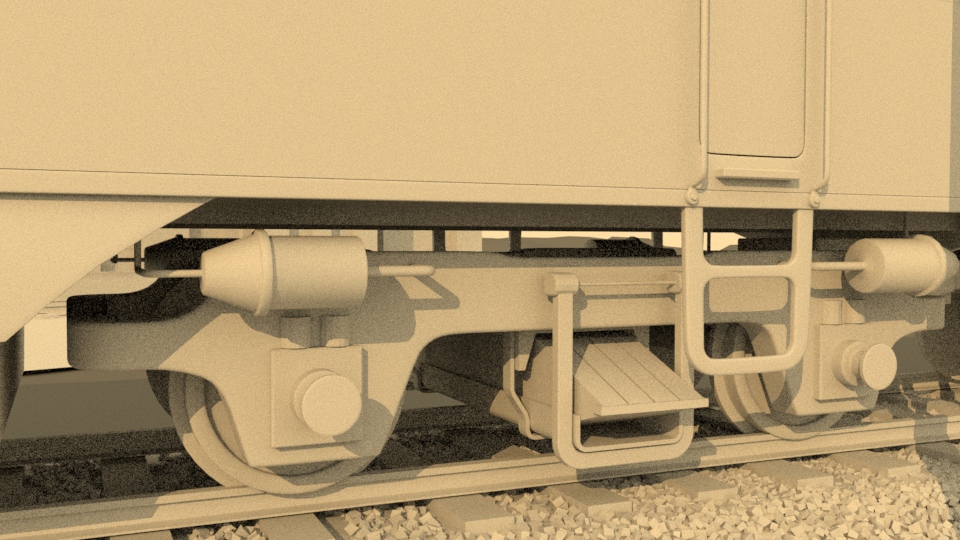
EXPERIMENTING with SHADERS, TEXTURE MAPS, PROCEDURAL NETWORKS and COLOURS for the WHEELS:

TEST RENDERS every 10 frames, varying details as I go:
-

- frame 220
-
- frame 230
-

- frame 240
-

- frame 250
-
- frame 260
-

- frame 270
-
- frame 280
-

- frame 290
-
- frame 300
-
- frame 310
-
- frame 320
-

- frame 330

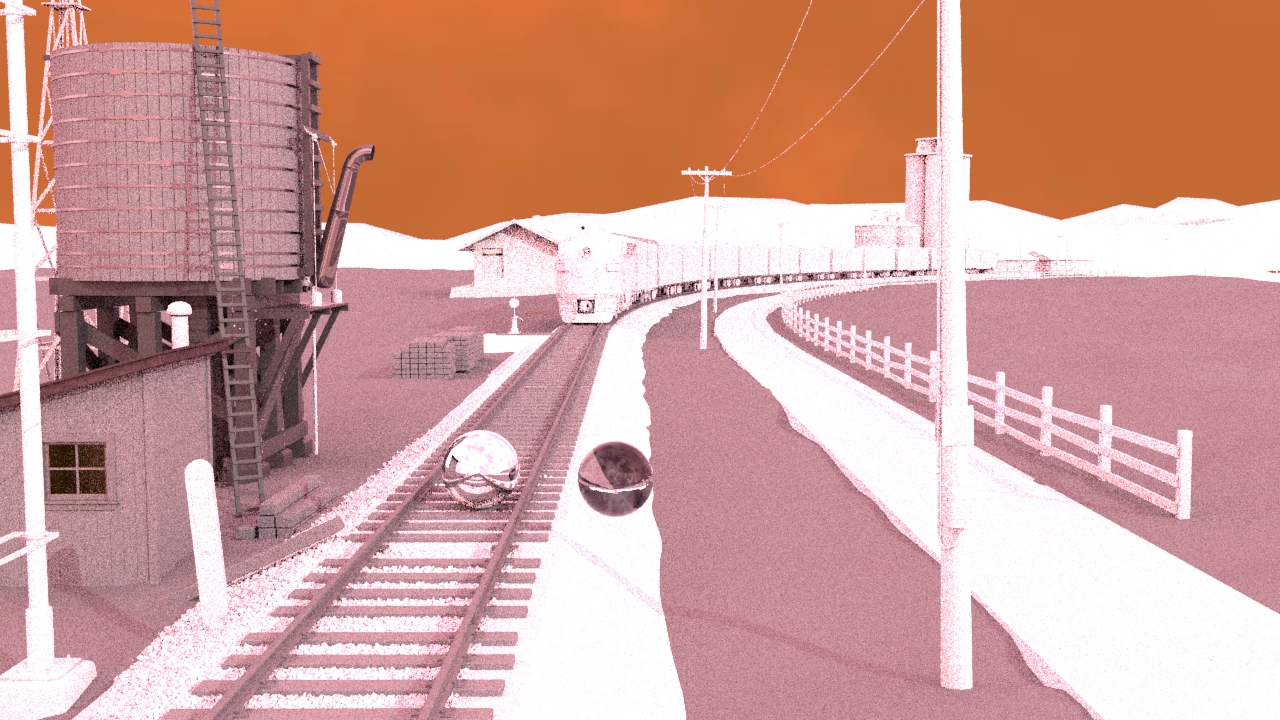
Arnold’s Motion Blur
-
- direct specular
-

- indirect specular
-

- refraction
-
- id engine
-
- id ground mountain tree
-
- id stone and railway

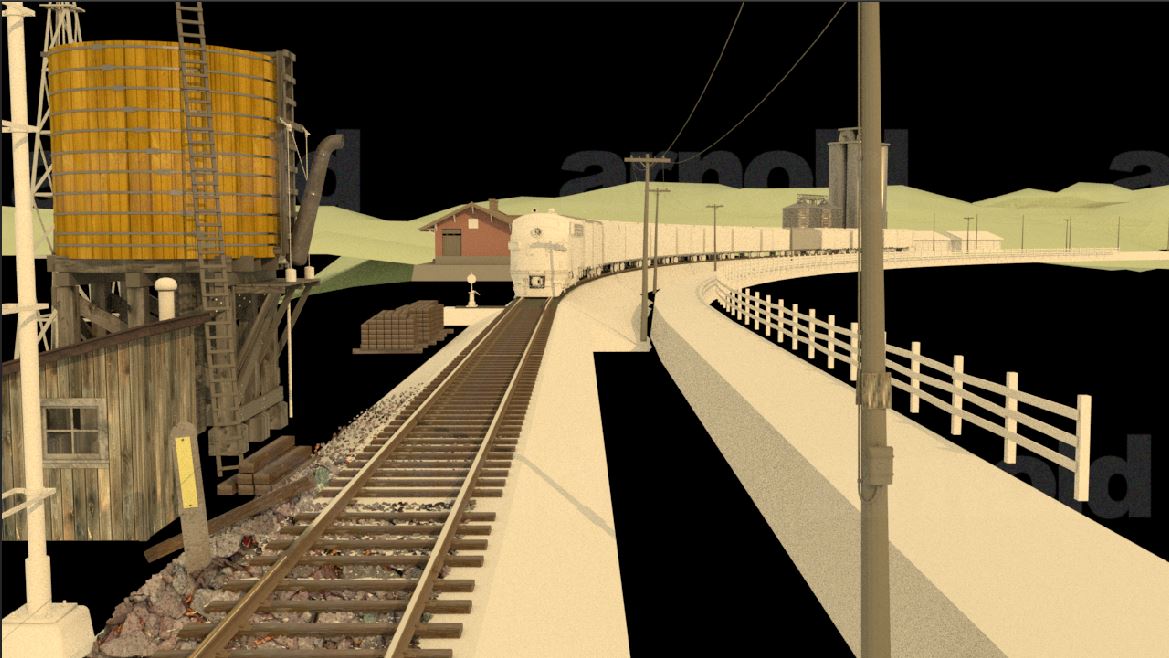
Therese starting on comp. Shuffling out AOV passes and sky matte painting behind test render from Maya’s .exr file.


CONTAINER TRAIN IN LANDSCAPE – JEFFREY SMART
IDEAS FOR ENVIRONMENT COLOURS

Oblivion: Universal Pictures, Relativity Media, Monolith Pictures, Chernin Entertainment, Radical Studios
Oblivion 2013 Extensive Behind the Scenes Inside Look

Demers, O., Urszenyi, C., 2002. Digital texturing & painting. New Riders, Indianapolis, IN. Page 106

Sarah Stone’s Shells 1781 shows an exotic assortment of shells thought to have been collected on Cook’s first Pacific voyage from 1768 to 1771. National Gallery of Australia Masterpieces for the Nation Fund 2016

WHEN THERE WERE STATIONS This site is about the way railways were – more or less after steam, but during the next phase of railway ‘development’ – the rationalisation. It happened all over the country, some states before others, but happened it has. Branch lines closed, and the evidence of their existence obliterated. Some lines remain open, but the stations were razed. The signal cabins, the intricate lattice signal masts and gantries, the staff… all gone – well mostly.
SOME THOUGHTS TO CONSIDER
Colours: Complementary, Split Complementary is more harmonious and still high energy, more complex. Double Split Complementary. Monochromatic with complementary highlights. Chiaroscuro is a gradation of light and darkness to create beautiful depth in atmosphere and mood.
Choose a focal point, controlling the focus.
The use of contrast, the luminous quality, level of detail and textural information.
Cloudy, less saturated, void of harsh shadows, lighting more constant. Value and saturation affected by the loss of light, muted and cool. Sunny is more saturated and warmer hues.
Quality of the edges, soft/hard creating sunlight, depth and harmony.
Consider the colour and size of the highlights, different colours and qualities on the same objects to create depth, authenticity to realism.
Shadows use cool colours, atmospheric depth is more muted and less saturated with the sky seeping over the distance. Softness in details does not lessen realistic qualities, it can exemplify realism. Let detail fade away, including into the shadows. Create changes in texture as the eyes perceive distance as lack of detail and can get variation and interest from monotone hues.
Environments impact on textures, bumps, reflections, specular highlights. Create a perfectly sunlit texture first, texture to reality, then change the hue and saturation to reflect the lighting and save both copies.
Look at photos, do paintings and scans of different surfaces for the objects, exploring how elements might look with colours, textures, damage, wear and tear. Look for the unexpected. Do a hand painted colour and grunge map, then open in photoshop and unwrap it into layers of basic colours and textures.
Adjust hue/saturation, levels, add different tones, look at inverting versions and using layer masks. Colour Map layer using the Magic Want (Airbrush, Smudge) with Multiply set to 90% to add more definition. Bump Map from this with different values of grey, consider a second Bump Map to accentuating some bump areas. Specular and Reflection Maps could be inverted, dark areas are less specular or reflective. Go layer by layer, maybe inverting and changing blending operations and opacity.
GENERAL
Color Palettes From Famous Movies Show How Colors Set The Mood Of A Film
SOUTH BRISBANE Queensland Government Railways
Trans Australian Railway at Pimba South Australia
STYLE
ARTISTS
Arthur Streeton
Sydney Nolan
Jack Absaiom
James Ainslie
Hudson River School
PHOTOGRAPHY
Blake Rudis
Daily Advertiser Your #Riverina, December 9 | Photos
CLOUDS
Clouds vary in density, thickness and composition where there will be a definite light and shadow side. Clouds transmit a greater quantity of light to the shadow side through internal scattering than the volume of light they pick up from secondary sources.
Greys mixed from blue and orange, red and green or violet and yellow.
Fine Art Photography of The Outback
LANDSCAPE
Lake Cargelligo, New South Wales
Federal Government review of grain rail lines in NSW
LIGHTENING
What comes first: thunder or lightning?
Netweather Community: Colours of lightening

CGI & VFX Lighting Showreel 2016 Alastair Dixon – CGI & VFX https://vimeo.com/145005694
MILE POST
POWER BOXES and LINES
RAILYARDS
RAINBOW
South Australia and Northern Territory
SIGNALS

The power-operated three-position upper quadrant semaphore signal, American in origin, was introduced to New South Wales by the English signal engineer, Mr C.B. Byles, in 1913. Mr Byles (1871–1948) led New South Wales Railways through its introduction of power signalling, from 1911 until 1929.[6]At night, two lights, one above the other, are exhibited. The spectacle attached to the signal arm has three lenses, that is a green for the vertical clear position and red for the other two lenses. In some cases the semaphore arm moves to the horizontal danger position when the line between the distant signal and the stop signal to which it applies is occupied. The Distant signals capable of exhibiting Danger are fitted with an upper red/green spectacle; the two-position versions have a fixed upper green. The Home/Starting signals give three indications. The arm moves from horizontal displaying a red light, upwards to 45 degrees displaying a green or yellow light, and fully vertical also displaying a green light. In double light areas, the lower light of these signals stays red until a full Clear indication is shown. Therefore, these signals will show the same lights indicated by the Lower Quadrant Semaphore Distant and two-arm signals, that is, two greens for Clear, a green over a red for Caution and two reds for Stop.
SIGNS
SILOS
Federal Government review of grain rail lines in NSW
SKY
Shooting the Aura of the Australian Outback
STATION
TRACKS
TRAIN
Shutter Stock Hitched Coupler Freight Train
Trains Adele Somer
Fast Trains HD Wallpapers Free Download
42101 4501=5L03 tour train at Mount Murray NSW
Loco Hauled Passenger Trains to Bacchus Marsh: Australian Trains
How Trains Turn
Wheel-rail interaction No 1

CSX Work Train In Reverse Wheels Lock Up Sliding Along Rails
Coupling Cars
Train starts up
SWITCHES
Rigging a train with IK Splines in Maya 2010 Cave House Studios
Maya – Animate a Train using IK Spline Handle Tool
Wheel rigging in MAYA 2014 the best solution in 10 mn
OUTDOOR ENVIRONMENT
Outdoor environments have the sun or moon as the light source and has gradation which is darkest straight up and lightest at the horizon being colour depends on the time of day. Need to think about where the line of sight bounces off the form into the sky and think bout the value and colour the sky is at that point. The contrast between the object and the sky affects how much of the reflection of the sky is seen in the object and this could be where there are shadows, an illusion of the cast-shadows being more reflective.

Sunbeams, small areas of atoms being illuminated and edges of cast shadows of clouds.
Atmospheric Perspective or perceived depth with further away having less value. The contrast shift between the light and dark values with less colour saturation than surfaces that are closer. Strongest at the horizon as has more atmosphere, looking straight up has less then looking further away such as the horizon.
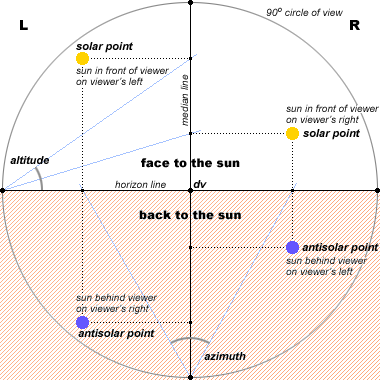
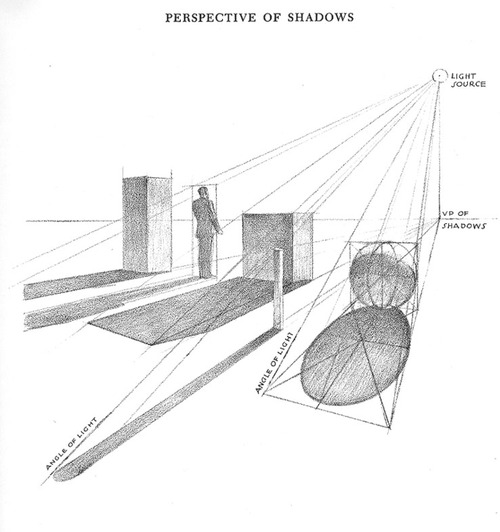
Sunlight direction and shadow construction is parallel and parallel lines in perspective have a vanishing point. Light rays share a vanishing point. Long when close to the horizon. Positive Sunlight, above the horizon and back lit. Negative sunlight which is below the horizon and front lit. Sunlight always has a constant angle of incident giving an even value over a surface. When the form changes the light’s rays change angles of incidence and the values change.


NATIONAL GEOGRAPHIC Earth’s Atmosphere, Clouds, Deserts, Ghan, South Australian Outback, Coober Pedy, Desert Sunset, Desert Thunderstorms
You don’t need to show light-by-light breakdowns unless it’s something really interesting that people couldn’t have guessed. For compositing exercises, showing before/after sometimes shows what you accomplished.
Your showreel should show that you can integrate 3D elements into a live-action environment, and also that you can light fully CG environments.
Composite a 3D creature, character, or vehicle into a live-action environment. Show that you can get the colors, lighting, shadows, and reflections to match between a real environment and something that you have lit in 3D. Demonstrate your range by lighting and rendering a variety of subjects, including some that are reflective, some that are organically textured or translucent, and some that are furry or have hair.
Show that you can light all-3D environments, including interiors and exteriors. The mood of the shot should be reflected in the lighting and colors as well as the content of the scene.
In addition to still images, it is a good idea to include some animation – not to prove that you are an animator, but only because most professional work involves dealing with moving footage. If you don’t have any animated characters, you could animate aspects of your environment such as the time of day, or different weather or seasons. Moving objects such as curtains, tree branches, or doors that cast different shadows and change the lighting during the shot. Some of the best lighting demonstrations involve studying a single location as the time or weather or mood changes; this shows how much lighting can add to a scene. If you are also interested in an effects TD position, then some effects animation—such as water, fire, or smoke—could be a good addition to your reel as well.
Developing something original, unique, or personal will make your showreel more memorable and reflect well on you as an artist, instead of doing fan-art or rip-offs of feature films.
-jeremy
Possible Job Description:
Good understanding of shading in Vray for Maya
Ability to use vray shading techniques to create specific stylised looks to match concept art.
Ability to optimize shaders to achieve the shortest possible render times and handle memory limitations.
Ability to spot and troubleshoot problems relating to shaders.
Ability to use Photoshop to alter painted maps given by texture artists.
Ability to alter UVs when needed to optimise time taken to shade an object.
Knowledge of lighting and rendering in vray.
Understanding of colour and light in the real world.
Knowledge of specific light types and how and when to use them.
Ability to light an environment from scratch.
Ability to optimize a scene and lights to keep render time down.
SCRIPTS USED DURING THIS PROJECT
Arnold RGB Matte AOV
This script creates RGB Matte AOV similar to VRays Multi Matte set up. I personally prefer this to Arnolds built in Object ID pass. © 2016 Bryanna London
Shuffle out EXR buffers
# Shuffle out EXR buffers
# Vincent Rossini 2012
# v1.0 (Release Candidate)
nodes = nuke.selectedNodes()
for node in nodes:
if node.Class() == ‘Read’:
channels = node.channels()
AOVs = list( set([channel.split(‘.’)[0] for channel in channels]) )
AOVs.sort()
if ‘rgba’ in AOVs:
AOVs.remove(‘rgba’)
for AOV in AOVs:
shuffleNode = nuke.nodes.Shuffle(label=AOV,inputs=[node])
shuffleNode[‘in’].setValue( AOV )
shuffleNode[‘postage_stamp’].setValue(False)
gradeNode = nuke.nodes.Grade(label=AOV, inputs=[shuffleNode])
else:
pass
# Extract AOVs for grading
# Vincent Rossini 2012
nodes = nuke.selectedNodes()
for node in nodes:
if node.Class() == ‘Read’:
channels = node.channels()
AOVs = list( set([channel.split(‘.’)[0] for channel in channels]) )
AOVs.sort()
if ‘rgba’ in AOVs:
AOVs.remove(‘rgba’)
for AOV in AOVs:
shuffleNode = nuke.nodes.Shuffle(label=AOV,inputs=[node])
shuffleNode[‘in’].setValue( AOV )
shuffleNode[‘postage_stamp’].setValue(False)
gradeNode = nuke.nodes.Grade(label=AOV, inputs=[shuffleNode])
else:
pass
Applying UVs to multiple objects:
import maya.cmds as cm
#grab all the selected objects
selectedObjects = cm.ls(sl=True)
#save first one into variable
#pop first one out of the selected objects list
driver = selectedObjects.pop(0)
#for each object in the selected objects list
for object in selectedObjects:
cm.select([driver,object])
#transfer attributes
cm.transferAttributes(sampleSpace=4,transferUVs=2, transferColors=2 )
”’
Name: Average Component Position – v1.0
Author: Vincent Rossini
Python: 2.6.4
Icon: avCP
Description:
This script will generate a locator at the world-space position of a single component
or for multiple components at their average world-space position.
Dependencies:
The script will not work over multiple geometry surfaces.
The script requires one to select a compatible component type from the following list:
NURBS Curves/Surfaces Polygonal Surfaces Subdiv Surfaces
CVs Faces Faces
EPs Edges Edges
Verts Verts
Usage:
1. Select component/components.
2. Click the avCP shelf button.
”’
import maya.cmds as mc
def AverageCompPnt(*args):
Components = mc.ls(selection=True, flatten=True)
mc.select(clear=True)
Node = Components[0]
Tmp = Node.split(‘.’)
TmpSize = len(Tmp)
NodeTransform = Tmp[TmpSize-2]
if ‘Shape’ in NodeTransform:
NodeType = mc.nodeType(NodeTransform)
else:
NodeAlias = mc.listRelatives(NodeTransform, shapes=True, path=True)
NodeType = mc.nodeType(NodeAlias[0])
if NodeType == ‘nurbsSurface’ or NodeType == ‘nurbsCurve’ or NodeType == ‘subdiv’:
SelectedVerts = Components
else:
SelectedVerts = mc.polyListComponentConversion(Components, toVertex=True)
ClusterTmp = mc.cluster(SelectedVerts)
spaceLoc = mc.spaceLocator(name=’averagedPoint_0#’)
pointConTmp = mc.pointConstraint(ClusterTmp, spaceLoc)
mc.delete(ClusterTmp)
testSelection = mc.ls(selection=True)
if len(testSelection) == 0:
mc.warning(‘No components selected! Please select component/s and try again…’)
else:
AverageCompPnt()
Name: FixReflectionRefraction – v1.0
Author: Vincent Rossini
import maya.cmds as mc
polyObjects = mc.ls(type=”mesh”)
for i in range(0, len(polyObjects), 1):
#print polyObjects[i]
mc.setAttr( “{0}.visibleInReflections”.format(polyObjects[i]), 1)
mc.setAttr( “{0}.visibleInRefractions”.format(polyObjects[i]), 1)
SETTING MODEL UP
2 SIDED LIGHTING OFF
SELECT ALL GEO and CHECK NORMALS, normals > unlock, normals > set to face, normals > conform
DELETE HISTORY
TURN ON REFLECTION and REFRACTION FOR THE GOE
aiSTANDARD ON EVERYTHING
UV LAYOUT and CHECKER ON EVERYTHING
PRE-PRODUCTION PROJECT
A realistic scheduling of tasks and deadlines to include a backup concept.
- Layout showing the position model in environment
- Rigging
- Animation
- Lighting
- Textures, UV Layout
- Shading
- Rendering
- Rendering Pipeline
- Compositing
SHOW REEL PROPOSAL
Pitch and present between 2 & 23 ideas for your major work.
What I am considering:
- story: sense of concept, staging
- lights: story telling, warm and/or cool, interaction of light over time, weather events, time of day, light linking, perspective
- camera: story telling, camera rig, shot angles, shot sizes
- movement: how and when, camera, objects, environment, aerials, motion blur on foreground object
- story: as progression of events, unfolding, left wanting more, reveal
- surfaces: changing over time, contrasting
- animation: timing, weight, personality
- light sources: candle light, my own HDRI, windows, lamps, street lights, sky lights, sun, moon, lighthouse, paper lanterns
- environment: fog, mist, smoke, lighting, fire, glow, sun rays on water like sunset
- out of frame: light, location through window, car driving past, lighthouse, sound, gobo
- background: environment, reference, give perspective,
- translucent: jellyfish on black, leaves
- surfaces: human, face, eyes, fabric, concert, timber, plastic, metal, glass, water, sky, bubbles, car, aeroplane, television, fish bowl, water droplets, rain, balloon, hammer, insect, helicopter, outer space
- times: different times of day and night with int and ext, moon, sun, shadows
- scenes: bedroom, factory, cu desk, ws landscape, city scape, suburbs, lane way, kitchen, camera, phone
- options: live action, different renders, wedge study
- depth of field
- sms
- set extension
- chrome balls
- personal logo
- trailer at the end of credits
- if it is a large scene I need to see some detail
- if interested in being realistic show ability to be realistic to the image and consider using difference references
- story v quality
- show: software, how it was done, skill sets
- with many options choose a pathway where it will be finished
Possibilities to include and breakdowns:
SHADER BREAKDOWNS
- diffuse direct
- diffuse indirect
- specular colour
- specular direct
- specular indirect
- reflection
- refraction
- ambient occlusion
- sub surface scattering
- luminance depth
- opacity
- illumination
- shadow
- default shading
COMPOSITE BREAKDOWNS
- background
- geo
- beauty
- lights
- volumetric scattering
- global illumination
- final gather
- motion blur
- dust particles
- fog
- depth of field
- z depth
- colour correction
LIGHTING
- lighting & flat comp
- primary lighting
- sky
- key
- fill
- rim
- kicker
- glow
- ambience
- environment
- candle
SHADOWS
- key light shadow
- fill light shadow
TEXTURE MAPS
- colour (colour, _int, sRGB.tif .tga) or diffuse (colour, _int, sRGB .tif), remove the specular component.
- diffuse rough (grey scale, sRGB .tga)
- diffuse weight rough (grey scale, _int, sRGB.tif)
- specular (grey scale, _int, sRGB.tif)
- specular diffuse (grey scale, _int, sRGB .tga)
- reflectivity (grey scale, sRGB .tga)
- displacement (open exr, 32-bit, floating point, RGBA), (tiff, 16-bit, integer, RGBA)
- normal, purple, (16-bit, tif,4K), (_lin, .exr .tif .tga, )
- ambient occlusion (16-bit, tiff, 4k)
- cavity (white, grey scale, 16-bit, tiff, higher filter)
- bump (grey scale, tga)
- weight (grey scale, sRGB .tga)
- opacity
- mask
- texture (.tif)
OTHER
- colour space: sRGB, IEC61966-2.1, linear, RGBA
- files: raw, tiff, exr, 4096 x 4096 – 4K
- depth: 8-bits/channel, 16-bits/channel
- textures
- images (.jpg, HDR Env Ref _ibl)
- fog
- colour correction
- final output/comp
- uv layout
- lookdev
- RGB
- velocity
- software used: maya, nuke, photoshop premier, after effects, uv layout
- techniques used: shading, rendering, lighting, animation, clouds, smoke trails, fluids, particles, destruction, snow, ice, rocks, ocean shading, compositing, fx, explosions, smoke dust, volumetric clouds
- skills: demonstrate how they work, TX files, Programming, Animation, Rigging
- credits: black on white, white on black, colour and name, lighting, quote, guided by, music, software used icon symbol, skype, year, web address, email address, mobile, mentors, graduate show reel, linkedIn, models from 3d render.com
MACBETH CHART: White and 18% Grey, mid grey 128, 128, 128.

macbeth chart
IDEA ONE
This idea is to show contrast in how light interacts with different surfaces and objects in an environment.
Create a mood, if the objects are not moving in the scene there is the camera and various shots to show different areas of the scene. Focus on the lights to add colour and movement such as the lights changing over time either with time of day or the weather and could see this happening in the surfaces of the objects in the scene.
To help achiever this the light sources could be candle light, HDRI, windows showing a shape or location, lamps, street lights, ceiling sky lights, what is happening out of the frame such as a car driving past. Using the background, even if not in the scene for reference to give perspective and motion blur.
The use of fog, mist, smoke, lighting, fire, glow.
Creating a story with the lights.

Challenge #23: Mad Science Modeled by Andrew Kin Fun Chan and Dan Konieczka.

Challenge #6: Candle Light Modeled by Jeremy Birn.

Challenge #4: Bottle Collection
IDEA TWO
Taking these ideas and applying it to an outside scene, again thinking of how to show mood and movement with the use of lights. With this scene it would be possible to include the sky to show the environment in the shot and consider some simple animation of the parts of the model, like the signal coming down and the train moving.

Challenge #14: The Local Train Modeled by Alvaro Luna Bautista.
IDEA THREE
Take this scene that I lit last year and light it for different times of day, creating different moods, going through a tunnel, in the country side, in the city, at a train station, raining snowing.


Challenge #37: BAY AREA TRANSIT by Preston Plat
HDRI background: http://www.hdrlabs.com/sibl/archive.html
Helped GoldenHour
Author: Blochi
Location: Los Angeles
RESEARCH, RESOURCES and SOME BENCHMARK SHOWREELS
10 Tips to Take Your Lighting and Compositing Demo Reel to the Next Level
So, you’ve created a masterpiece. And you’re ready for the world to marvel at the details! Creating an animation of your environment can lead to impressive results. But where do you start? Mario Cameras shares his top tips for arch-viz animations and explains why it’s important to plan ahead to make the most of your valuable time.
HOW TO CREATE A STUNNING PORTFOLIO, WITH JARED SOBOTTA
Jared is an Environment Texture Artist whose work spans a variety of AAA game studios including White Moon Dreams, Bioware and, currently, Naughty Dog. Based on his experience, we thought Jared the perfect person to share some secrets on how to be successful landing an interview in this industry based on compiling an all-star portfolio. The below breakdown is packed with valuable information for all artists who are carving their dream path towards creating awesome visuals for movies, games and TV. Check it out:
CG Spectrum’s Animation Department Head, Mark Pullyblank, provides some invaluable advice on what Animation Supervisors look for in a demo reel. He also gives some great tips on what to do and what NOT to do.
- You’re only as good as your worst piece.
- Cut the fat. Size doesn’t matter.
- Send it out.
- Don’t assume you’re not qualified.
CG Society:
- lighting challenges forum > mini challenge > lighting challenge > index of lighting challenge
http://www.3drender.com/challenges/
Turbo Squid:
3D Models for Professionals
TF3DM 3D Models for free
> smart IBL > sIBL Archive
Belight:
3D Objects and Textures Web Resources, find some web resources for 3D objects (3ds, skp, Ogre XML formats supported) and textures, that can be used in Live Interior 3D Standard or Pro Editions. Please note that we cannot guarantee that all 3D models and textures can be properly imported and used in Live Interior 3D software. Check the model and texture copyrights on each particular website.
https://www.belightsoft.com/products/liveinterior/3dobjectsresources.php
Blendswap is the biggest site for free 3D-models made with blender for blender users. The models are released under different creative commons licenses and you need to create a free account to be able to download them.
Import the model into Blender and export it back out as an obj or fbx files since these 2 formats are readable by Maya.
HDR Images: sIBL Archive
Artist of the Month Reinier Reynhout
3dRender for Lighting Challenges and Resources
CGI & VFX: Showreels Vol.1 – YouTube
CGSOCIETY How to make a Lighting Showreel?
Amman Akram 3D Artist & Developer
Strictly Showreels, tag “arnold”
10 key tips for lighting and look development
TIPS TO CREATE MOVIE QUALITY ASSETS FOR YOU DEMO REEL I honestly believe that choosing the right concept is key to the success of your work. Pick something you like and be passionate about it, because you are going to work on it for a lot of hours!
SHOW REEL TIPS
- only your best work, judged by your worst work, below par work leave off
- the work you want to be doing more work of
- short, 30 sec and amazing work with an eye for design and animation
- personal piece, done more or less on your own, could be an intro
- edited well with every shot showing something new
- leaving the viewer wanting more, want to go and see the portfolio
- see something else in the portfolio that was not on the reel
ACM SIGGRAPH: SHOWREEL PLANNING WORKSHOP
SEEING IS BELIEVING 1/2/17
Speaker: Dr Shilo T. McClean, is the Head of the UTS Animal Logic Academy and Chair of Sydney ACM Siggraph (Professional Chapter). She is the author of the books: Digital Storytelling – the narrative power of VFX in film and Digital Playing Fields – new rulz for film, art and performance.
http://sydney.siggraph.org.au/
43 sections, 21 films, 10 montages of 4 to 10 sec long usually being 3 sec, 25 years of work = 3 minutes
The show reel is what opens the door, if it is not in the showreel the conversation does not go any further. Will always be learning including for work given to you that you do not know how to do and need to learn how to do it. Prepare and go about the work in a way that facilitates how the work is analysed, planning, how to go about your work and learning. Always be working on something, working to make it better and making new work. Spend time exploring, researching and finding out about what the shot, sequence and/or movie is all about, what is it that is needing to be achieved. Need to go the distance for the eye catching and detail of what you are wanting to achieve. Show the diversity, range of ability, different styles and skill area of what you can do.
One perfectly created shot is better than one really good shot padded out with other not so good stuff, only put the beautiful shots in. What catches your eye and why. Be brave, critical, get feedback and only the best stuff. Sell them on what it is that you can do. Do not need to see how you have improved, they only want to know that you are good and assume that you had to improve to be good. Not selling ‘improving’, sell what it is that you can do, I can do this shot/work and this is the standard I can do it at, a sense of yes you are up to the job, show the technical standards of your work. Can show the elements and how you put it together, breakdowns.
How can I look at this differently? How can I find a way to see what I want to make in a way that other people are not doing? How can I do this differently? Dedication to learn what you want to craft as an image.
Close up is a clever way to show how technically awesome it is. Draws you attention to the things that you want to most show off. To show it in all its detail, show it off and not cheating like moving fast, putting it all out there to be seen.
Look at places other than were your eye is being told to go, look at what else is in the shot and everything else had to be made and put there.
What catches your eye and why? Variety, diversity, range of different things even from the same film, different kinds of shots, editing creating narrative moments and changing energy, maintaining interest with pacing and music, length, music choice that setting the rhythm and pace.
What shots do you wish you had done and why? Notice this and think about why, was it the lighting, the colour or the way it moved, what was in the shot that made me respond, what informs my understanding of how images work together, what is making something eye catching. what grabs me, why does this grab me, what is it about the shot that is so powerful and engaging and then want to bring this to the shot you are making. Always looking, learning and living in that approach to the world, how you walk around in the world.
How do they make you feel? What is about them emotionally, did they make you feel anything, emotional experience you have, have an emotional connection? Close your eyes and think of a particular shot that caught your eye.
But, before you go and throw together a 20-minute opus beginning with your Primary School finger paintings and finishing with the 100-layer environment sketch you just finished, make sure you read through our list of tips provided by several of our mentors here at CG Spectrum.
- MAKE YOUR REEL OR FOLIO ENTERTAINING “What’s compelling to me is if I forget I’m watching a demo reel. I’m just being entertained.” Mark Pullyblank
- OPEN AND CLOSE WITH A BANG It is incredibly important to grab the viewer’s attention as early as possible with what you think is your best piece then leave a them with a lasting memory to close.
- KEEP IT SHORT AND SWEET A demo reel or folio that is concise and concentrated is not only filled with high quality content but also stands a better chance to be appreciated by the viewer.
- BE RUTHLESS WITH YOUR OWN WORK It always pays to look at your work objectively.
- MAKE SURE IT’S APPLICABLE TO THE POSITION OR STUDIO Do your research and create pieces that show off what you can do for the client.
- SHOW WORK YOUR PROCESS In some instances, studios and clients might ask to see how you go about creating your work. They might want to see that you have mastered the basics or that you are using techniques that they can work with.
Tram Wires Swanston Street 2017
Katrin Starke⎜Roto/Paint & Compositing Demo Reel
Sony Pictures Imageworks – Lighting Reel Tips
The Present Lighting Breakdown Markus Kranzler1 month ago
Making OFF— VFX Breakdowns
Show Reel 2012 Cosku Turhan
Edison Compositing Reel 01/2017
CGI Animated Short Film HD: “A Fox Tale Short Film” by A Fox Tale Team
Lee Sunnyu – Lighting show reel (magnifying glass, close ups, movement, surfaces, reflections)
Billy Jang – CG Lighting Reel 2014 (movement, layers)
Ryan North – Lighting and Compositing Artist – 2014 show reel (surfaces, reflections, 7 11 falls, night lights and on sign)
Jean-Aves TEILLET – CGI VFX Showreels HD: “Shading/Lighting/Rendering Reel” (sky, glass, metal, shadows)
Damir Filipovic – CGI VFX Showreels “Lookdev & Lighting Showreel” (CU, surfaces, glass, reflections, shadows)
GROOVING – A VFS Rigging/TD demoreel by Bruno Nicko
Tim Hoffman – CGI & VFX Showreels: “Look Dev, Lighting & Texturing, Technical Director Reel” (night, paper section, spot light, volumetric)
Lighting / CG Generalist Showreel 2015 James Lojo
Animation Showreel 2014 Edwin Schaap
Ali Dixon – VFX Showreel – 2012 (reflections, windscreen, bubbles)
Sebastien Carrillo – CGI VFX Showreels HD: Lighting & Look Dev Modeling // Texturing (mix of CG and live action)
tejas tried – lighting show reel 2009-2014 (Life of Pi, bunnies Yogi Bear, Alvin)
David Luong – 2016 Lighting/Compositing/DMP Show Reel (shadows, breakdowns, candle light, particles, explosions, cloud, fog, petals, helmet, reflections, contrasting surfaces)
Antonio Fylladitis – Shading and Lighting Showreel 2016 (breakdowns, CU, glossy, reflections, water drops)
Edu Martin – CGI VFX Showreels HD: “Lighting Reel” (glass, glossy, reflections, flame light, shadows, night, beam light)
Alessandro Cangelosi – CGI Showreel HD: “FX TD / Lighting TD Show Reel” (night, headlights, aerials, clouds, sky, surfaces)
Phillip Chang – CGI & VFX Showreels HD: “Lighting Showreel” (light credit, breakdowns, shiny surfaces, flame)
Navjit Gill Lighting & Compositing Show reel 2015 (shadows, glossy, reflections, window, glass, rubix cube)
Peter Hostyanszki – CGI VFX Showreels HD: “Lighting & Compositing Reel” (surfaces, sunset, shadows, night, water, space, cloud shadow, light flare)
Ross Novak – Animation Reel 2016
Jessy Kwon – CGI VFX Showreels HD: “Lighting / Compositing VFX: “Beetle” (surfaces, live action, door light, breakdown, set extensions)
Graham Cunningham – CGI VFX Showreels HD: “Cinematics Lighting & Compositing Demo 2014” (CU, surfaces, space, windscreen, shadows)
Clément Gérard – CGI VFX Showreels HD: “Lighting / Generalist TD” (window, sun rays, night, city scares, explosions, volumetric, shadows)
Mark Stepanek – Lighting Show Reel – 2014 (dim light, surfaces, shadows, landscapes, train)
Alessandro Cangelosi – CGI Showreel HD: “FX TD / Lighting TD Show Reel” (night, headlights, aerials, clouds, sky, surfaces)
vfx/design reel 2012 – Tim BorgmannPLUS3 years ago
Stephanie Cushing – 2014 Lighting/Compositing Show Reel (ice, cave, water, shadows, surfaces, night, moon)
Jesse Hildreth – VFX, Lighting Show Reel 2015 (surfaces, heat haze, water, space, dim light, shadows)
Martin Madeddu – CGI VFX Showreels HD: “Lighting\Rendering\Compositing” (faces)
Corentin Provost – CGI & VFX Showreels: “Texturing / Look Development / Lighting / Compositing” (breakdowns, shadows, light rays, models)
Georgy John Panicker – Lighting Show reel 2015 (stills)
Jean Philip – Marvel’s Ant-Man Show Reel – 3d lighting (disco lighting)
Tarek Elaydi – Lighting Show Reel 2011 (night, shadows, train, landscape, gingerbread man, rays, people)
Design Centre Enmore 3D Art and Animation (DCE3D)
3D Lighting Showreel (Demo reel) By Pankaj Adhav.
IN CLASS
(Bind Furyl, Vancouver Film School Stephen, Keban Chauhan, Gems Cuneo?)
Disney Research Capture the Eye and PDF
DCE3D: Sam Getz. Show Reel. 2013
MACRO from Esther Lopez
Texture artist demo reel – Iaina Estrela
Demoreel 2011 (Generalist) from Billy Dao
STUDENT FOUND EXAMPLES
Jake Grygier (motion blur in the foreground, lighting), Kyle David (how pieces fit together), Greenyer, Javier Blanco, Julie Tardiew, Dave Nolan (sun rays on water, real time render, real engine flow tick), Chritover LIvesey (shows how the models are used), Victor Hernandez (depth of field, good poses, gives a story), Corentin Provost (surfacing), Jung A Ram (what surprise next), Woman in Hanbok, Dorean Traditional Dress, Henning Sanden, Frank Tzeng (tick), Beat Reichenbach (tell a story in a shot, breakdown through window, no music, include something alive), Adrien Lambert (lights, camera), Jose Manuel Linares Lopeg, Stephan Mangin, Matthew Ladler (rigging, need good shoulders), Patrick Jordan, Push Believability, Engy’s Invention [SFM].
